Showing posts with label WFMW. Show all posts

Wednesday, 13 February 2013

Baked beans tip

My new pantry
Love!


Chubs loves baked beans. I've got no idea why - I think they're disgusting - but she seems happy so yay! We buy the salt reduced ones and they are pretty high in protein and fibre, so there's certainly worse food she could be having.

I hate having left over baked beans lurking in the back of the fridge to go off, and the super small tins are expensive, wasteful and not salt reduced. Chubs eat about a third of a tin, and she like them at room temperature (ick!)

Easy solution - when she has them for breakfast Dear Husband or I open a new tin, put a third into her bowl and let her go for it. The rest of the tin goes into two small plastic containers and tossed in the freezer. I then put these container into Chubs' lunch box on daycare days and they will heat them up for her.

Not wasting leftovers AND not having to do separate lunchbox prep works for me!

Wednesday, 6 February 2013

Spoon rest hint


I've had this photo sitting around for a while but I don't think that I've been able to upload it.

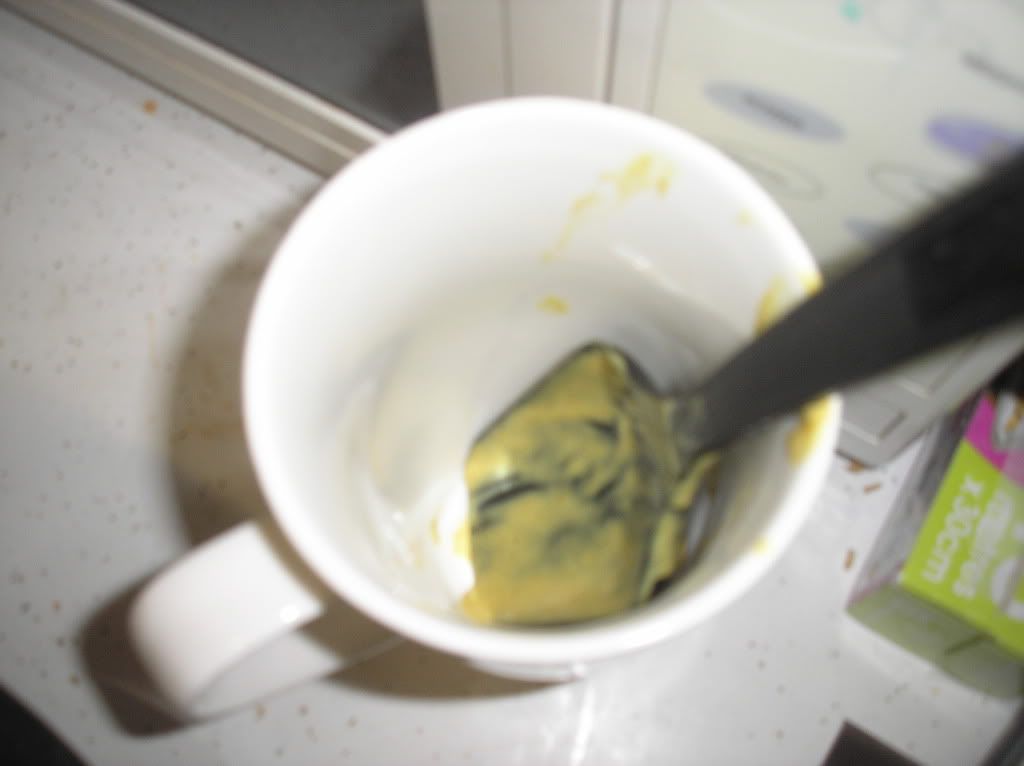
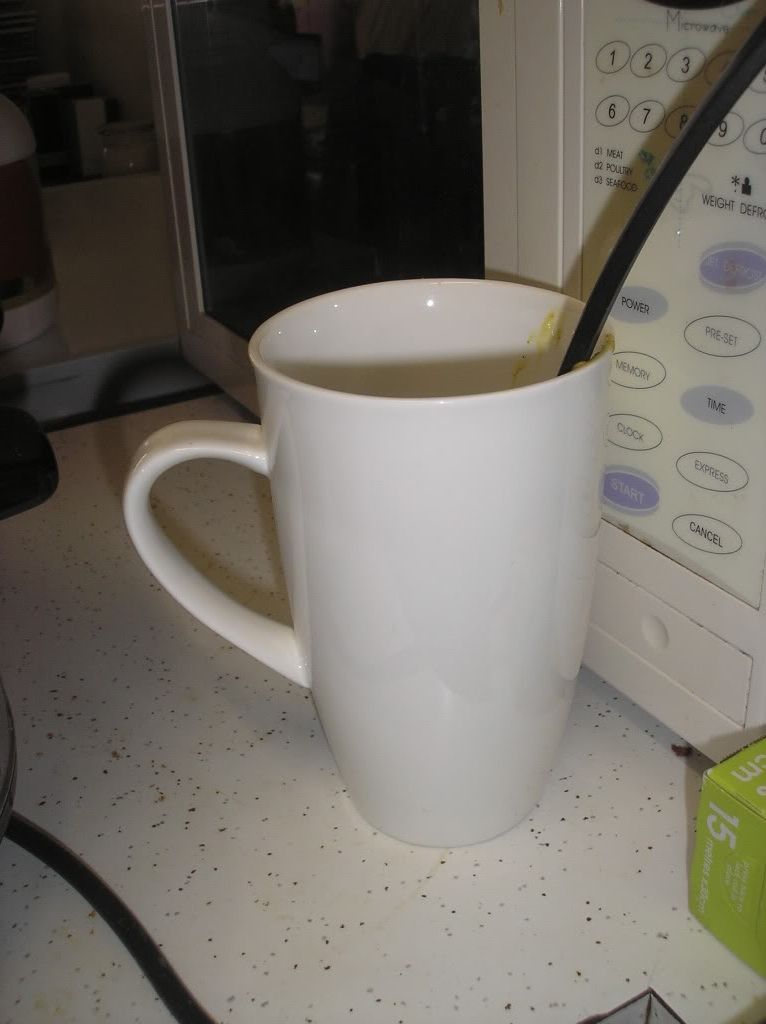
I have an oversized coffee cup which is perfect as a spoon rest - much better than using a saucer or the onces that sit flat on the bench. Using it works for me!

Linked

Sunday, 6 January 2013

Packing tip for baby

We cosleep a lot of the time, but have always taken the portacot away with us as well. We do this firstly because she spends the first part of the night in the cot, and secondly because it is good to have a safe contained space in case of a broken glass, a spill or a time out.

Whenever we have flown the portacot has been free luggage (along with the car seat and stroller and carry on nappy bag) which is good because a lap child does not have any luggage allowance of her own for clothes and other gear.

Solution: shove as many clothes as you can into the portacot. On our last trip away I was able to fit all of this into space in the portacot.


There is here:

- 7 cloth nappies
- 7 cloth nappy inserts
- 3 dresses
- set of portacot sheets
- 20 disposable nappies
- 2 maxi dresses of mine

As you can see, this is another bag (or overflowing beer carton box) of space which it would have taken up had it not been packed in the portacot.

Linked

Wednesday, 2 January 2013

4WD cleaning up tip

It looks like we won't be going 4WDing for the forseeable future, unfortunately.


Whenever we return from a trip, I wash the snatch strap before putting it away. To do this easily and effectively I put it in the washing machine. I wash with a very small amount of detergent (less than a quarter) and with cold water and extra rinse. Line dry it very well before packing it away.

A snatch strap is a critical piece of recovery gear, especially in sand like on Fraser Island. They aren't cheap either, so make sure you look after it. Some snatch strap care tips:

- Wash and dry your strap completely when you return from a trip before packing it away
- Inspect it before and after every trip for signs of damage. Better to discard it and replace when you are at home than to have it snap when you are doing a recovery and leave you stranded or worse, injur someone.
- Keep it in a bag instead of rolling around in the car where sand and dirt can damage it. That's a good place to keep your gloves and shackles too, just make sure that you can get to it.
- Attaching the snatch strap to the car and leaving it there is really only necessary when doing a water crossing. If you get stuck while doing a water crossing, then it may be hard to reach your recovery point, and seconds count. By the time that you have found the recovery point, attached the snatch strap and run it to your recovering vehicle, then both the car and then engine may be flooded. However, in the case of sand or mud it will usually be easy enough to attach the snatch strap if and when needed, rather than leaving it attached and wrapped aroung the bull bar or roof racks. When exposed like this it experiences more wear and tear than necessary and may be more of a hassle. Sometimes it's easier to snatch a car backwards, so if you have attached to the front then moving it will be necessary anyway. So to preserve its life, only attach when and where needed.
- Ensure that shackles are cared for well. Only use rated shackles and don't drop them or bash them about. Again, it's preferable to replace a shackle at home than to have one break and become a missle when doing a recovery.

Have fun four wheel driving, and as always do it safely!

Linked

Thursday, 19 April 2012

Packing list for a weekend away

Over Easter, we were offered a last minute opportunity to go to the beach for the weekend. It was wonderful (despite the car breaking down and illness all round.)

We went to the Gold Coast which is about a one/ one and a half hour drive from here depending ont he traffic. It took us longer, taking two calls to RACQ roadside assistance to get there. Because we drove, we didn't have to worry too much about how much gear we took. I didn't know what shops were nearby or where they would be, I didn't want to pay convienence store prices and it was a public holiday so we took all our food down with us. We went shopping on Thursday here for food including a bag of ice and then we put all the cold food in the esky.

Here's the packing list that I worked to, for Dear Husband, 10 month old Chubs and me. We were staying in a holiday apartment with a kitchen - obviously if we were in a hotel room or camping or something it would be different.


Chubs
4 onesies/ outfits
3 ls rompers
1 jumper
3 pair socks
Shoes (not because she needs them, but because they are cute!)
2 bunny rugs
Sun hat
Swimming hat
Swim ring

Other
Three beach towels
Toys
Dummies
Nappy bag
Disposable nappies (I didn't take cloth)
Pack of wipes
Porta cot
Bed rail
Sheets for porta cot

Some jars of baby food - it was 'bad mother food' while we were on holidays :)
Spoons
Small plastic containers
Bibs
Face washer
Water bottle

Groceries
Esky
Ice

My clothes and gear
Dear Husband's clothes and gear


It was a lot of gear and the car was full, but we did use it all. There wasn't anything that I though we shouldn't have bothered with, although we certainly could have culled a lot more if we needed to for space reasons.

Linked

Wednesday, 18 April 2012

What's in a name bib: tutorial


I made a few bibs like this recently as gifts. They are super easy and super cute! I put the names onto bibs, but like the Heart Two Heart shirt you could put it on a shirt, a bag or anything else which would suit.

You will need:
- Something to place the name onto (a bib, a t shirt, a bag etc)
- knit fabric to cut up. An old t shirt is perfect, as long as the fabric isn't too thin or stretched. This is great for a t shirt which has a stain or a hole in one area only.
- thread in a coordinating or contrasting colour
- sewing machine or needle to hand sew
- scissors
- ruler (optional)

Firstly you need to cut out your letters. You could print off a template if you like; however I just free handed it, I cut a strip 7cm wide and then cut the small letters out of that (in this case, a, r and r). Out of a 10cm strip I cut out the large letters (H, y).

Arrange the letters on the bib until you're happy, then pin them. I recut a few letters to adjust the proportions until I was happy.


Stitch around the outside of each letter. I used a sewing machine, but you can hand stitch it if you like. My pi day shirt shows you what the hand stitching can look like. The knit fabric won't fray, which is why this works well.


Take out the pins, pull the threads through to the back and tie off.


Ta da! You're done.


Please let me know if you tried this tutorial, and if there's anything else you think I should add to it.
Linked

Wednesday, 11 April 2012

Slow cooker chicken curry

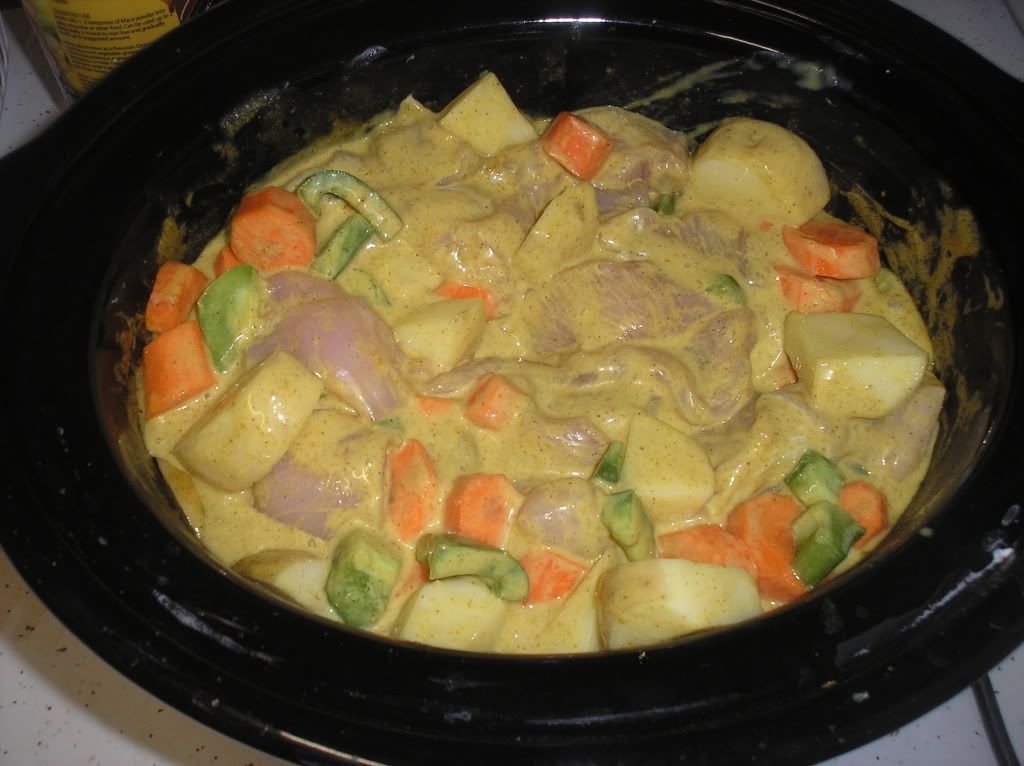
We eat this meal about once a week, and we love it. It's easy, fairly cost effective and reasonably healthy, although it probably should have less carbs and more veggies. It does use a packet mix - the only thing that I can make from scratch is an infected mosquito bite.

Ingredients
- 3 chicken breasts, diced
- 4 large carrots, peeled and roughly chopped
- 4 large potatoes, diced. (We leave the skin on, since we don't mind the taste, it's more nutritious and I'm lazy, but you could certainly peel them if you prefer.)
- half capsium (bell pepper), finely diced
- 400g tin coconut milk (not cream)
- packet of slow cooker curry mix


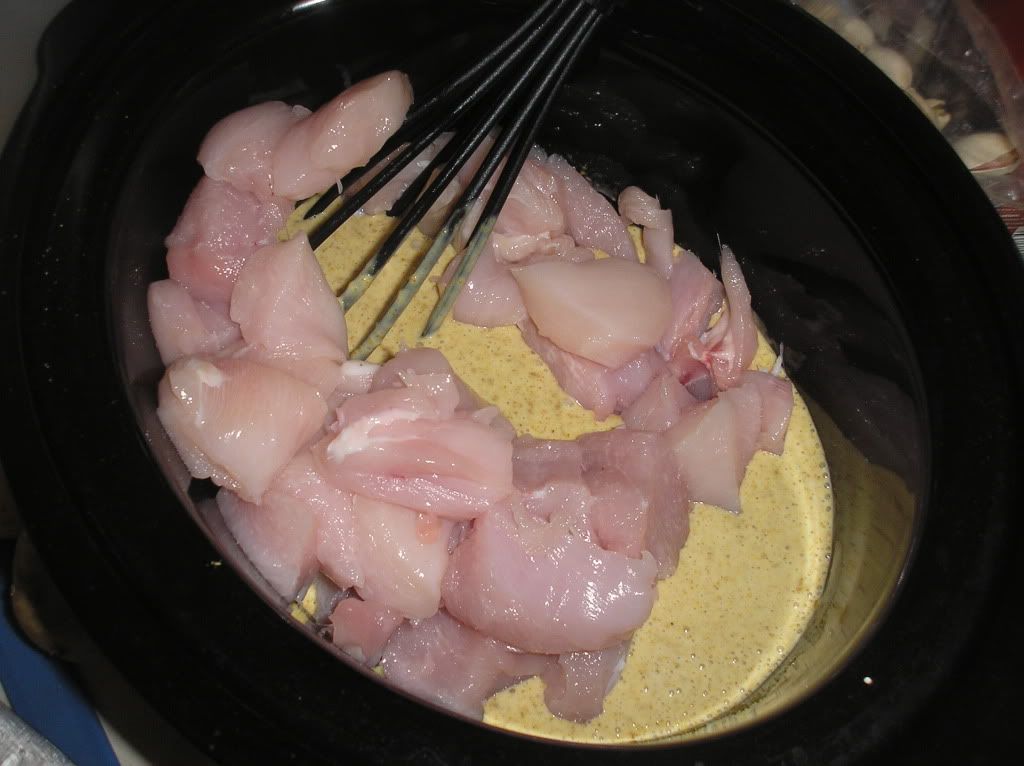
Pour the coconut milk into the slow cooker and mix the packet mix powder in. Cut the chicken breasts and dd those too. Cut the vegetables and add them to the slow cooker. Leave on high for four hours. Serve with jasmine or brown rice.


This makes four very generous portions. I generally make it with fresh chicken so that Deah Husband and I can have dinner for one night, and put another night's dinner in the freezer. I often get a fifth serve depending on how hungry we are.

I know that this isn't a ground breaking recipe, but it works for us and we have it pretty much every week.

Wednesday, 4 April 2012

Applique tip

I got as close as I think I'm going to get today to my sewing day. There was still far too much housework done, but on my rare baby free day I did manage to get in a few good hours of sewing.

All of my baby free sewing day was spent sewing for my baby though, which I thoroughly enjoyed. Today's tip comes from the School of Trial and Error.

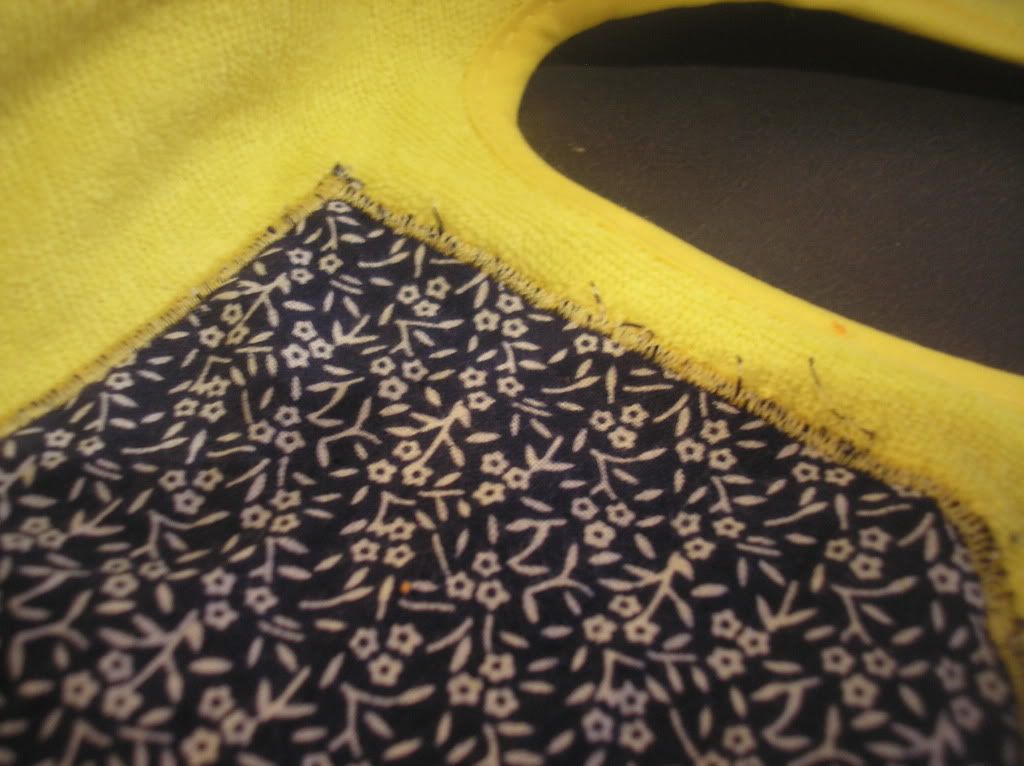
When you want to use applique to put a design onto something, make sure you match the thread to the design, not the background. I've done plenty of applique before, but I've never notices this before. I must have always matched the thread to the design by chance, or maybe I haven't used such an obvious colour contrast before.

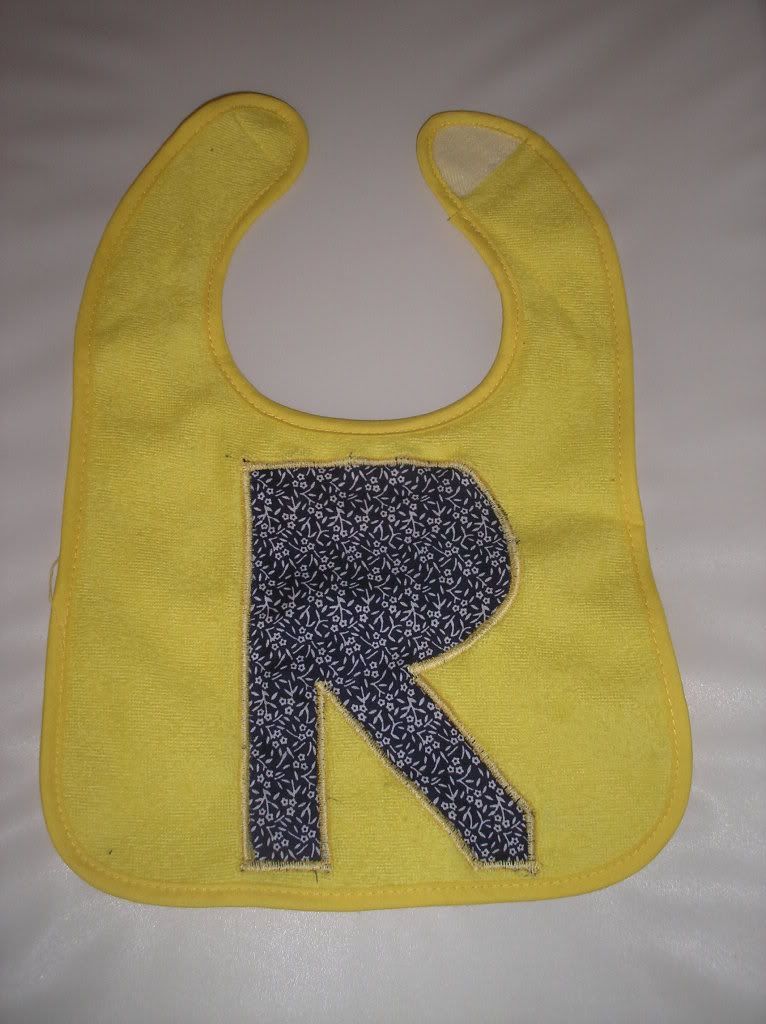
In this case I was making a bit for a friend's baby girl, Rochelle. The design is an 'R' in navy with small white flowers on a yellow bib, and I used yellow thread to do the applique. Didn't work well.


It's too easy to see though the applique and all the threads. I went over it again with a wider stitch and a shorter stitch, but it didn't improve much.


The navy design is still peeking through the light coloured thread.

I was able to finish the bib and I still think it looks sweet, but after that I switched to matching the thread colour to the design. I made several other bibs and shirts doing this, and it stopped the peek-through a lot more.

Here's the final bib, all ready to get wrapped up and drooled on!

Wednesday, 21 March 2012

As wet as a bug in a tub WFMW

We've been through a few different ways of bathing Chubs depending on the circumstances, so I would like share with you what has worked for us at different times. We don't have a bath in our bathroom (only a shower) and our laundry is a separate outside shed, so using the laundry tub wasn't really an option either.

Since space is at a premium for us (and because I'm a cheapskate frugal) we never purchased a hard plastic baby bath. I had this plastic storage tub which the lid had broken for years ago. I had been using it as a laundry basket, but when Chubs was born we just turned it into her bath.

Bath Number One

When Chubs was a newborn; however, it was easier to put her into the shower with us. Usually I would undress and de-nappy her and then hand her into Dear Husband who was already in the shower. He would hold her while I washed her with two washers. As a newborn, it was pretty much only her bum and the fat rolls on her chubby neck which ever got dirty. He would then pass her out into my towel- draped arms and I would then dry and dress her on the change table.

This worked well as it was much easier for one of us to hold her in the shower than to try to hold her in the tub, and it meant more free hands since there were two of us. Even if one of us tried to hold her in the tub and the other one washed, there was too many arms in the way and not enough room. Chubs didn't really like reclining in the tub anyway. She also was born with heaps of beautiful hair which didn't fall out. Her hair gets knotty and covered in spit up (then) and food (now) so it was easier to shampoo her hair in the shower than in the tub.

The biggest problem with the shower is that it's definatly a two adult plan. One person needs to be ready in the shower, and the other one needs to pass the baby. There's no way that one person has enough arms to hold a slippery baby, operate the taps and wash the baby all while being wet and slippery themselves. When Dear Husband is away with work and I am home alone with Chubs, I only ever bathe her in the tub, not the shower.

A friend of mine had a toddler and newborn twins, as well as a frequently travelling husband. She tried putting the twins in a Bumbo seat in the bath so she could do all three at once, but I hear that the Bumbos didn't fare too well. She said they kind of fell apart from the water, which I think is quite disappointing, especially considering how expensive they are. (To clarify, she still has the girls, they just aren't newborns and a toddler any more :)  )

When Chubs was five to six months old, we all went away for five weeks with Dear Huband's work. His work arranged for us to have this inflatable baby bath, which is like a teeny-tiny wading pool.

Bath Number Two

I love love love this bath! One of the great things about this bath is the inflatable stopper bit in the middle. At five months, Chubs was just beginning to sit up, but hadn't quite worked it out yet - and definately not reliably. I was able to let her sit in the tub with one hand on her shoulder to stop her falling back, and the bar in the middle stopped her bottom from slipping forward and her legs from shooting out underneath her.

The other great thing about this bath was that it's soft and inflatable. Because it's soft, she couldn't bump her head or anything. We were able to let the air out and bring it home on the plane. It's great if you don't have much space. We certainly didn't deflate and reinflate it everyday, but it would be much smaller for storing between babies and for travel (as I said) than a normal hard plastic bath.

However, the inflatable bath was a pain to clean as it never really dried in all the crevices, so it got mouldy and was hard to get out. It was also hard to fill and empty since it was flexible, so it all had to be done with multiple buckets-ful. These were minor issues though, and I really could have coped with them quite easily. The reason that we stopped using the inflatable bath was that as Chubs got bigger, she got more mobile. By about eight months, she could sit up very well unassisted and could grab the side and try to stand up, pushing the flexible walls down in the process. You can imaging what the flood in our bathroom looked like.

Bath Number One Three
So we are now on to Bath Number Three. It looks mightly similar to Bath Number One, hey? Chubs can sit up in this one now and it's working much better than it did when she was a newborn. She still comes in for a shower every now and again, but she will usually play for 20 minutes or so in the tub - which is great to get us through the cranky evening hours.

So that's our scrub-a-bub-tub story until now. I wonder what happens next?

Linked to WFMW

Wednesday, 14 March 2012

Pi day shirt

Happy Pi Day everyone!

March 14 (or 3.14 if you write the date the American way) gives us 3.14159265... reasons to celebrate irrationality.

In celebration, here's what I'm wearing today.


The pi is cut from a repurposed knit shirt and hand stitched on because I'm all crafty and edgy and stuff. (Also, the sewing machine is in Chubs' room and I didn't get it out before she went to bed and I'm too scared to make noise bringing it out in case I wake her up...)


Around the neck band is 135 dots representing pi to 29 decimal places, and the decimal point too.

Happy Birthday Einstein, too. How cool is that? What Pi Day activities do you have planned?

Linked with Kirsten and Jo.

Wednesday, 29 February 2012

Tutorial: How to sew kindy sheets WFMW

I've been sewing kindy sheets for about 12 years and making a little bit of money along the way*.

The kindy I sew for needs sheets which have a finished size of 65cm by 125cm, with a drawstring bag which has a finished size of 45cm by 45cm. The sizes don't need to be exact, but should be fairly close. If in doubt with the bag it can be a bit bigger.

Finished sheet sets

These sheets are good for two reasons. Firstly, the bottom sheet with the open elastic corners is much easier for young children to put on and take off by themselves than regular fitted sheets (such as cot sheets). If you wanted to encourage your young child to make his or her own bed at home, bottom sheets like these would be easier to put on and take off than regular sheets while your child is still learning. Secondly, the bag is big enough that the children can put the sheets in themselves.

There are two main ways to make the sheets. Firstly you can make the top sheet and the bottom sheet as one piece each, either from two separate pieces of coordinating fabric or all from the same fabric. The second way is to add a strip of coordinating fabric to one or both sheets. If you do this it is usually a more efficient use of fabric and can make for a really cute set, but does take more sewing.

I've used both an overlocker (serger) and a sewing machine in this tutorial. You can just use a sewing machine if you don't have an overlocker - indeed, that's what I did for a long time before I had an overlocker.

Making the sheets
1. Cut out the two sheets. In this case I have cut 127cm x 67cm as I will be using an overlocker to do a rolled hem on the edges. If you want to use a sewing machine to hem the edges (with a fold over hem) then you will need a bigger seam allowance depending on how deep you want to make your hem. For sheets with a strip see step two.

2. If you are adding a strip of fabric to one or both sheets, then your total length needs to be 125cm + seam allowance for the strip joining + hem allowance for top and bottom.

Two sheets cut and pinned to add a strip to the top

3. Sew the strip on if you are adding one, then hem all four sides of the sheet. Repeat for the other sheet. Tie off threads and trim. Iron sheet if you feel so inclined.
Sewing the strip for the top of the sheet

4. On one sheet only (which ever one you want to be the bottom sheet) stitch a 20 - 25cm piece of elastic across each corner. Make sure stitching is secure.

Stitching the elastic to the bottom sheet corner

Sewn elastic on the corner of the bottom sheet (wrong side)

Making the bag
The bag can be made from smaller pieces of fabric sewn together or from a larger piece.

1. If you are stitching smaller pieces together - pin, sew and iron them to get two 50-ish cm squares or one piece which is 100cm by 50cm (ish). It's ok if the squares are a bit bigger. Pin right sides together.

Front (and back) of pinned bag - wrong side out


2. Sew three sides (or two sides plus the fold) leaving the top open.

3. Zig zag or overlock the raw edges on the opening. If you have the selvages on the opening (like I do in the photo) then you can skip this step.

4. Fold the top down 2 - 3 cm, iron and pin. Stitch the drawstring closed leaving a 2 cm gap.

Pinning for the drawstring pocket
Stitching the drawstring pocket


5. Cut a piece of ribbon or cord which is 5 - 10 cm longer than the drawstring pocket. Pin a safety pin through one end and feed it through the gap from step 4. Remove the pin and tie a secure knot in the ribbon or cord.

6. Tie off and trim all threads and turn bag right side out. Pop sheets inside and enjoy!


If you are making mutiple sets, make sure that each bag is different so that the children can recognise their own.

* Kindy sheet sets don't make much money when you factor in your time, however if you are looking for a way to finance your hobby, you make a small profit if you don't take into account your time. I actually enjoy the sewing so I'm happy to count it as recreation which works for me.

Since I never waste a scrap of fabric, I've also linked this to Waste-not Wednesday.

Wednesday, 22 February 2012

Happy Thinking Day


Happy Thinking Day to all my Guiding sisters all over the world! If you are not one of the ten million members of the World Association of Girl Guides and Girl Scouts, then I would like to invite you to share in Thinking Day activities.

Thinking Day is the 22nd of February and is so named as it is when we think of our Guiding sisters across the world. Typically it involves activities to explore and discover what it is like for those in other countries. As well as awareness, there is a call to action. This year's theme is MDG7: Environmental Sustainability. There's a whole host of activities to do with reducing the use of fossil fuels, saving resources, sustainable energy sources and advocating for change. Click that link to download the activities in English, French or Spanish.

There is also a fundraising component where Guides all over the world donate to the Thinking Day Fund to help support the growth and development of girls and young women worldwide. When Lady Baden-Powell was asked how much girls should give, she said as much as they would have spent on an ice cream, so the WTD fund is also known affectionately as The Ice Cream Fund.

Empowering girls and young women to be agents of change works for me. I've also linked this to Jo's Waste-not Wednesday, too. As a Girl Guide leader, a teacher, a citizen and a mother, I view my responsibility to make the world a better place seriously. I don't want to waste my opportunities to help reach the MDGs. 2015 is fast approaching, and we can't waste any more time.

Wednesday, 15 February 2012

WFMW - Discount Christmas fabric

This week's WFMW is about getting discount fabric. In the new year, most fabric shops discount their Christmas fabric. It can be 50% off, and sometimes up to 80% or 90%, especially if it is still there by the end of February. Here's some which I picked up last week.


Sorry about the poor quality of the photo...
Would you believe this is the best one I had out of seven photos?
Most of the fabric in this photo was heavily discounted and worked out to less that $3 a metre which is a steal! I try to pick non-Christmassy Christmas fabrics which I can use for other projects. The birds, flowers, babuska dolls, stars, stripes and candy swirls above were all 'Christmas' fabrics all of those will work very well for other projects.

I did get some fabric which really does look like Christmas fabric, so I can make some things for next year. I've sewn some tree decorations before, but I'm thinking about making some bunting for next year. I'm eyeing off this tutorial - what do you think?

Obviously the selection is limited, and when it's gone it's gone. If there's something that you really like or you have a particular style that you want, then don't wait until January or February. However, if you're happy to see what you get - substantially reduced, then it's a great idea.

Discount fabric works for me!
Linked to Jo as well.


Wednesday, 8 February 2012

WFMW - Packing list for baby and Mum

Today's WFMW is about helping things to go more smoothly in the day to day crazy-ness that is life. I work part time and Chubs is in daycare on those days. I do several things to make these days the least stressful as possible, and one of those is packing lists.

Chubs' day care bag (and the un-vacummed floor...)


Below is the list of what I need to do the night before, as well as what needs to be packed and collected each morning.


Night before jobs

- Chubs lunch - two bottles + teats, lunch, snack, biscuits, rusks, dummy

- Mummy lunch

- Batteries on charge

- Ice packs in freezer

Chubs' daycare bag


Night before

-         Sheet bag – top sheet, bottom sheet, bunny rug , white hair brush

-         Drawstring with 6 cloth nappies, wet bag

-         Spare clothes – long sleeved romper, onesie, singlet, jumper, socks
 
-         3 disposable nappies

Morning of

-         Lunchbox

-         Blankie (in sheet bag)


Mummy work gear

Night before

-         Breast pump bag with flanges, diaphragm, valve, 2 bottles, 2 lids, 2 disks, motor, battery pack

-         Lunchbox

-         Book bag

-         Computer bag

-         Anything else?

Morning of
-         Computer

-         Keys + nametag

-         Lunchbox – lunch, ice packs

-         Breast pump – add batteries

-         Anything else?


Our packing list is printed out and is stuck on the 'command centre' at home. The 'command centre' is just a wall where we have the calendar, small whiteboard, notes etc. Any extras for that particular day (hopefully) get written on the whiteboard.

Obviously your packing list will look different to mine, depending on what your family's needs are. However, having a list means that Chubs and I still have what we need, even when I'm in a sleep deprived haze. Packing lists work for me!

Saturday, 4 February 2012

Saturday snippets - The Mercy House

I am planning on linking on Saturdays to share information, and first up is The Mercy House.

Those of you who are WFMW-ers will no doubt already be familiar with The Mercy House. In short, it is a maternity home in Kenya which provides prenatal and neonatal care to some of the most at risk young women in the world, as well as training, education, counselling and emotional and spirtual support and guidance.

The Mercy House was started when Kristen Welsh saw a great need and is totally funded on donations and from sales of the jewellery, placemats, bags and other wares which the girls produce in the House. Please pop in to have a look at the amazing, literally life changing and saving that is happening, and support it though donations, purchases and/ or prayers.

Wednesday, 1 February 2012

WFMW - Free pattern - very simple slipover vest (knitting)


This very simple free knitting pattern is ideal for charity knitting. I first created it several years ago for Knit-a-Square, who works with AIDS orphans and other vulnerable children in South Africa and Zimbabwe.

As I explained earlier, a slipover is a vest which can be worn directly on the skin if needed. It therefore needs to be very soft and stretchy. It is a much looser knit than would normally be used so there should be lots of give.

This pattern required knit stitch only - no purl, increasing or decreasing. This makes it prefect for beginners. If you think you would like more of a challenge, try the medium difficulty slipover.

It is important that the slipover is not too short - if in doubt, a little longer is better. Also ensure that you leave plenty of room for the armholes - about a third of the total length. Sadly some vests which have been sent to KAS cannot be used because the arm holes are too small.

The slipover I made in the pictures was made with leftover bits of very soft 100% wool yarn, which is why it has the stripey appearance. (It's the same slipover, it just looks different front and back.) You can make your slipover all in one colour, the four pieces in different colours, or stripey like mine. For more ideas on colour combinations have a look here.


Slip over pattern Very easy knitting – knit stitch only.


This slip over is made by knitting two large rectangles for front and back, and then two straps. All four rectangles are sewn together at the end.

Use 7.5 mm needles and soft yarn – anything from 4 ply (two strands) to 8 ply. Consider using two strands of baby yarn. Natural fibre a good next to the skin, just ensure that the yarn you use isn't scratchy.

Large rectangle – make two (one for the front, one for the back)

Work in garter stitch (knit every row)

*NB 'Size' referes to the size of the finished garment

Size
Number of stitches to cast on 
Number of rows
9 inches by 12 inches
32
84
10 inches by 13 inches
35
91
11 inches by 15 inches
39
105
12 inches by 16 inches
42
112
13 inches by 18 inches
46
126


Straps – make two

Work in garter stitch (knit every row)

Size
Number of stitches to cast on 
Number of rows
9 inches by 12 inches
10
30
10 inches by 13 inches
10
30
11 inches by 15 inches
12
32
12 inches by 16 inches
12
34
13 inches by 18 inches
15
34


Sew together


Sew straps between front and back rectangles as shown

Fold in half, sew up side seams (blue to blue and green to green) leaving the top third of garment open for arm holes. Do not make the arm holes too small.

Weave in ends.


For postal instructions on how to get your slipover to AIDS orphans and other vulnerable children, click here. To see slipovers and other knitting in action, have a look here.

To see other ways that Work for Me to help those in our local and global community, check our Kristen's blog.
Related Posts Plugin for WordPress, Blogger...