Showing posts with label sewing. Show all posts

Monday, 11 February 2013

Sewing/ craft tip and menu plan


Sometimes splitting up a big project into smaller sections which can be done during nap time is the only way to get any crafting done.

One way to do this is to cut out on one day, and then put it away to be sewn the next day, or the next week, or the next year.

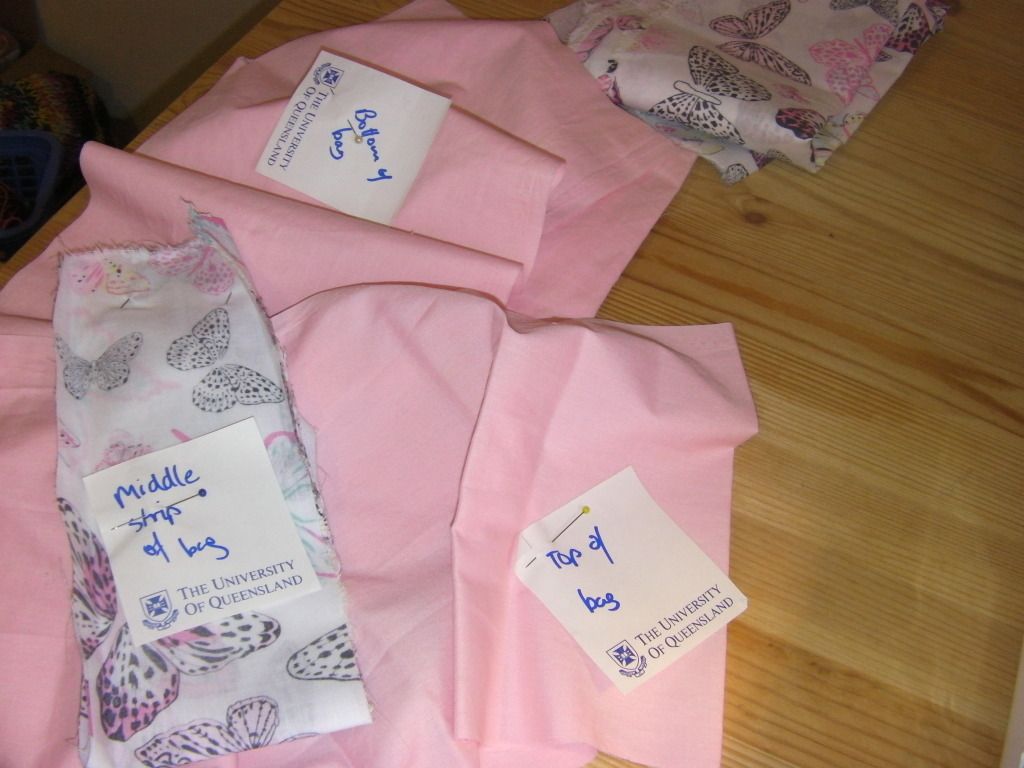
The problem is, I have a mind like a sieve. So I need to label every piece, every partly done item. Write in on a piece of paper and pin it, with super detailed instructions. Makes much more sense when I pull it out again.


I haven't done menu planning in a long time, but I'm keen to get back into it. Especially now that we have the new kitchen, I'd like to try out some new meal which still suit my dead easy, cheap and healthy requirements.

Menu plan for this week:

Monday: Stir fry
Tuesday: Scavenge (I have a work function)
Wednesday: Bolognese (from the freezer)
Thursday: Roast beef
Friday: Roast beef leftover and salad
Saturday: Chicken curry (from the freezer)
Sunday: Chicken bolognese

Saturday, 6 October 2012

Simple toddler dress -free tutorial

This too cute dress is very easy to make, since we shortcut a bit with the t shirt!


Materials:

- Small amount of fabric - 1/2 metre if getting it cut with plently left over, or a fat quarter would be enough too.
- T shirt (I used a size two)
- Thread
- Measuring tape
- Sewing machine
- Overlocker optional.


There are a few modifications that I would make next time, but otherwise it worked well.

Procedure:

Step 1:

To start with measure the bottom of the t shirt. The fabric skirt will be twice as long, so multiply this number by four. (It would be really bad if you were a maths teacher, and you only multiplied this number by two, and cut the fabric half as long as it would have been.) The yellow shirt that I used was 31 cm wide, so my fabric should have been 124cm long plus a little bit more for seams (this is not an exact project, so a bit bigger or smaller is ok.)

Step 2:


Cut the fabric as wide as you need it (four times the width of the shirt) and as long as you want it. I cut it 20cm + seam allowance, which was probably too much. (I put a generous hem on it and will probably take it up a bit more.

Don't cut it in two pieces like I did accidentally. Luckily it was a forgiving fabric and I ws able to stitch it back together. If you were cutting from a fat quarter (rather than 112cm wide fabric cut by the metre) then you may need to stitch the two pieces together anyway.

Step 3:

With right sides together pin then stitch the fabric into one long loop. I used the overlocker, but you could just use a regular sewing machine. You should now have one long loop, twice the width of your shirt.


Step 4:


Sort out the edges of the loop. I put a rolled hem for the bottom (which I ended up changing) and then just overlocked the top edge so it wouldn't be raw.

Step 5 (not pictured):
Mark with a dressmaker's pencil or similar four evenly spaced marks on the loop. That is, put a mark where you want the two sides to sit and the front centre and back centre. This is to make sure that your gather is even (or even-ish)

Step 6:


Set your sewing machine to very large, loose stitches, about 3cm from the top edge. Stitch all the way around the loop. This thread will be removed later so no need to fuss about colour matching or being super straight and perfect. Do not tie off at the beginning or the end.

Step 7:


Pull the thread through so that the skirt gathers up. You want to make the skirt about half it's size; if in doubt go smaller since it's easier to let it out than it is to gather it in. If you do need to gather it in again, pull on the stitching to tighten it up.

Step 8:


Pin the skirt to the shirt. The skirt should be upside down an wrong side out; the shirt should be right side out. To make sure that you have an even gather, only use four pins initially - pin the marks from Step 5 to the side seams and front and back centre of the shirt. For a toddler sized dress, this will be enough pins.

In hindsight, I wish that I had cut the hem off the shirt, or sewn the skirt above it. I may yet go back and fix this, but I won't get another sewing day for months so I wanted to post this before then!

Step 7:


Stitch the skirt to the shirt, smoothing down the gather as you go. You may need to adjust the gather; be guided by the four pins, and estimate an even gather between every two pins.

I'm not sure how this would go using an overlocker; I will try that next. If you did do this, then you could skip overlocking the top of the skirt in Step 4.

When you have finished sewing the skirt to the shirt, remove the gather thread.

Final steps:

Turn right side out and have a look at the dress. I ended up taking the dress up with a 1.5 inch hem. Since I did the rolled hem underneath, I'm hoping that next year when Chubs is taller I can just rip out the extra hem and I won't need to re-hem underneath.


I'm still not happy with the hem join here. Also keep in mind that I haven't ironed it. I haven't really decided what to do, so I will keep you posted. Chubs is wearing this dress to a birthday party at the playground tomorrow, so that should give it a good 'test run' too.

Final final step: Find a too-cute toddler to wear it!


I hope this tutorial has been useful for you; I plan to update this when I've had a chance to make a few more and iron out the kinks. (Get it, since I didn't iron... oh well.) Please let me know what you think in the comments!

Linked and linked
Monday, 16 July 2012

Rainbow party bags + menu plan

For Chubs' first birthday we had a rainbow party - check out some of the food and decorations here.

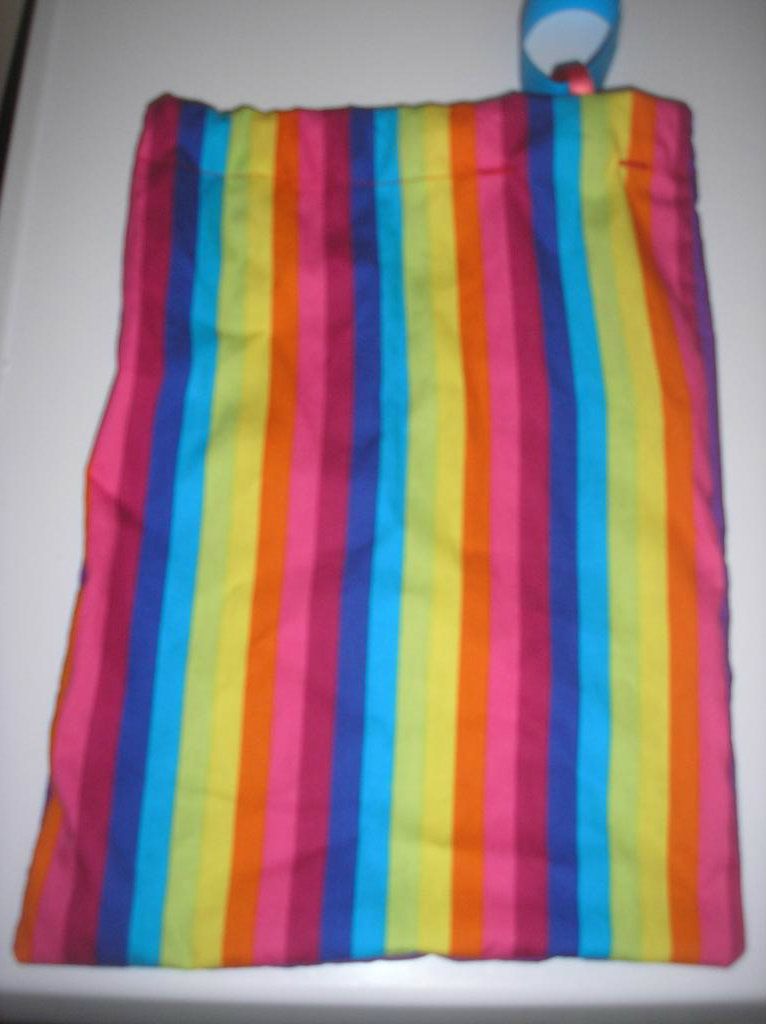
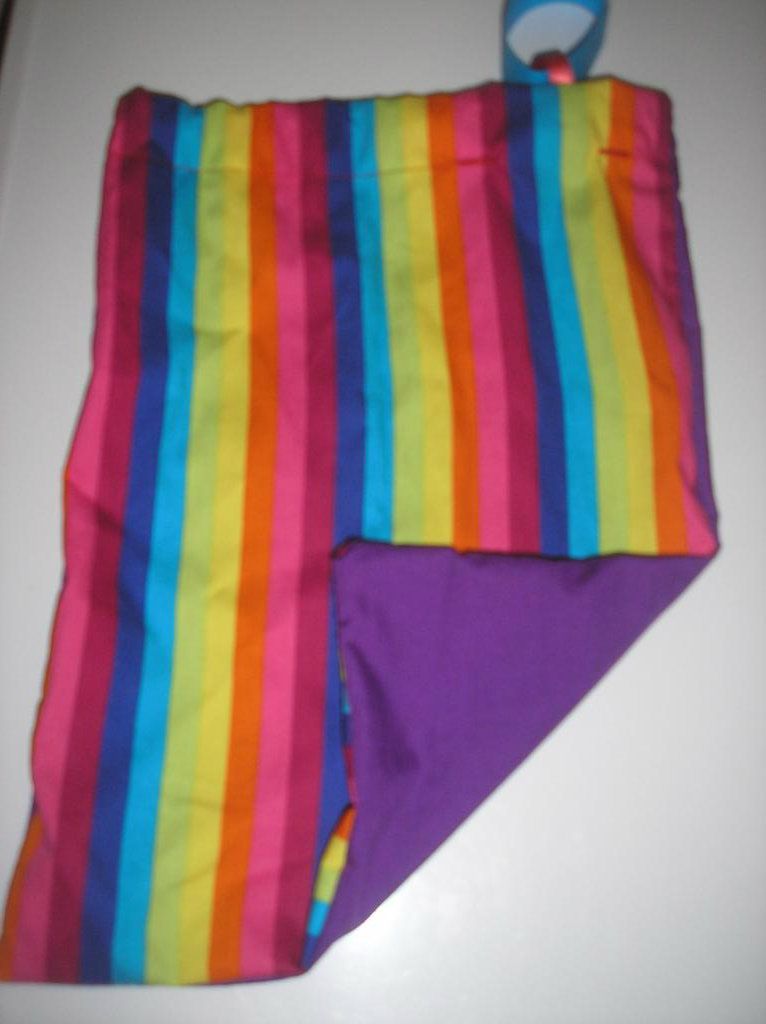
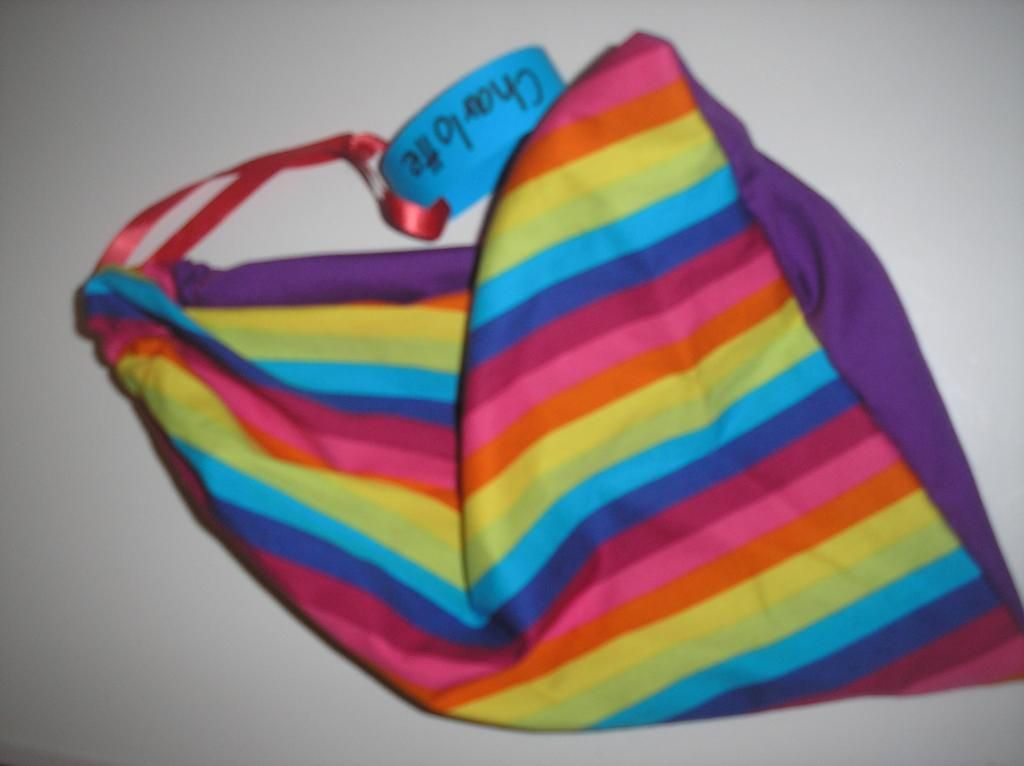
For the party bags, I wanted something that wasn't just a bag full of sugar. I have a family full of dentists to start with, but also many of the party guests were little babies so lollies weren't really appropriate.


I made a whole lot of drawstring bags with this rainbow fabric on one side and a plain colour on the other. I split the bags up into three categories - babies, little kids and older kids. Babies got the bag, some bubbles and a foam bath toy. Little kids got the bag, a few lollies, playdough and some small plastic dinosaurs and older children got bubbles and some lollies. The bags were bigger than a normal party bag - about 30cm wide and 35cm tall - because I wanted them to be useful, not just cute.


I thought I took a photo of the rainbow playdough, but I can't find one. Basically I made up four batches of white (uncoloured) play dough, then I split it into six even balls. I coloured each ball one of red, orange, yellow, green, blue and purple then I kneaded and kneaded and kneaded and kneaded! (My hands were quite sore afterwards - you really can see why it's good for muscle development and find motor skills for little kids - and big people, too!) Then I rolled each colour into a thick sausage and cut it up into ten pieces. I then put one piece of each colour in a sealy/ ziplock bag.

Since the bags had different things, I named each bag just by stapling a piece of card with the child's name on it. There were a few sets of siblings invited so I made sure that each child got a different coloured back so they could tell them apart.


Many mums at the party thanked me for playdough which kept several kids occupied for a few hours that afternoon. The bags were useful too, and I've seen a 'in use' since the party which was exactly what I intended, so I'm glad they've been enjoyed.

More rainbow birthday party ideas


Menu plan for this week

I need to have some tests on Friday which means I need to have a special diet for three days before - lots and lots of carbs! So here's the plan for a high carb diet this week. Depending on what the results show it may very well be my last flirtation with carbohydrates, so I'm going to enjoy it!

Monday: Pork stir fry (plus I'll try to do some freezer cooking)
Tuesday: Spaghetti bolognese
Wednesday: Spaghetti with chicken bolognese (made the same as normal but with chicken mince)
Thursday: leftovers from Tuesday and Wednesday and a big bowl - perhaps my last - of spaghetti! I do love spaghetti.
Friday: We are going out to a birthday party for a relative so we'll eat there
Saturday: Out with other rellies
Sunday: scavenge.

Linked

Saturday, 12 May 2012

Pick it from the garden KASAD12: Flora


I'm someone who likes sharing her ideas, discussing things and connecting. Have you noticed ;) ? You probably won't be suprised to learn that there are several internet forums which I frequent, well, frequently.

One of them is the Knit-a-Square forum. As well as being a place to chat with other charity knitters and crocheters, share ideas and trouble shoot, it's a place where we can share photos of our squares and particpate in monthly challenges. The challenges are totally optional and usually revolve around a theme which is very loosely applied. It's just something fun to do to keep things interesting and to act as inspiration.

Previous themes include Flags of the World, January Jewels, and Africa in August. This month's challenge is Pick it from the Garden in May. Fruits, vegetables, flowers, trees, critters - anything really! Some squares are beautiful pictures, some are just loosely inspired and what is always needed in huge amounts - brightly coloured Plain Janes. Check out the beautiful creations here.

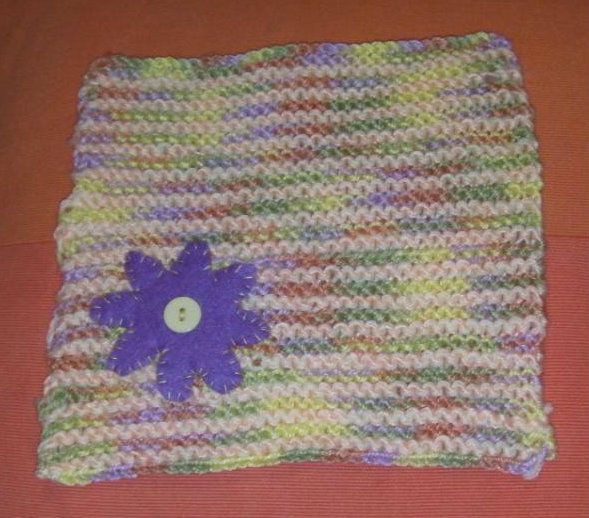
So with that in mind, here's KASAD12: Flora (tutorial)


This square is made by stitching a felt flower onto a knitted square.

Materials

- 8 ply yarn in two colours. Approximately 30g of each colour.
- small piece of felt
- yellow button
- 5mm knitting needles
- yarn needle to weave in ends, scissors to cut yarn and felt
- sewing needle and thread.

Skills and difficulty
Beginner knitter
- cast on
- cast off
- knit stitch
- making and sewing flower
- carrying unused yarn up the side

Colours
In this example, C1 is green/ yellow/ orange/ purple varigated yarn, C2 is pale apricot.

Procedure
To make square:

1. Using C1, cast on 36 stitches. Work in garter stitch.
2. Knit in C1 for 2 rows (1 ridge).
3. Knit in C2 for 2 rows ( 1 ridge).
4. Repeat steps 2 and 3 until work measures 20 cm (8 inches) - this should be about 32 rows.
5. Cast off and leave a 50cm tail.
6. Weave in beginning end and butterfly the tail.

To make flower:
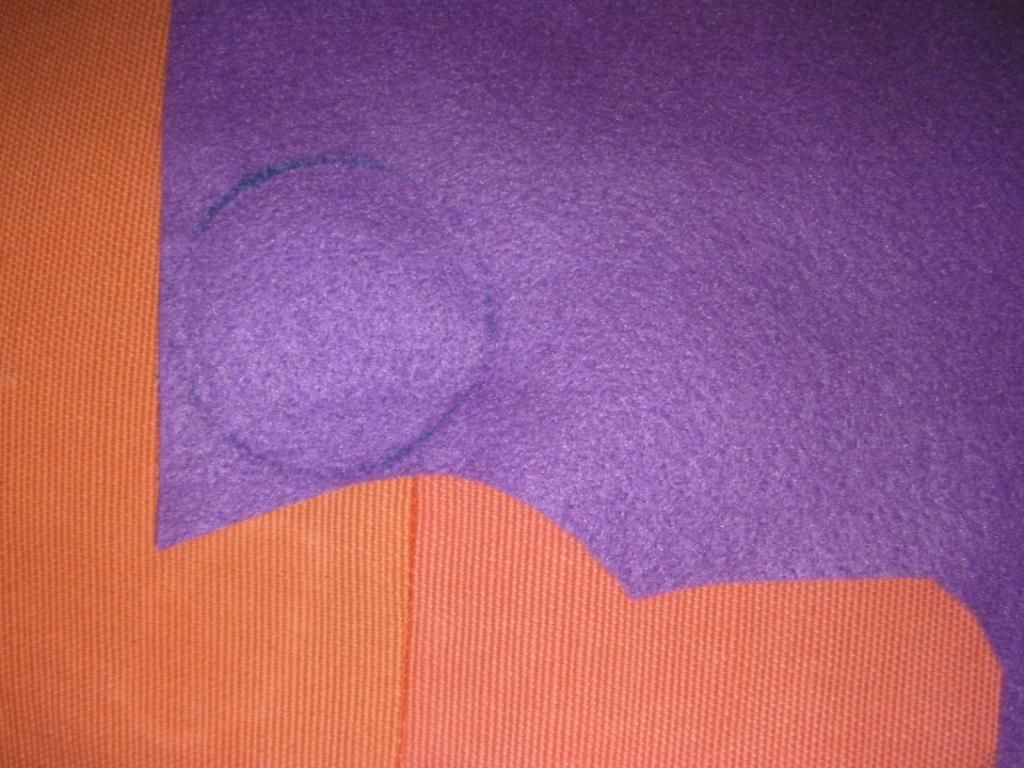
1. Draw around a cup, jar or similar to make a circle on the felt. Cut out circle.

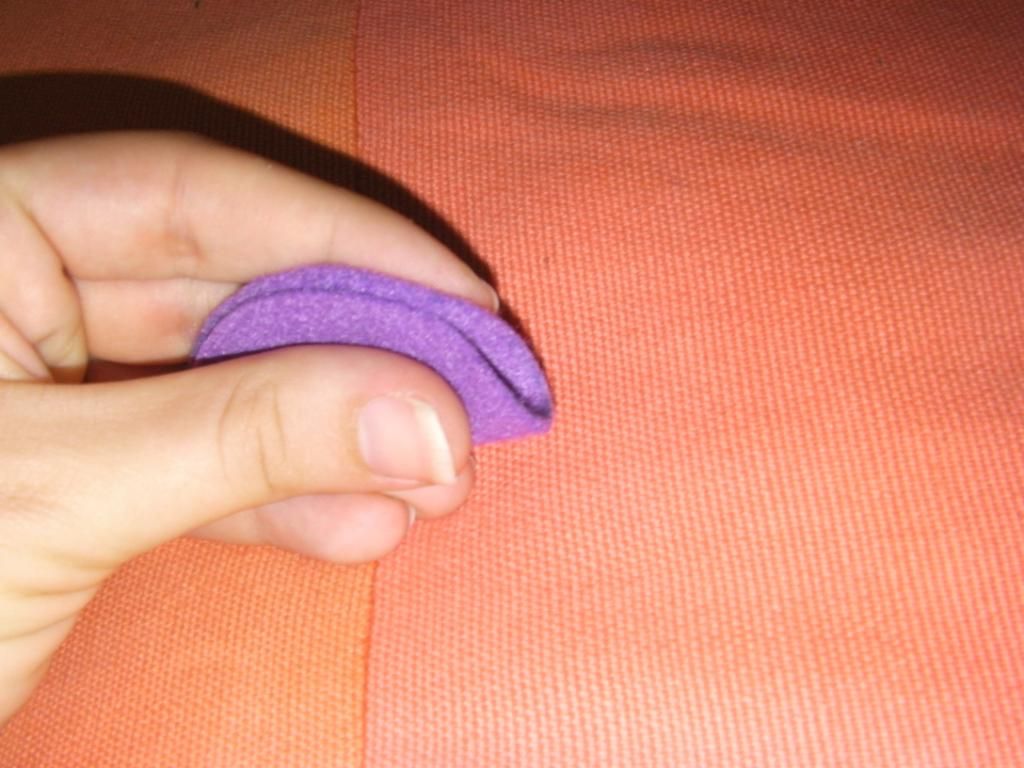
2. Fold the circle in half and press down the 'crease' hard.

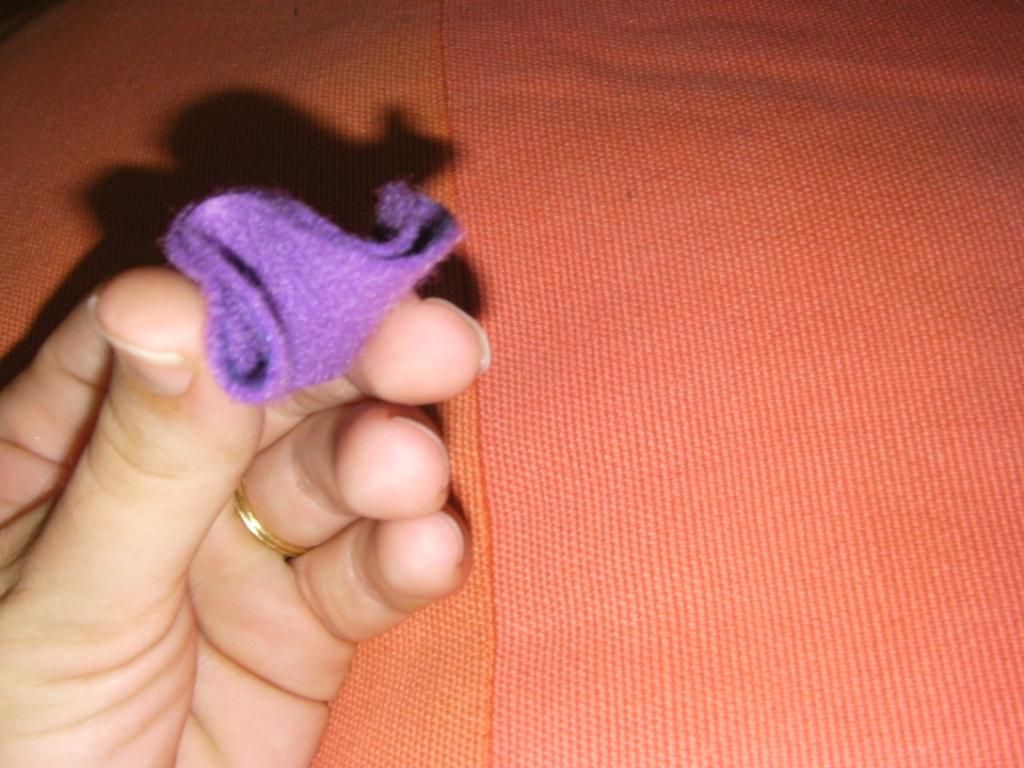
3. Concertina (zig zag) fold the semi circle into three or four. Again, press down the creases hard, it needs to be as flat as possible.

4. Cut a curved top off the edge of the circle to form the petals. Make it rounded, not pointy or you will end up with a star instead of petals. If you're anything like me then you will need to do several of these to get one that looks vaguely like a flower.


You should now have a flower and a knitted square.

To finish:

1. Blanket stitch the flower to the square.
2. Sew a yellow button SECURELY to the centre of the flower.

Voila - a beautiful flower to brighten up a blanket


Variations
- You could add several flowers, or stitch any other shape to a plain square.
- A crocheted flower or other embelishment could be used instead of a felt one
- A Plain Jane square could be used instead of the stripey one
- A crocheted square could be used instead of a knitted one.


Return to all the KASAD posts

Monday, 23 April 2012

Monday musings

Well, our fortnight of 14 family events has drawn to a close and I think I can draw breath now before the next lot begins! This week I have a work function on Tuesday night, then Wednesday is a public holiday for ANZAC Day.

I spent a lot of time making kindy sheet sets over the last week. I think that a good way to maximise my time is to cut a lot of sheets out in one go, then sew separately. I had some Chubs free time this week to sew, but I spent much of it cutting and pinning. Cutting and pinning is something I can do when she is napping or asleep for the evening, but I really need her out of the house to sew since the sewing machine wakes her up. I got 14 sheet sets cut out and pinned on Saturday night, so I can sew them next time.

The laundry system fell down last week but otherwise seems to be going well. It's still the putting away that it the rate limiting step.

I did get a chance to go bridesmaids dress shopping Chubs-free on the weekend. We think we may have found a dress that suits the six of us (eeeep!) and will suit the bride's dress and the boys, too, but there's at lease one more shopping trip in store. It was heaps of fun though and we did see some beautiful dresses.


You know, I really don't know why I do meal plans, since I don't think we've stuck to one yet! Last week's plan:
Monday: steak and veggies - yes, the only meal of the week we stuck to the plan on!
Tuesday: Bolognese I have no idea what we ate on Tuesday, but I don't think it was bolognese. I will keep thinking... ETA It may have been steak.
Wednesday: out Nanny Tops came over to babysit so she had some freezer chicken curry and we had Thai at the restaurant for our family function.
Thursday: slow cooker chicken curry - I cooked up some Bolognese during nap time, but Dear Husband came home with a hot chook from the shop. This is exactly what the meal plan is supposed to avoid. We ate the chicken on Thursday night and had the Bolognese on Friday night.
Friday: chicken stir fry See above
Saturday: hot chook from shop Steak and veggies since we found a big pack of nice steaks at the shops
Sunday: beef stir fry Steak and veggies, we had steak left over from Saturday

This week:
Monday: Slow cooker chicken dish I want to try
Tuesday: I'm at my work function so Dear Husband will have something from the freezer
Wednesday: Steak and veggies
Thursday: Freezer Bolognese
Friday: I'm out so again Dear Husband will sort himslf out.
Saturday: Steak and veggies
Sunday: Slow cooker chicken curry

Sunday, 22 April 2012

Applique bib - tutorial


This is a lovely nap time or one evening project if you want something which can be done in a short space of time.

What you will need:

- bib to place your design on
- two small scraps of coordinating fabric -10cm by 10cm (4 in) will be plenty
- sewing machine and coordinating thread
- scissors
- circles to draw around, pencil

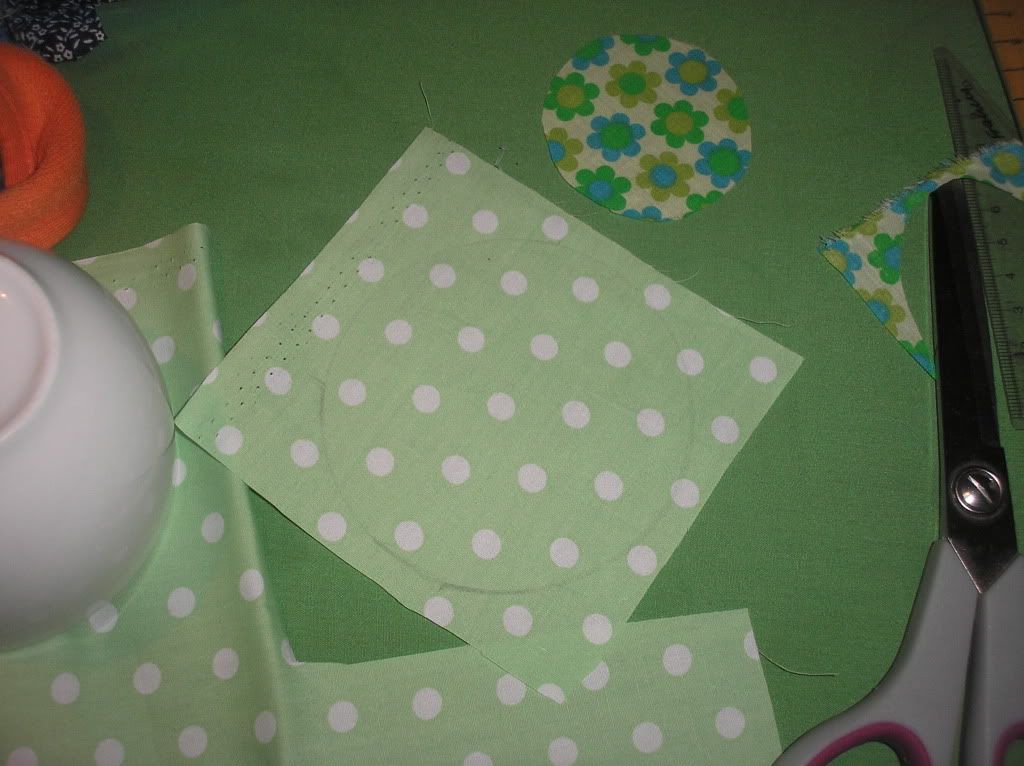
Firstly, draw and cut out two circles of different sizes of each of the fabrics. I used the tea cup and demitasse cup from our dinner set which gave nice proportions.


Pin the smaller circle on top, making sure it is centred.


Now stitch the smaller circle to the larger one. To do this, set your sewing machine to the widest zig zag stitch and the shortest stitch lenght. When you stitch it, line out the outside of the zig zag with the edge of the smaller circle. If you have the edge of the smaller circle in the middle of the zig zag, then it probably won't catch all the way around. (This is because of the circular cut and where the bias lies.)


Remove the pins, pull the threads through to the back and tie off. You need to do this now, since you won't be able to get to the back later.


Pin the two circles onto the bib. Make sure that the design in centered. I may have skipped this step on the green bib...


Sew the larger circle to the bib using the same method as before. Pull the threads through to the back, tie off and trim.


A beautiful bib, all finished in less than an hour. I teamed this green one with a drawstring bag to make a cute gift.

Wednesday, 18 April 2012

What's in a name bib: tutorial


I made a few bibs like this recently as gifts. They are super easy and super cute! I put the names onto bibs, but like the Heart Two Heart shirt you could put it on a shirt, a bag or anything else which would suit.

You will need:
- Something to place the name onto (a bib, a t shirt, a bag etc)
- knit fabric to cut up. An old t shirt is perfect, as long as the fabric isn't too thin or stretched. This is great for a t shirt which has a stain or a hole in one area only.
- thread in a coordinating or contrasting colour
- sewing machine or needle to hand sew
- scissors
- ruler (optional)

Firstly you need to cut out your letters. You could print off a template if you like; however I just free handed it, I cut a strip 7cm wide and then cut the small letters out of that (in this case, a, r and r). Out of a 10cm strip I cut out the large letters (H, y).

Arrange the letters on the bib until you're happy, then pin them. I recut a few letters to adjust the proportions until I was happy.


Stitch around the outside of each letter. I used a sewing machine, but you can hand stitch it if you like. My pi day shirt shows you what the hand stitching can look like. The knit fabric won't fray, which is why this works well.


Take out the pins, pull the threads through to the back and tie off.


Ta da! You're done.


Please let me know if you tried this tutorial, and if there's anything else you think I should add to it.
Linked

Tuesday, 17 April 2012

Nap time projects

I am going to start posting tutorials, ideas and suggestions for nap time projects. I find that I frequently put off creating, since I no longer have big chunks of time to get things done in. I really enjoy crafting, and it's a bit of 'me time' that really helps me to feel better in myself the rest of the time.

I love making things for Chubs. I hope that when she's older she looks back at photos of her wearing a shirt with her name on it, an embroidered bib or a beanie I knitted her and that she realises that they were made for her with love.

Sewing with the machine isn't really a nap time project for me since the sewing machine is in Chubs' room, but if you have an area somewhere else then it might be.

The washing up and vacuuming that you should have been doing during nap time instead of crafting? You're on your own there :)

Please be sure to leave a comment if you have a nap time project that you would like to share!
First project: Heart Two Heart shirt.

Thursday, 5 April 2012

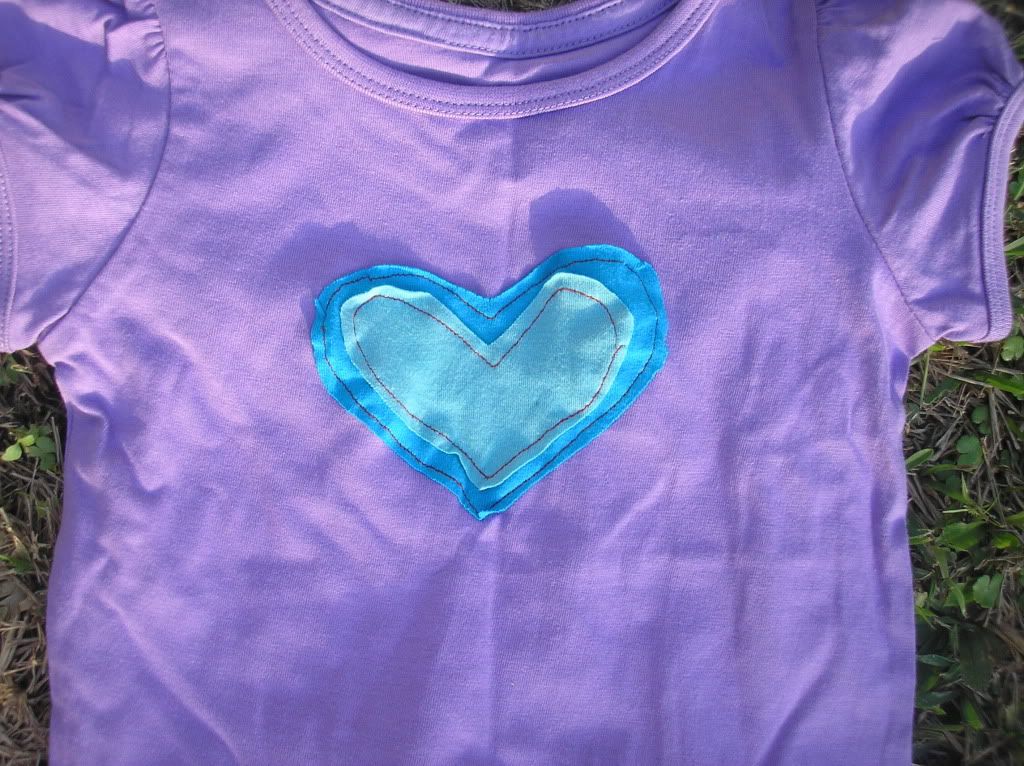
Tutorial: Heart Two Heart shirt


On my sewing day I couldn't resist making this little gem for my precious baby girl. It's quite simple and would be a great project for a beginner.

You will need:

- Something to put the design on: a shirt, a bib, a bag - anything that will work. I got this purple one for $3 on sale at a department store.
- Knit fabric in two colours - old t shirts are perfect, as long as the fabric isn't too stretched, thin or worn. This is a great use for the still-good portions of a stained or torn t shirt.
- Thread in a coordinating colour
- A sewing machine or a needle for hand sewing
- Scissors
- Pins
- An iron if you want to iron your garment before you take a photo for your blog so you can't see the creases. Obviously this is optional.

Choose a simple design like a star, a letter or (in this case) a heart. If you have a working printer (which I don't) you could be super and print out a template. Alternatively, you could get handy with a ruler and a protractor to make your design - the maths nerd in me loves this option. I chose to be all artistic and whimsical (read: slack) and free hand the heart.


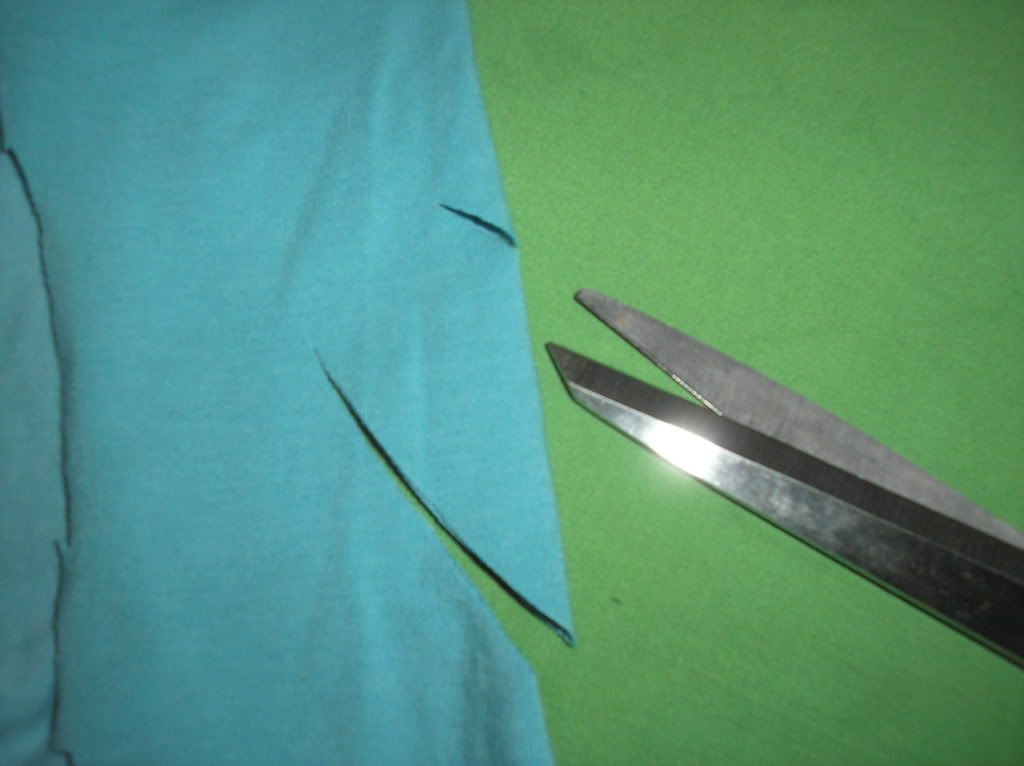
Cut out two of your design - one a bit smaller than the other. The way I did this is to cut them both the same size, and then trim one down. Embrace the wonky look here - this isn't a perfect polished project.


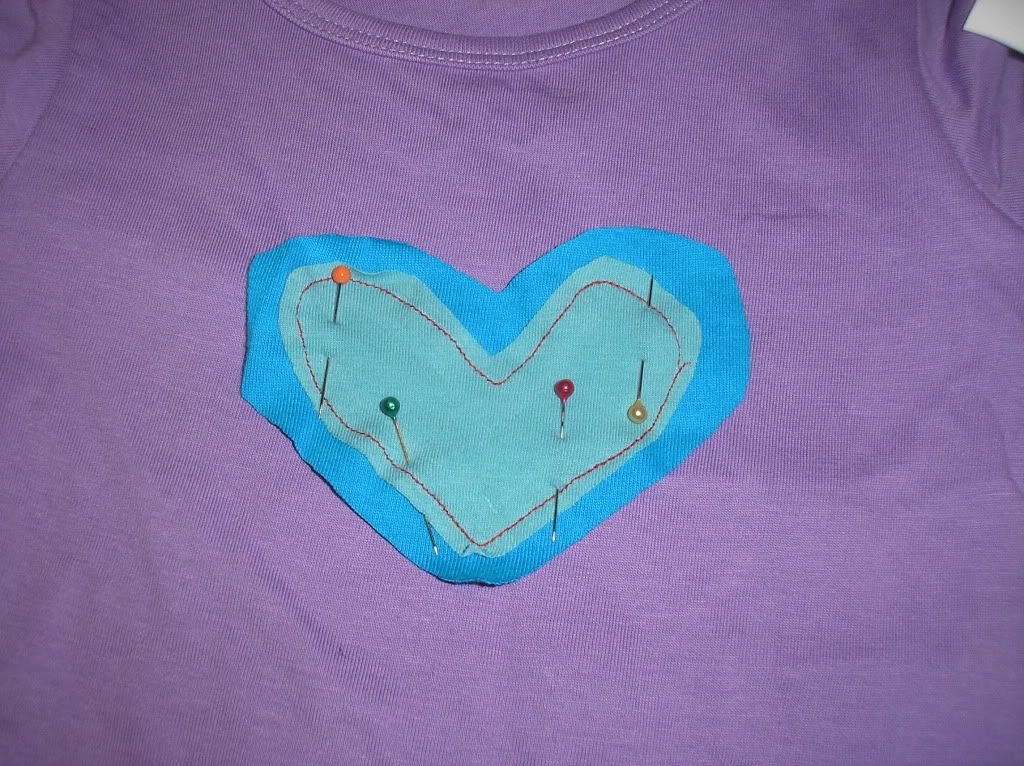
Pin the smaller one on top of the larger one. Both piece should have the right side facing up. If you like ironing, feel free to iron here, or not.


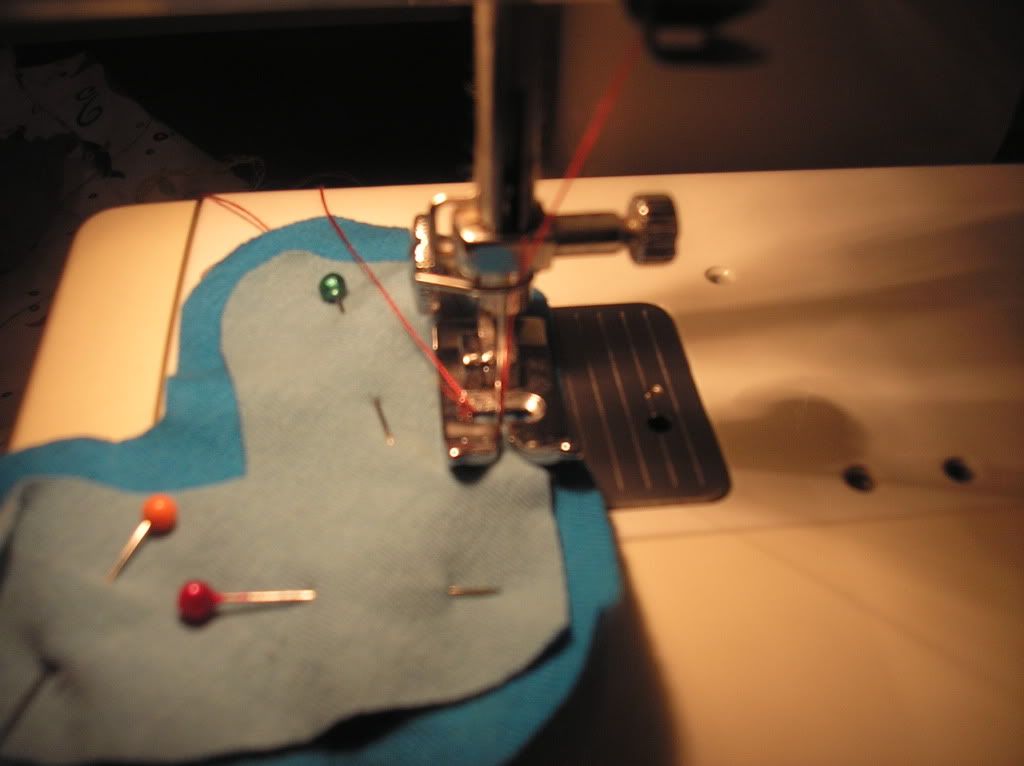
Leaving a small gap, stitch around the inside edge of the small shape. I used a sewing machine here, but for my pi day shirt I hand stitched the lettering if you want to see what that looks like.


Take the pins out, pull the threads through to the back and tie off. Do this step now, since you won't be able to later.

Pin the design onto the shirt (or bag or bib or whatever you are using).


Stitch around the larger design, attaching it to the shirt.


Finish off the threads, take out the pins and enjoy!

This Heart Two Heart shirt tutorial is brough to you by Chubs, who is as snug as a bug in a rug in hers!


Wednesday, 4 April 2012

Applique tip

I got as close as I think I'm going to get today to my sewing day. There was still far too much housework done, but on my rare baby free day I did manage to get in a few good hours of sewing.

All of my baby free sewing day was spent sewing for my baby though, which I thoroughly enjoyed. Today's tip comes from the School of Trial and Error.

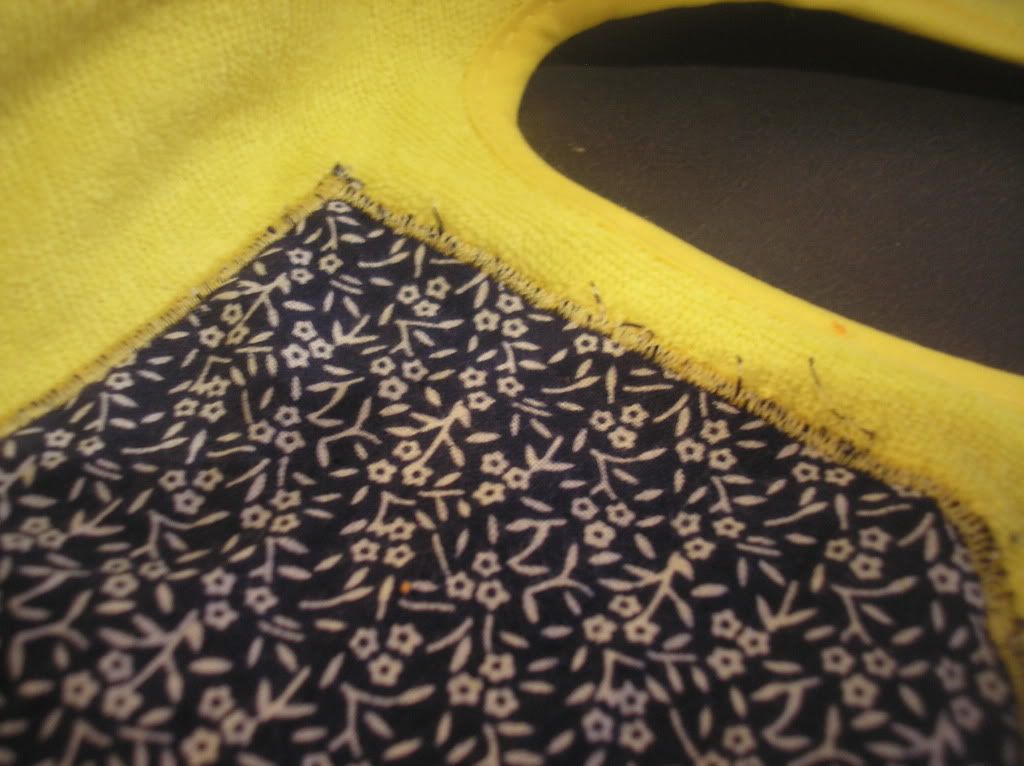
When you want to use applique to put a design onto something, make sure you match the thread to the design, not the background. I've done plenty of applique before, but I've never notices this before. I must have always matched the thread to the design by chance, or maybe I haven't used such an obvious colour contrast before.

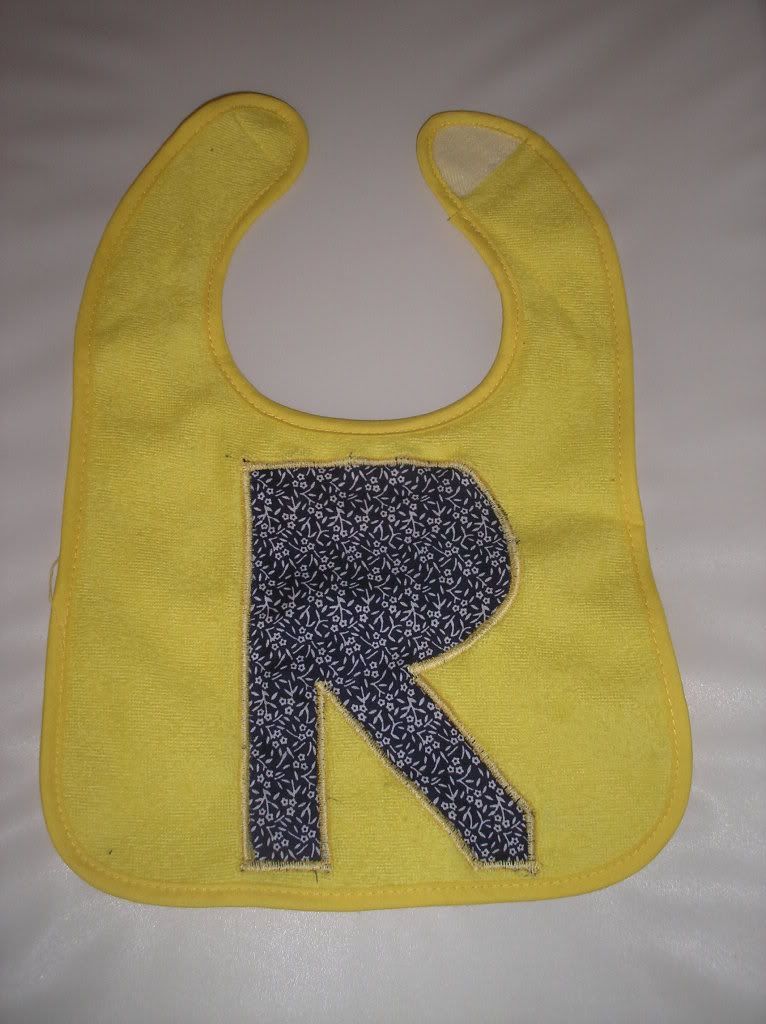
In this case I was making a bit for a friend's baby girl, Rochelle. The design is an 'R' in navy with small white flowers on a yellow bib, and I used yellow thread to do the applique. Didn't work well.


It's too easy to see though the applique and all the threads. I went over it again with a wider stitch and a shorter stitch, but it didn't improve much.


The navy design is still peeking through the light coloured thread.

I was able to finish the bib and I still think it looks sweet, but after that I switched to matching the thread colour to the design. I made several other bibs and shirts doing this, and it stopped the peek-through a lot more.

Here's the final bib, all ready to get wrapped up and drooled on!

Related Posts Plugin for WordPress, Blogger...