Showing posts with label craft. Show all posts
Monday, 11 February 2013
Sewing/ craft tip and menu plan
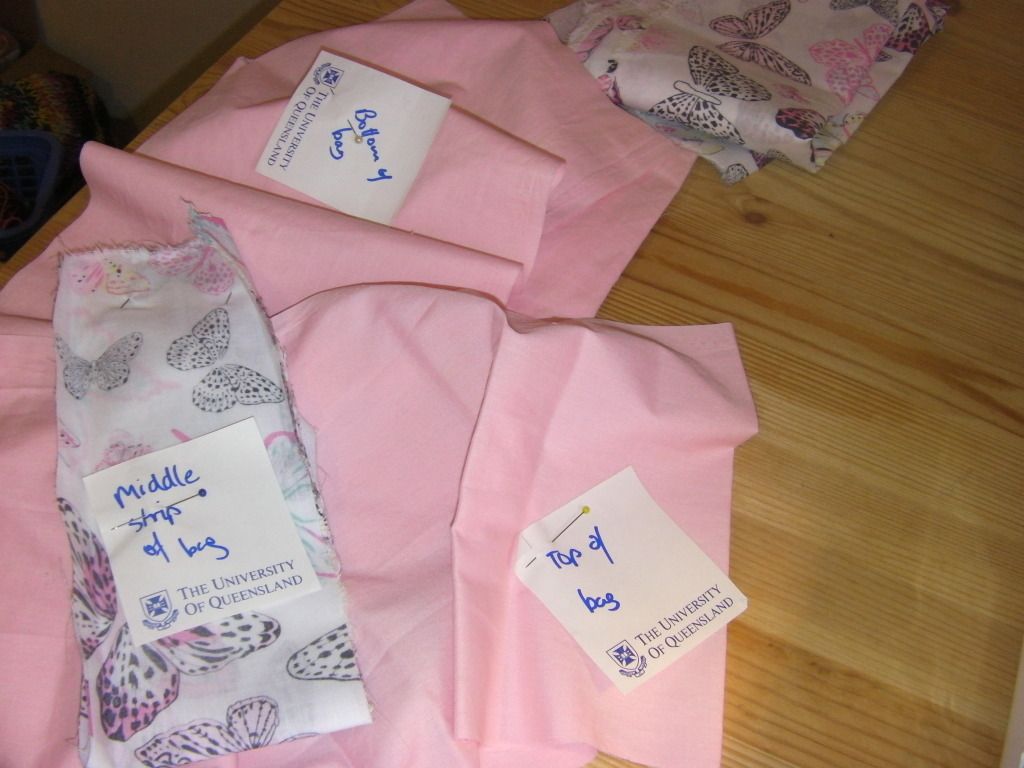
Sometimes splitting up a big project into smaller sections which can be done during nap time is the only way to get any crafting done.
One way to do this is to cut out on one day, and then put it away to be sewn the next day, or the next week, or the next year.
The problem is, I have a mind like a sieve. So I need to label every piece, every partly done item. Write in on a piece of paper and pin it, with super detailed instructions. Makes much more sense when I pull it out again.
I haven't done menu planning in a long time, but I'm keen to get back into it. Especially now that we have the new kitchen, I'd like to try out some new meal which still suit my dead easy, cheap and healthy requirements.
Menu plan for this week:
Monday: Stir fry
Tuesday: Scavenge (I have a work function)
Wednesday: Bolognese (from the freezer)
Thursday: Roast beef
Friday: Roast beef leftover and salad
Saturday: Chicken curry (from the freezer)
Sunday: Chicken bolognese
Labels:
craft,
food,
menu planning,
nap time project,
sewing,
tips
Thursday, 3 January 2013
Gingerbread house update
Well, in short - it worked! It's not often that I can say that about a baking endeavour. Yes, I know that I'm really stretching it to call this 'baking', but it's Christmas!
I didn't have too many dramas. It came as several pieces with a massive bag of fondant. It was more that enough, even after I made mistakes and slathered it on which was good. The leftovers may or may not have been eaten/ sucked from the bag later...
It was pretty easy to build, except for the 'hold in place for one minute until set' instruction. After an hour the roof was still sliding off and we discovered that this was made in Canada. I'm guessing that a Canadian Christmas and one in Queensland have a pretty huge difference in temperature! All was fixed with more fondant and a little rest in the fridge.
It was fun sticking it together. Because it was a kit I didn't do any planning, I just stuck on the lollies as I went. (Reckless, I know.) I'm looking forward to planning one in the future. Apparantly some people do themed ones each year, I'd love to do that after a couple of years. (By the way - this is definately an after bedtime or nap time project!)
Some last minute renovations to the chimney. This is the only house I've ever had with one.
The finished product! Unfortunately after the night in the fridge some of the lollies were 'crying' but otherwise I thought that it looked really good. The kit also came with a snowman, a gingerbread man and a Christmas tree which you can see in the 'front yard'.
This is the back of the house. Much less crying from the lollies here! The middle swirly mint is what the three on the front of the house are supposed to look like.
This was the first one I'd made and I enjoyed it. I'd love it to become a tradition in our family. It's not something that Dear Husband or I have ever done in our families before. It's very hard for us to get excited about Christmas, but it's something that we really want to make special for Chubs. I'd love to have her 'help' decorate as she gets older, and for gingerbread at breakfast to be a Christmas time treat. (Incidentally, she loved the icing but had a mixed appreciation of the gingerbread itself.) I thought that the kit biscuits tasted quite nice, although I may change my mind after I've made one from scratch!
So, all in all, a successful venture, which makes a nice change!
I didn't have too many dramas. It came as several pieces with a massive bag of fondant. It was more that enough, even after I made mistakes and slathered it on which was good. The leftovers may or may not have been eaten/ sucked from the bag later...
It was pretty easy to build, except for the 'hold in place for one minute until set' instruction. After an hour the roof was still sliding off and we discovered that this was made in Canada. I'm guessing that a Canadian Christmas and one in Queensland have a pretty huge difference in temperature! All was fixed with more fondant and a little rest in the fridge.
It was fun sticking it together. Because it was a kit I didn't do any planning, I just stuck on the lollies as I went. (Reckless, I know.) I'm looking forward to planning one in the future. Apparantly some people do themed ones each year, I'd love to do that after a couple of years. (By the way - this is definately an after bedtime or nap time project!)
Some last minute renovations to the chimney. This is the only house I've ever had with one.
The finished product! Unfortunately after the night in the fridge some of the lollies were 'crying' but otherwise I thought that it looked really good. The kit also came with a snowman, a gingerbread man and a Christmas tree which you can see in the 'front yard'.
This is the back of the house. Much less crying from the lollies here! The middle swirly mint is what the three on the front of the house are supposed to look like.
This was the first one I'd made and I enjoyed it. I'd love it to become a tradition in our family. It's not something that Dear Husband or I have ever done in our families before. It's very hard for us to get excited about Christmas, but it's something that we really want to make special for Chubs. I'd love to have her 'help' decorate as she gets older, and for gingerbread at breakfast to be a Christmas time treat. (Incidentally, she loved the icing but had a mixed appreciation of the gingerbread itself.) I thought that the kit biscuits tasted quite nice, although I may change my mind after I've made one from scratch!
So, all in all, a successful venture, which makes a nice change!
Friday, 19 October 2012
Knit a square photos
Some of these have been posted before, and some of these are new. Many of these have the patterns written for them as part of the Knit A Square A Day project. If the idea of getting your needles clicking to help others sounds good, then get started! Knitting for charity can be wonderful in so many ways. For more information visit here or www.knit-a-square.com .


Saturday, 13 October 2012
Rosette craft: tutorial
A dear friend of mine recently got married, and two weeks before that we had the Hen's night. We had six bridesmaids and they shared most of the work (including Rachael in particular :) ) but the rosettes were my domain :)
These were for the Hen's night, obviously, but could easily be adapted for birthday parties or any other events.
Materials (makes 12):
- 2 pieces of craft felt in main colour
- 2 pieces of card in coordinating colour (you could use felt instead if desired)
- Printed circles with event name/ design
- 1 four meter roll of ribbon in main colour (will be some left over)
- 1 four meter roll of ribbon in coordinating colour (will be some left over)
- suitable glue (eg PVA or foam)
- stapler and staples
- scissors
- pencil
Method:
Step 1a:
Using something round (I used a tea cup) trace circles onto the background colour felt.
Step 1b:
Start cutting!
Step 2:
Using a smaller cup or other round object, draw circles on the card. Again, you could use felt if you want. Get cutting!
Step 3:
Draw or find and print a logo or design for your event. You guessed it, get cutting! (... and yes, I realise that each rosette is one apostrophe short of a grammatically correct event. Don't worry, it bugged me all night.)
Step 4:
Not pictured
Cut both colours of ribbon into 30 cm lengths. It doesn't need to be perfect - a bit longer or shorter is ok.
Step 5:
Staple a piece of ribbon of each colour to the background felt. It should be about 2 - 3 cm from the edge of the disc.
Step 6:
Spread the glue on the background disk of felt, and then glue the cardboard disk on top. Finish off by gluing the design on top.
Step 7:
Put a safety pin through the top and you're all done!
These were for a one night event, so I didn't spend heaps of time finishing the edges of the ribbon, sewing a loop for the pin or anything like that. Mass production was my aim with the cutting, so the edges aren't as smooth as they could be, although it you are a scrapbooker (and I'm not) you could use those cool cuttie- out- punch things to speed things along and fancy them up a bit. I also wish that I had bought ribbon on a roll, not on a flat cart, since it had all the kinks in it.
The bride had a great night and so did everyone else. I hope that these rosettes might make an appearance at your event to make everyone feel special.
Saturday, 6 October 2012
Simple toddler dress -free tutorial
This too cute dress is very easy to make, since we shortcut a bit with the t shirt!
Materials:
- Small amount of fabric - 1/2 metre if getting it cut with plently left over, or a fat quarter would be enough too.
- T shirt (I used a size two)
- Thread
- Measuring tape
- Sewing machine
- Overlocker optional.
There are a few modifications that I would make next time, but otherwise it worked well.
Procedure:
Step 1:
To start with measure the bottom of the t shirt. The fabric skirt will be twice as long, so multiply this number by four. (It would be really bad if you were a maths teacher, and you only multiplied this number by two, and cut the fabric half as long as it would have been.) The yellow shirt that I used was 31 cm wide, so my fabric should have been 124cm long plus a little bit more for seams (this is not an exact project, so a bit bigger or smaller is ok.)
Step 2:
Cut the fabric as wide as you need it (four times the width of the shirt) and as long as you want it. I cut it 20cm + seam allowance, which was probably too much. (I put a generous hem on it and will probably take it up a bit more.
Don't cut it in two pieces like I did accidentally. Luckily it was a forgiving fabric and I ws able to stitch it back together. If you were cutting from a fat quarter (rather than 112cm wide fabric cut by the metre) then you may need to stitch the two pieces together anyway.
Step 3:
With right sides together pin then stitch the fabric into one long loop. I used the overlocker, but you could just use a regular sewing machine. You should now have one long loop, twice the width of your shirt.
Step 4:
Sort out the edges of the loop. I put a rolled hem for the bottom (which I ended up changing) and then just overlocked the top edge so it wouldn't be raw.
Step 5 (not pictured):
Mark with a dressmaker's pencil or similar four evenly spaced marks on the loop. That is, put a mark where you want the two sides to sit and the front centre and back centre. This is to make sure that your gather is even (or even-ish)
Step 6:
Set your sewing machine to very large, loose stitches, about 3cm from the top edge. Stitch all the way around the loop. This thread will be removed later so no need to fuss about colour matching or being super straight and perfect. Do not tie off at the beginning or the end.
Step 7:
Pull the thread through so that the skirt gathers up. You want to make the skirt about half it's size; if in doubt go smaller since it's easier to let it out than it is to gather it in. If you do need to gather it in again, pull on the stitching to tighten it up.
Step 8:
Pin the skirt to the shirt. The skirt should be upside down an wrong side out; the shirt should be right side out. To make sure that you have an even gather, only use four pins initially - pin the marks from Step 5 to the side seams and front and back centre of the shirt. For a toddler sized dress, this will be enough pins.
In hindsight, I wish that I had cut the hem off the shirt, or sewn the skirt above it. I may yet go back and fix this, but I won't get another sewing day for months so I wanted to post this before then!
Step 7:
Stitch the skirt to the shirt, smoothing down the gather as you go. You may need to adjust the gather; be guided by the four pins, and estimate an even gather between every two pins.
I'm not sure how this would go using an overlocker; I will try that next. If you did do this, then you could skip overlocking the top of the skirt in Step 4.
When you have finished sewing the skirt to the shirt, remove the gather thread.
Final steps:
Turn right side out and have a look at the dress. I ended up taking the dress up with a 1.5 inch hem. Since I did the rolled hem underneath, I'm hoping that next year when Chubs is taller I can just rip out the extra hem and I won't need to re-hem underneath.
I'm still not happy with the hem join here. Also keep in mind that I haven't ironed it. I haven't really decided what to do, so I will keep you posted. Chubs is wearing this dress to a birthday party at the playground tomorrow, so that should give it a good 'test run' too.
Final final step: Find a too-cute toddler to wear it!
I hope this tutorial has been useful for you; I plan to update this when I've had a chance to make a few more and iron out the kinks. (Get it, since I didn't iron... oh well.) Please let me know what you think in the comments!
Linked and linked
Materials:
- Small amount of fabric - 1/2 metre if getting it cut with plently left over, or a fat quarter would be enough too.
- T shirt (I used a size two)
- Thread
- Measuring tape
- Sewing machine
- Overlocker optional.
There are a few modifications that I would make next time, but otherwise it worked well.
Procedure:
Step 1:
To start with measure the bottom of the t shirt. The fabric skirt will be twice as long, so multiply this number by four. (It would be really bad if you were a maths teacher, and you only multiplied this number by two, and cut the fabric half as long as it would have been.) The yellow shirt that I used was 31 cm wide, so my fabric should have been 124cm long plus a little bit more for seams (this is not an exact project, so a bit bigger or smaller is ok.)
Step 2:
Cut the fabric as wide as you need it (four times the width of the shirt) and as long as you want it. I cut it 20cm + seam allowance, which was probably too much. (I put a generous hem on it and will probably take it up a bit more.
Don't cut it in two pieces like I did accidentally. Luckily it was a forgiving fabric and I ws able to stitch it back together. If you were cutting from a fat quarter (rather than 112cm wide fabric cut by the metre) then you may need to stitch the two pieces together anyway.
Step 3:
With right sides together pin then stitch the fabric into one long loop. I used the overlocker, but you could just use a regular sewing machine. You should now have one long loop, twice the width of your shirt.
Step 4:
Sort out the edges of the loop. I put a rolled hem for the bottom (which I ended up changing) and then just overlocked the top edge so it wouldn't be raw.
Step 5 (not pictured):
Mark with a dressmaker's pencil or similar four evenly spaced marks on the loop. That is, put a mark where you want the two sides to sit and the front centre and back centre. This is to make sure that your gather is even (or even-ish)
Step 6:
Set your sewing machine to very large, loose stitches, about 3cm from the top edge. Stitch all the way around the loop. This thread will be removed later so no need to fuss about colour matching or being super straight and perfect. Do not tie off at the beginning or the end.
Step 7:
Pull the thread through so that the skirt gathers up. You want to make the skirt about half it's size; if in doubt go smaller since it's easier to let it out than it is to gather it in. If you do need to gather it in again, pull on the stitching to tighten it up.
Step 8:
Pin the skirt to the shirt. The skirt should be upside down an wrong side out; the shirt should be right side out. To make sure that you have an even gather, only use four pins initially - pin the marks from Step 5 to the side seams and front and back centre of the shirt. For a toddler sized dress, this will be enough pins.
In hindsight, I wish that I had cut the hem off the shirt, or sewn the skirt above it. I may yet go back and fix this, but I won't get another sewing day for months so I wanted to post this before then!
Step 7:
Stitch the skirt to the shirt, smoothing down the gather as you go. You may need to adjust the gather; be guided by the four pins, and estimate an even gather between every two pins.
I'm not sure how this would go using an overlocker; I will try that next. If you did do this, then you could skip overlocking the top of the skirt in Step 4.
When you have finished sewing the skirt to the shirt, remove the gather thread.
Final steps:
Turn right side out and have a look at the dress. I ended up taking the dress up with a 1.5 inch hem. Since I did the rolled hem underneath, I'm hoping that next year when Chubs is taller I can just rip out the extra hem and I won't need to re-hem underneath.
I'm still not happy with the hem join here. Also keep in mind that I haven't ironed it. I haven't really decided what to do, so I will keep you posted. Chubs is wearing this dress to a birthday party at the playground tomorrow, so that should give it a good 'test run' too.
Final final step: Find a too-cute toddler to wear it!
I hope this tutorial has been useful for you; I plan to update this when I've had a chance to make a few more and iron out the kinks. (Get it, since I didn't iron... oh well.) Please let me know what you think in the comments!
Linked and linked
Tuesday, 4 September 2012
National Science Week
I just realised that this post was sitting in my drafts. Sorry, it's a bit late now but hopefully it's still funny!
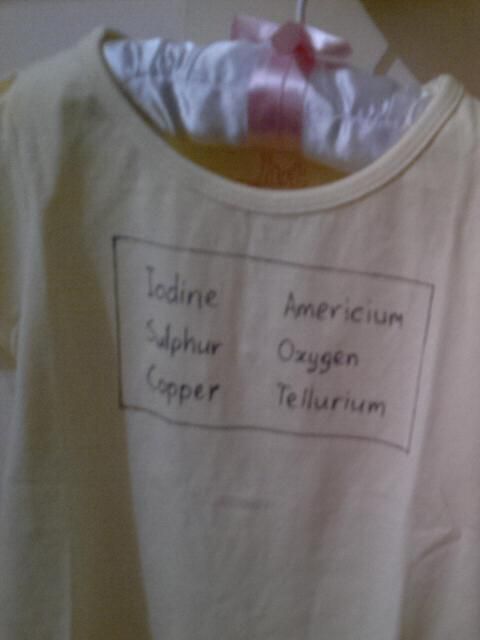
As National Science Week draws to a close, I would like to share with you one of Chubs' outfits from this week.
Anyone looking for a geeky baby shirt idea, here you go:
For those of you who aren't so nerdy, the symbols of the elements iodine, americium, sulphur, oxygen, copper and tellurium spell
I Am SO CuTe
If you're giggling by now, then you probably didn't need the explanation, and I suspect that you and I are the same type of nerd.
If you did need the explanation, then you are probably groaning and rolling your eyes now. It's ok, I'm used to it :D
I also did some volcanoes (ie, vinegar and bicarb) with my very helpful and enthusiastic scientists-in-training at playgroup and at Chubs' daycare (with the big kids.) Very simple but lots of fun and dead easy to clean up! Yay for science!
As National Science Week draws to a close, I would like to share with you one of Chubs' outfits from this week.
Anyone looking for a geeky baby shirt idea, here you go:
For those of you who aren't so nerdy, the symbols of the elements iodine, americium, sulphur, oxygen, copper and tellurium spell
I Am SO CuTe
If you're giggling by now, then you probably didn't need the explanation, and I suspect that you and I are the same type of nerd.
If you did need the explanation, then you are probably groaning and rolling your eyes now. It's ok, I'm used to it :D
I also did some volcanoes (ie, vinegar and bicarb) with my very helpful and enthusiastic scientists-in-training at playgroup and at Chubs' daycare (with the big kids.) Very simple but lots of fun and dead easy to clean up! Yay for science!
Monday, 16 July 2012
Rainbow party bags + menu plan
For Chubs' first birthday we had a rainbow party - check out some of the food and decorations here.
For the party bags, I wanted something that wasn't just a bag full of sugar. I have a family full of dentists to start with, but also many of the party guests were little babies so lollies weren't really appropriate.
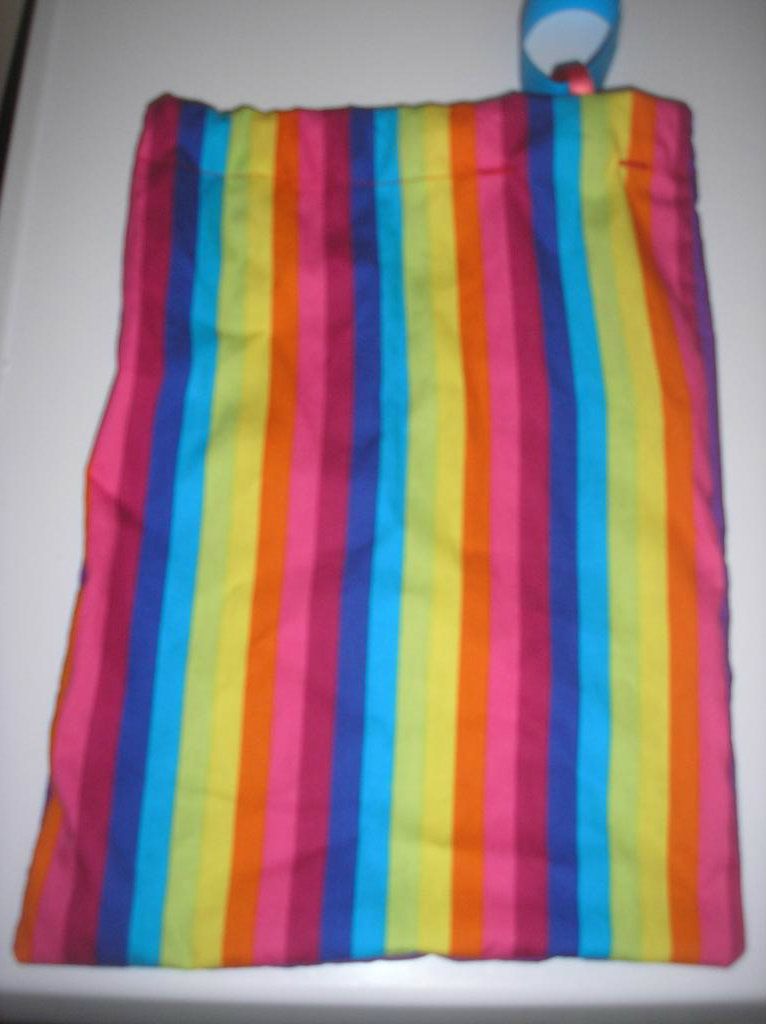
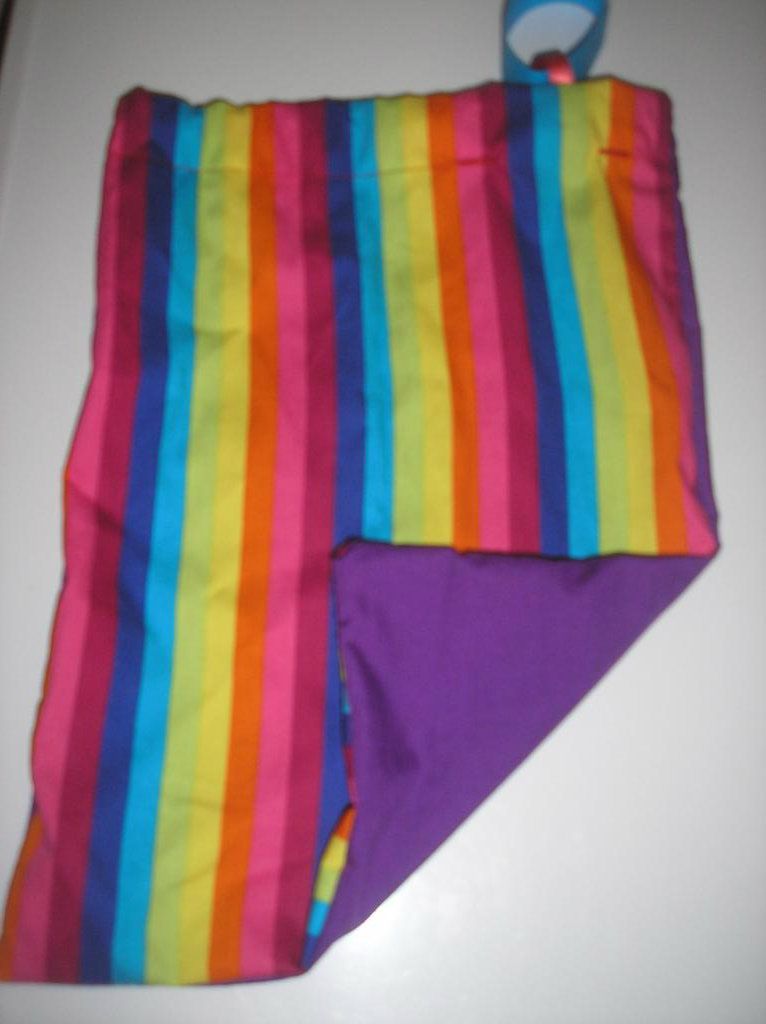
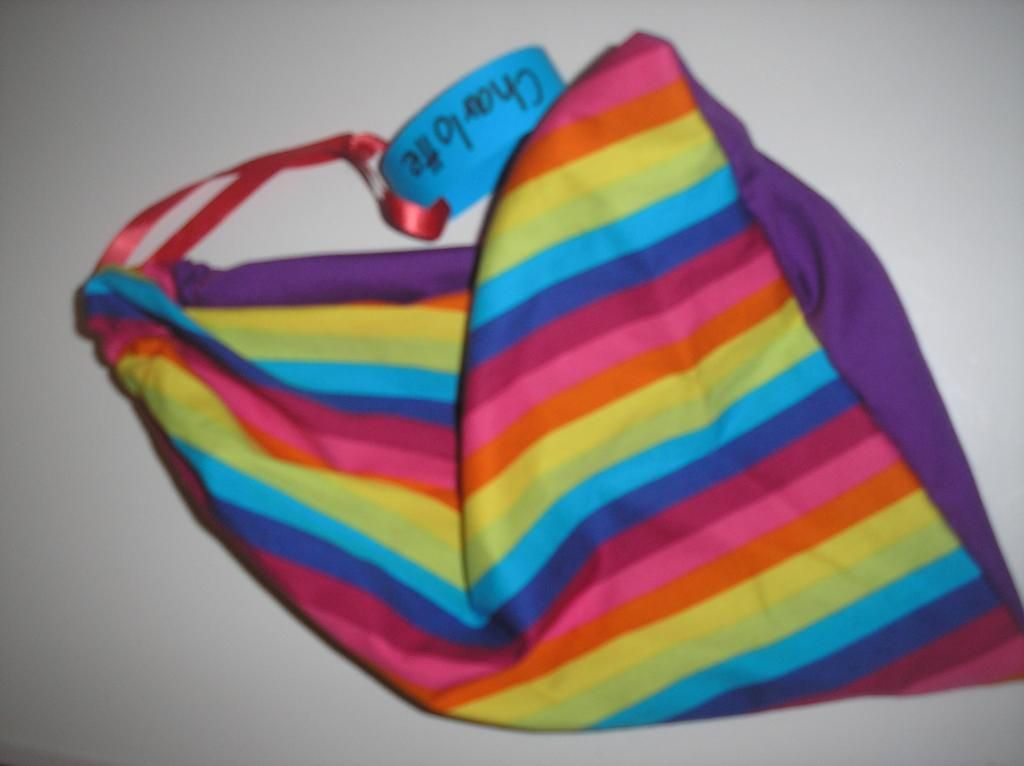
I made a whole lot of drawstring bags with this rainbow fabric on one side and a plain colour on the other. I split the bags up into three categories - babies, little kids and older kids. Babies got the bag, some bubbles and a foam bath toy. Little kids got the bag, a few lollies, playdough and some small plastic dinosaurs and older children got bubbles and some lollies. The bags were bigger than a normal party bag - about 30cm wide and 35cm tall - because I wanted them to be useful, not just cute.
I thought I took a photo of the rainbow playdough, but I can't find one. Basically I made up four batches of white (uncoloured) play dough, then I split it into six even balls. I coloured each ball one of red, orange, yellow, green, blue and purple then I kneaded and kneaded and kneaded and kneaded! (My hands were quite sore afterwards - you really can see why it's good for muscle development and find motor skills for little kids - and big people, too!) Then I rolled each colour into a thick sausage and cut it up into ten pieces. I then put one piece of each colour in a sealy/ ziplock bag.
Since the bags had different things, I named each bag just by stapling a piece of card with the child's name on it. There were a few sets of siblings invited so I made sure that each child got a different coloured back so they could tell them apart.
Many mums at the party thanked me for playdough which kept several kids occupied for a few hours that afternoon. The bags were useful too, and I've seen a 'in use' since the party which was exactly what I intended, so I'm glad they've been enjoyed.
More rainbow birthday party ideas
Menu plan for this week
I need to have some tests on Friday which means I need to have a special diet for three days before - lots and lots of carbs! So here's the plan for a high carb diet this week. Depending on what the results show it may very well be my last flirtation with carbohydrates, so I'm going to enjoy it!
Monday: Pork stir fry (plus I'll try to do some freezer cooking)
Tuesday: Spaghetti bolognese
Wednesday: Spaghetti with chicken bolognese (made the same as normal but with chicken mince)
Thursday: leftovers from Tuesday and Wednesday and a big bowl - perhaps my last - of spaghetti! I do love spaghetti.
Friday: We are going out to a birthday party for a relative so we'll eat there
Saturday: Out with other rellies
Sunday: scavenge.
Linked
For the party bags, I wanted something that wasn't just a bag full of sugar. I have a family full of dentists to start with, but also many of the party guests were little babies so lollies weren't really appropriate.
I made a whole lot of drawstring bags with this rainbow fabric on one side and a plain colour on the other. I split the bags up into three categories - babies, little kids and older kids. Babies got the bag, some bubbles and a foam bath toy. Little kids got the bag, a few lollies, playdough and some small plastic dinosaurs and older children got bubbles and some lollies. The bags were bigger than a normal party bag - about 30cm wide and 35cm tall - because I wanted them to be useful, not just cute.
I thought I took a photo of the rainbow playdough, but I can't find one. Basically I made up four batches of white (uncoloured) play dough, then I split it into six even balls. I coloured each ball one of red, orange, yellow, green, blue and purple then I kneaded and kneaded and kneaded and kneaded! (My hands were quite sore afterwards - you really can see why it's good for muscle development and find motor skills for little kids - and big people, too!) Then I rolled each colour into a thick sausage and cut it up into ten pieces. I then put one piece of each colour in a sealy/ ziplock bag.
Since the bags had different things, I named each bag just by stapling a piece of card with the child's name on it. There were a few sets of siblings invited so I made sure that each child got a different coloured back so they could tell them apart.
Many mums at the party thanked me for playdough which kept several kids occupied for a few hours that afternoon. The bags were useful too, and I've seen a 'in use' since the party which was exactly what I intended, so I'm glad they've been enjoyed.
More rainbow birthday party ideas
Menu plan for this week
I need to have some tests on Friday which means I need to have a special diet for three days before - lots and lots of carbs! So here's the plan for a high carb diet this week. Depending on what the results show it may very well be my last flirtation with carbohydrates, so I'm going to enjoy it!
Monday: Pork stir fry (plus I'll try to do some freezer cooking)
Tuesday: Spaghetti bolognese
Wednesday: Spaghetti with chicken bolognese (made the same as normal but with chicken mince)
Thursday: leftovers from Tuesday and Wednesday and a big bowl - perhaps my last - of spaghetti! I do love spaghetti.
Friday: We are going out to a birthday party for a relative so we'll eat there
Saturday: Out with other rellies
Sunday: scavenge.
Linked
Subscribe to:
Posts (Atom)