Showing posts with label tutorial. Show all posts

Saturday, 13 October 2012

Rosette craft: tutorial

A dear friend of mine recently got married, and two weeks before that we had the Hen's night. We had six bridesmaids and they shared most of the work (including Rachael in particular :)  ) but the rosettes were my domain :)
 
These were for the Hen's night, obviously, but could easily be adapted for birthday parties or any other events.


Materials (makes 12):
 
- 2 pieces of craft felt in main colour
- 2 pieces of card in coordinating colour (you could use felt instead if desired)
- Printed circles with event name/ design
- 1 four meter roll of ribbon in main colour (will be some left over)
- 1 four meter roll of ribbon in coordinating colour (will be some left over)
- suitable glue (eg PVA or foam)
- stapler and staples
- scissors
- pencil
 
 
Method:
 
Step 1a:


Using something round (I used a tea cup) trace circles onto the background colour felt. 
 
Step 1b:


Start cutting!
 
Step 2:
 

Using a smaller cup or other round object, draw circles on the card. Again, you could use felt if you want. Get cutting!

Step 3:


Draw or find and print a logo or design for your event. You guessed it, get cutting! (... and yes, I realise that each rosette is one apostrophe short of a grammatically correct event. Don't worry, it bugged me all night.)

Step 4:
Not pictured

Cut both colours of ribbon into 30 cm lengths. It doesn't need to be perfect - a bit longer or shorter is ok.

Step 5:


Staple a piece of ribbon of each colour to the background felt. It should be about 2 - 3 cm from the edge of the disc.

Step 6:


Spread the glue on the background disk of felt, and then glue the cardboard disk on top. Finish off by gluing the design on top.


Step 7:

Put a safety pin through the top and you're all done!


These were for a one night event, so I didn't spend heaps of time finishing the edges of the ribbon, sewing a loop for the pin or anything like that. Mass production was my aim with the cutting, so the edges aren't as smooth as they could be, although it you are a scrapbooker (and I'm not) you could use those cool cuttie- out- punch things to speed things along and fancy them up a bit. I also wish that I had bought ribbon on a roll, not on a flat cart, since it had all the kinks in it.

The bride had a great night and so did everyone else. I hope that these rosettes might make an appearance at your event to make everyone feel special.


Saturday, 6 October 2012

Simple toddler dress -free tutorial

This too cute dress is very easy to make, since we shortcut a bit with the t shirt!


Materials:

- Small amount of fabric - 1/2 metre if getting it cut with plently left over, or a fat quarter would be enough too.
- T shirt (I used a size two)
- Thread
- Measuring tape
- Sewing machine
- Overlocker optional.


There are a few modifications that I would make next time, but otherwise it worked well.

Procedure:

Step 1:

To start with measure the bottom of the t shirt. The fabric skirt will be twice as long, so multiply this number by four. (It would be really bad if you were a maths teacher, and you only multiplied this number by two, and cut the fabric half as long as it would have been.) The yellow shirt that I used was 31 cm wide, so my fabric should have been 124cm long plus a little bit more for seams (this is not an exact project, so a bit bigger or smaller is ok.)

Step 2:


Cut the fabric as wide as you need it (four times the width of the shirt) and as long as you want it. I cut it 20cm + seam allowance, which was probably too much. (I put a generous hem on it and will probably take it up a bit more.

Don't cut it in two pieces like I did accidentally. Luckily it was a forgiving fabric and I ws able to stitch it back together. If you were cutting from a fat quarter (rather than 112cm wide fabric cut by the metre) then you may need to stitch the two pieces together anyway.

Step 3:

With right sides together pin then stitch the fabric into one long loop. I used the overlocker, but you could just use a regular sewing machine. You should now have one long loop, twice the width of your shirt.


Step 4:


Sort out the edges of the loop. I put a rolled hem for the bottom (which I ended up changing) and then just overlocked the top edge so it wouldn't be raw.

Step 5 (not pictured):
Mark with a dressmaker's pencil or similar four evenly spaced marks on the loop. That is, put a mark where you want the two sides to sit and the front centre and back centre. This is to make sure that your gather is even (or even-ish)

Step 6:


Set your sewing machine to very large, loose stitches, about 3cm from the top edge. Stitch all the way around the loop. This thread will be removed later so no need to fuss about colour matching or being super straight and perfect. Do not tie off at the beginning or the end.

Step 7:


Pull the thread through so that the skirt gathers up. You want to make the skirt about half it's size; if in doubt go smaller since it's easier to let it out than it is to gather it in. If you do need to gather it in again, pull on the stitching to tighten it up.

Step 8:


Pin the skirt to the shirt. The skirt should be upside down an wrong side out; the shirt should be right side out. To make sure that you have an even gather, only use four pins initially - pin the marks from Step 5 to the side seams and front and back centre of the shirt. For a toddler sized dress, this will be enough pins.

In hindsight, I wish that I had cut the hem off the shirt, or sewn the skirt above it. I may yet go back and fix this, but I won't get another sewing day for months so I wanted to post this before then!

Step 7:


Stitch the skirt to the shirt, smoothing down the gather as you go. You may need to adjust the gather; be guided by the four pins, and estimate an even gather between every two pins.

I'm not sure how this would go using an overlocker; I will try that next. If you did do this, then you could skip overlocking the top of the skirt in Step 4.

When you have finished sewing the skirt to the shirt, remove the gather thread.

Final steps:

Turn right side out and have a look at the dress. I ended up taking the dress up with a 1.5 inch hem. Since I did the rolled hem underneath, I'm hoping that next year when Chubs is taller I can just rip out the extra hem and I won't need to re-hem underneath.


I'm still not happy with the hem join here. Also keep in mind that I haven't ironed it. I haven't really decided what to do, so I will keep you posted. Chubs is wearing this dress to a birthday party at the playground tomorrow, so that should give it a good 'test run' too.

Final final step: Find a too-cute toddler to wear it!


I hope this tutorial has been useful for you; I plan to update this when I've had a chance to make a few more and iron out the kinks. (Get it, since I didn't iron... oh well.) Please let me know what you think in the comments!

Linked and linked

Monday, 14 May 2012

KASAD14: Chrysanthemum (tutorial)

Today's KASAD explores how to knit a diagonal square. These can be especially good when you are knitting with new yarn or needles and you aren't sure of the tension. You can keep knitting until the square gets to the length you need - it's not like knitting a horizontal square where you are 'stuck' with the width, which may be too narrow or too wide. It saves you knitting a swatch, too, as you can use the finished diagonal square to measuer your gauge.

When knitting a diagonal square, you will need to know how to increase and decrease. Some increases like 'yarn over' are very 'gappy' and you can use this to make a lacy pattern. Some other increases like 'make one' or knitting into the front and back of the stitch are less visible. Whatever type you use it will change the appearance of the square.

The square will increase in length and width, and then you need to bring it back in again. One of the things I love about these squares is the instant results. Because the first few rows are very short, they knit up quickly so you get a lot of length for your efforts. Then it slows down a bit, but once you're over the middle it finishes quickly - all down hill.

KASAD14: Chrysanthemum


Materials

- 8 ply yarn in two colours approximately 30g of each
- 6mm knitting needles
- yarn needle to weave in ends, scissors to cut yarn.

Skills and difficulty
Beginner to intermediate knitter
- cast on
- cast off
- knit stitch
- changing colour at the end of row
- increasing
- decreasing
- stitching felt design

Colours
In this example
- C1 is pink
- C2 is pale yellow

Procedure
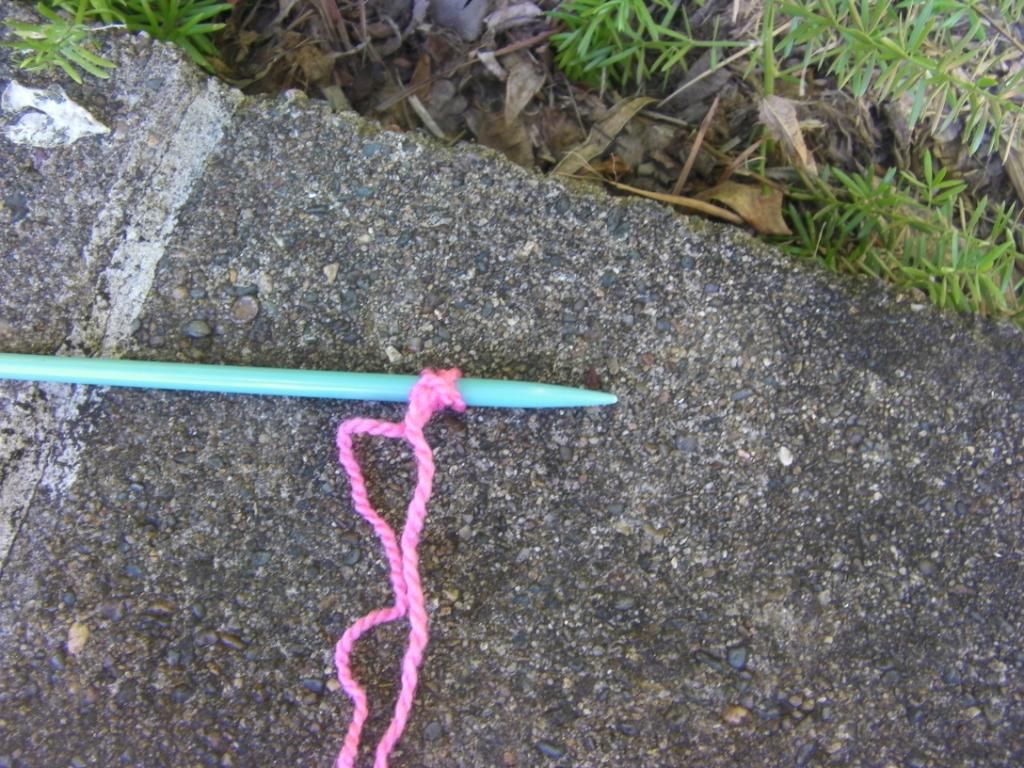
1. Cast on 3 stitches in C1

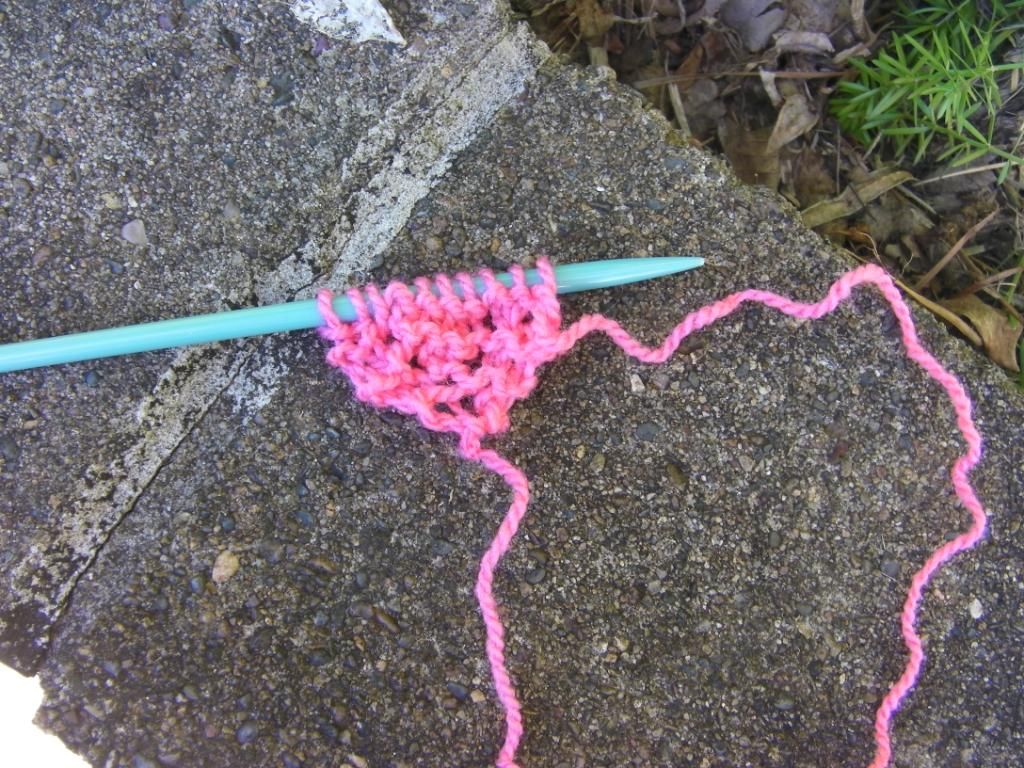
2. Knit two stitches then increase one by 'yarn over'. To do this, wrap the yarn around the needle once in between the third and fourth stitch so that you can knit into it on the next row.
3. Keep knitting until the end of the row.


4. Repeat steps 2 and 3 until the edge of the work measures 16cm (7 inches)


5. Knit 2 rows (1 ridge) without increasing. End C1.
6. Start C2. Knit 2 rows (1 ridge).
7. Knit 2 stitches, then decrease one by knitting two stitches together.
Knit two stitches together
(I find it easiest to do this by knitting into the back of the stitches)

Wrap one strand of yarn around both stitches.
This poor quality photo is taken just before the stitches are slipped off the top.


8. Keep knitting until the end of the row.
9. Repeat steps 7 and 8 until there are 3 stitches left.


10. Cast off and leave a 50cm tail.
11. Weave in ends and butterfly the tail.

Once you have completed the square, add a felt flower as described on Saturday.

Return to all the KASAD posts


The Southern Institute

Saturday, 12 May 2012

Pick it from the garden KASAD12: Flora


I'm someone who likes sharing her ideas, discussing things and connecting. Have you noticed ;) ? You probably won't be suprised to learn that there are several internet forums which I frequent, well, frequently.

One of them is the Knit-a-Square forum. As well as being a place to chat with other charity knitters and crocheters, share ideas and trouble shoot, it's a place where we can share photos of our squares and particpate in monthly challenges. The challenges are totally optional and usually revolve around a theme which is very loosely applied. It's just something fun to do to keep things interesting and to act as inspiration.

Previous themes include Flags of the World, January Jewels, and Africa in August. This month's challenge is Pick it from the Garden in May. Fruits, vegetables, flowers, trees, critters - anything really! Some squares are beautiful pictures, some are just loosely inspired and what is always needed in huge amounts - brightly coloured Plain Janes. Check out the beautiful creations here.

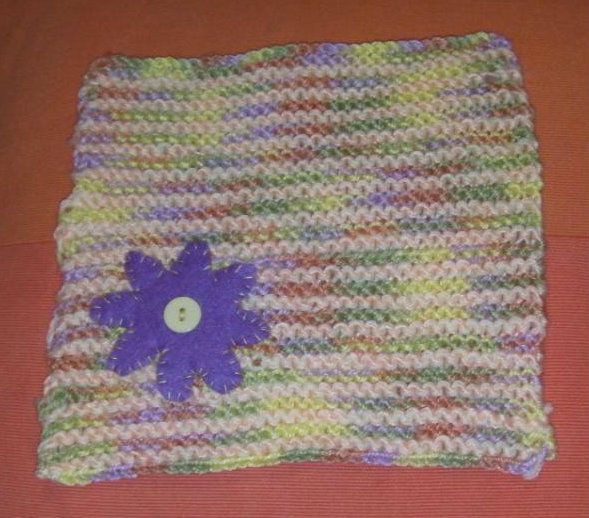
So with that in mind, here's KASAD12: Flora (tutorial)


This square is made by stitching a felt flower onto a knitted square.

Materials

- 8 ply yarn in two colours. Approximately 30g of each colour.
- small piece of felt
- yellow button
- 5mm knitting needles
- yarn needle to weave in ends, scissors to cut yarn and felt
- sewing needle and thread.

Skills and difficulty
Beginner knitter
- cast on
- cast off
- knit stitch
- making and sewing flower
- carrying unused yarn up the side

Colours
In this example, C1 is green/ yellow/ orange/ purple varigated yarn, C2 is pale apricot.

Procedure
To make square:

1. Using C1, cast on 36 stitches. Work in garter stitch.
2. Knit in C1 for 2 rows (1 ridge).
3. Knit in C2 for 2 rows ( 1 ridge).
4. Repeat steps 2 and 3 until work measures 20 cm (8 inches) - this should be about 32 rows.
5. Cast off and leave a 50cm tail.
6. Weave in beginning end and butterfly the tail.

To make flower:
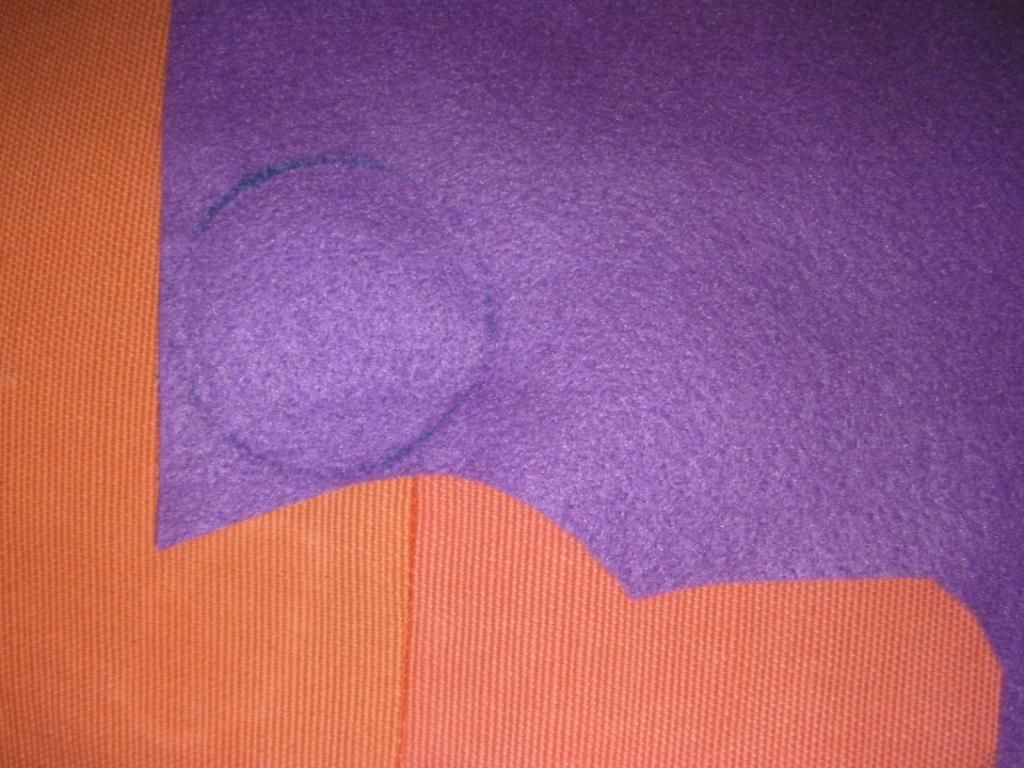
1. Draw around a cup, jar or similar to make a circle on the felt. Cut out circle.

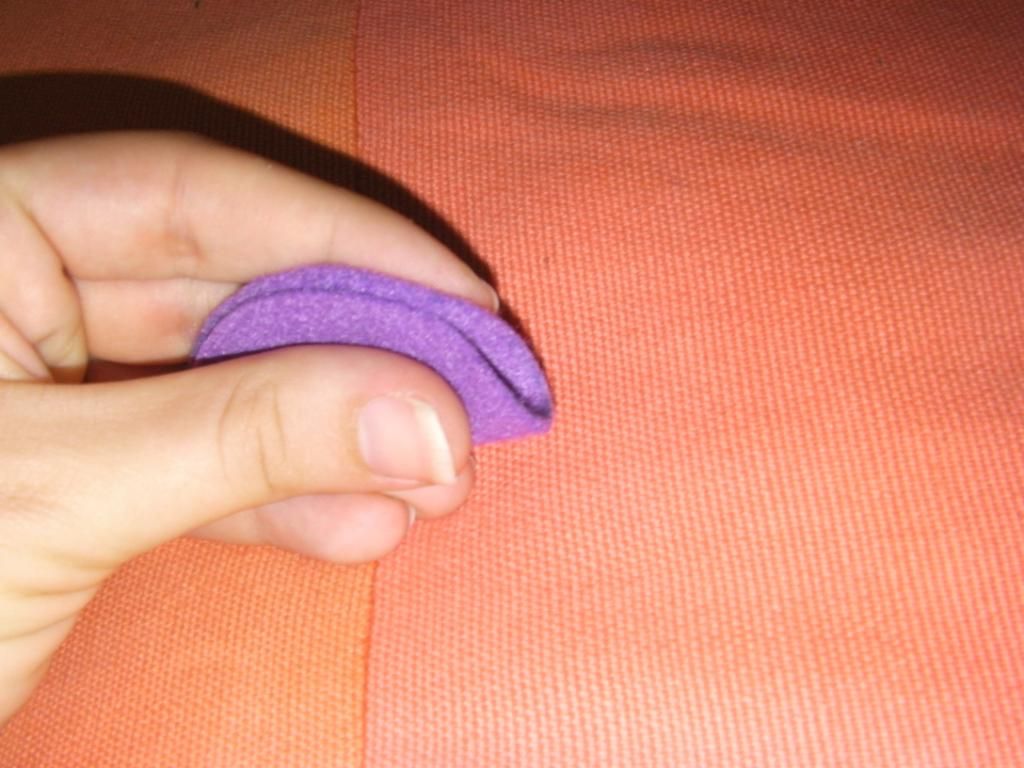
2. Fold the circle in half and press down the 'crease' hard.

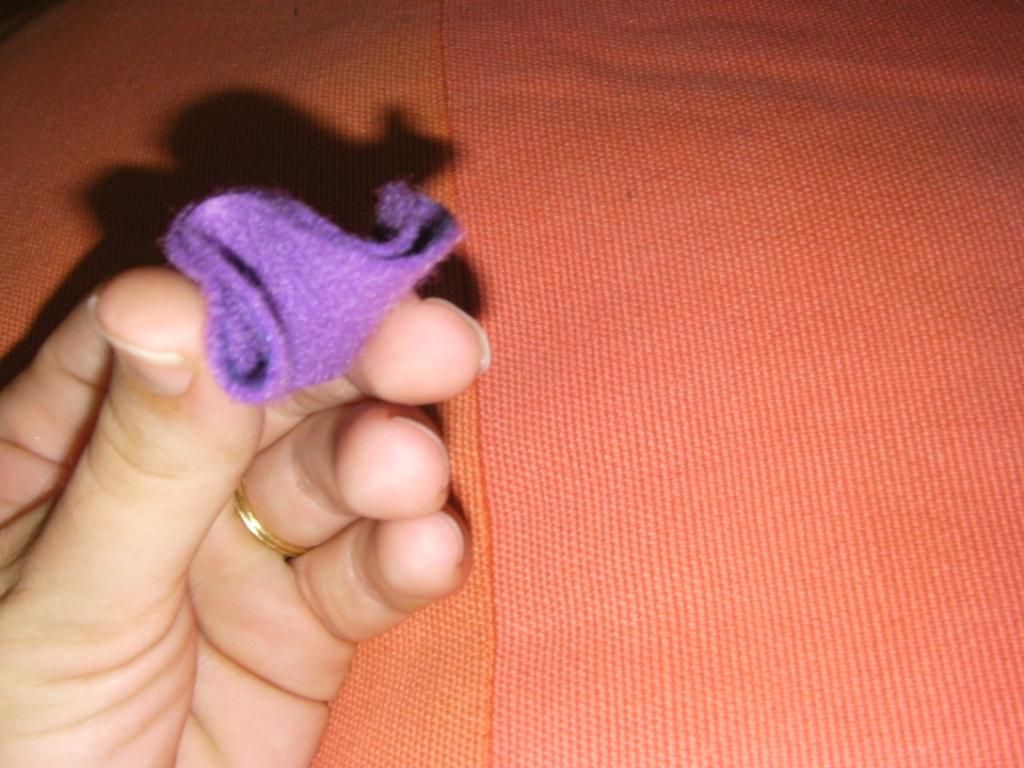
3. Concertina (zig zag) fold the semi circle into three or four. Again, press down the creases hard, it needs to be as flat as possible.

4. Cut a curved top off the edge of the circle to form the petals. Make it rounded, not pointy or you will end up with a star instead of petals. If you're anything like me then you will need to do several of these to get one that looks vaguely like a flower.


You should now have a flower and a knitted square.

To finish:

1. Blanket stitch the flower to the square.
2. Sew a yellow button SECURELY to the centre of the flower.

Voila - a beautiful flower to brighten up a blanket


Variations
- You could add several flowers, or stitch any other shape to a plain square.
- A crocheted flower or other embelishment could be used instead of a felt one
- A Plain Jane square could be used instead of the stripey one
- A crocheted square could be used instead of a knitted one.


Return to all the KASAD posts

Sunday, 6 May 2012

Stitch holder and KASAD6: Mint coconut ice

If you're a crafter, I'm guessing that you have many UFO (unfinished objects) lying around. I needed the needles that I had this project on, and I wasn't going to get this blue vest finished in time. I needed these needles to make a lot of the squares for this month, so the pressure was on!

The vest was on circular needles. (I often knit in rows on circular needles - they are smaller and I prefer the way they sit on my hand. Also, I can't lose one since they're attached!)

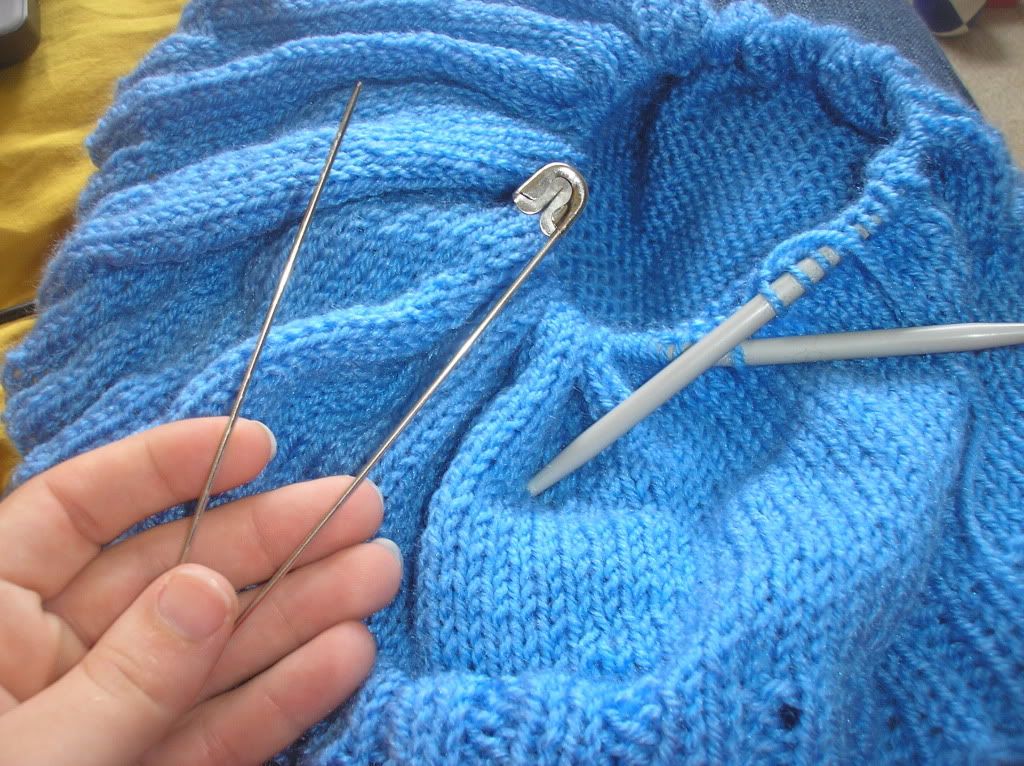
The stitch holder looks like a really big safety pin.

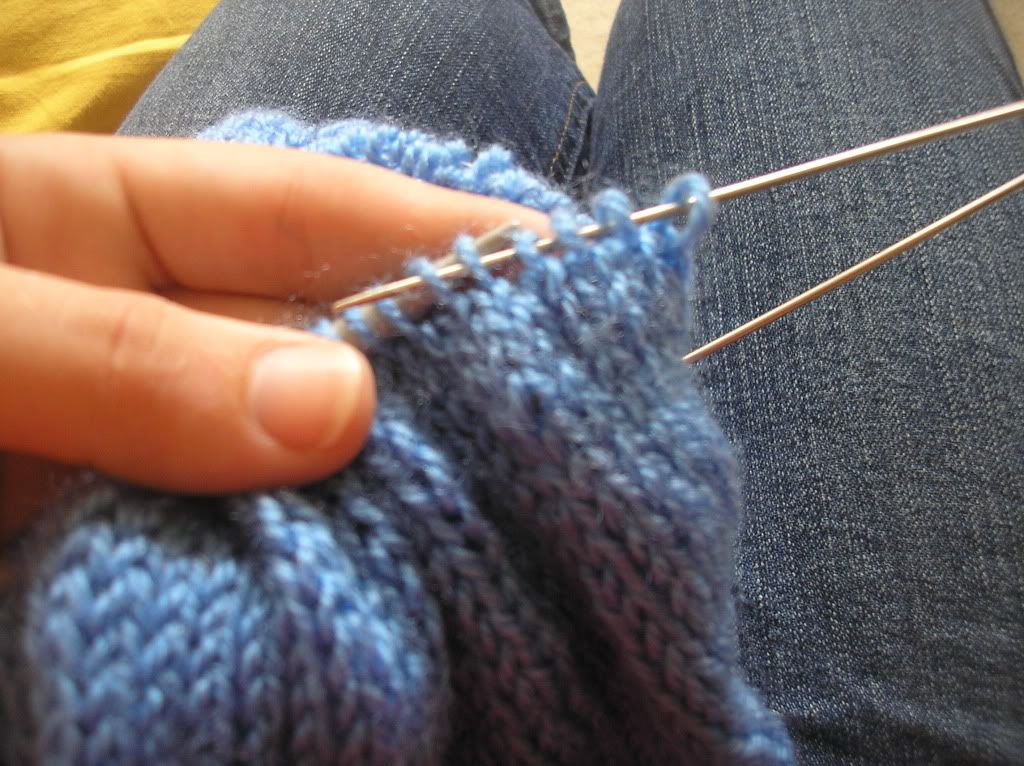
A few stitches at a time, move the stitch from the needles onto the stitch holder. Keep going, moving the knitting around the needles as you go.

I find it easiest to pick the stitches up with the pin before I slide them off the needle.

When you have moved all the stitches onto the stitch holder, fasten the 'safety pin' bit up and you're all finished. Free needles, and another UFO to come back to :) Now, for today's square, knitted with these liberated needles...


KASAD6: Mint coconut ice

I think the colours in this square are just so yummy!


Materials
- 8 ply yarn in three colours - pink, white and green. Approximately 20 g each
- 6mm knitting needles
- yarn needle to weave in ends, scissors to cut yarn.

Skills and difficulty
Beginner knitter
- cast on
- cast off
- knit stitch
- changing colours at the end of a row

Colours
In this example, C1 is light green, C2 is white and C3 is hot pink.

Procedure
1. Cast on 32 stitches in C1 (green)
2. Knit every row (work in garter stitch) for 8 rows (4 ridges). End of C1.
3. Start C2 (white). Knit every row (work in garter stitch) for 8 rows (4 ridges). End of C2.
4. Start C3 (pink). Knit every row (work in garter stitch) for 8 rows (4 ridges). End of C3.
5. Repeat step 3 (white stripe)
6. Repeat step 4 (pink stripe)
7. Repeat step 3 (white stripe)
8. Repeat step 2 (green stripe) but don't end C1 yet
9. Cast off and leave a 50cm tail.
10. Weave in ends and butterfly the tail.

Return to all the KASAD posts

Thursday, 26 April 2012

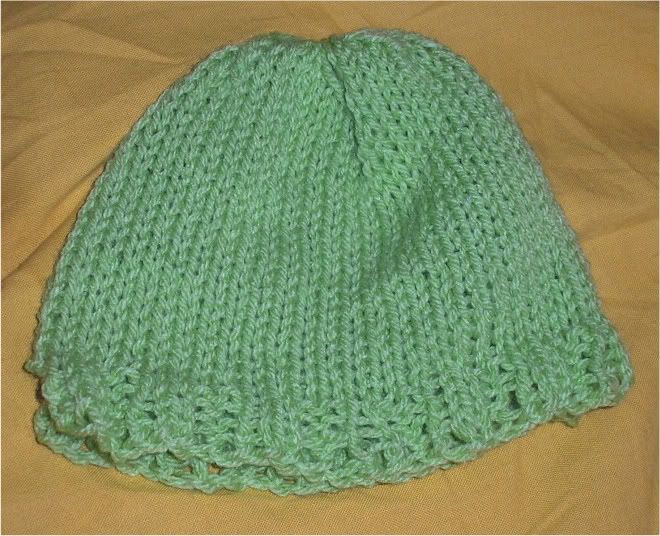
Easy baby beanie or warm hat: Tutorial

This cute - as little beanie is a nap time project, if you can knit very fast! You may get it done in an hour, but most probably won't. Because it's so small, however, it's easy to bundle away and pick up again tomorrow.

This free pattern is a good project for beginners and for knitting for charity.

You will need:
- circular knitting needles, 6mm
- 8 ply yarn or two strands of 4 ply yarn. Doubled up baby yarn is excellent for this project.
- yarn needle and scissors

Knitting skills required:
- cast on
- knit stitch
- purl stitch (for ribbed brim only, not required for rolled brim)
- knitting in rows (for ribbed brim only, not required for rolled brim)
- knitting in the round
- decreasing

Cast on 54 stitches onto the circular needles.


ribbed brim (solid colour yarn)

rolled brim (varigated yarn)


For a rolled brim:
Knit one row. Join the knitting, being careful not to twist it. If you are new to knitting in the round, I recommend the ribbed brim. Keep knitting every row.

For a ribbed brim:
Work in rows for the first 8 rows.
Row 1: knit 2, purl 2. Repeat along row.


Row 2: purl 2, knit 2. Repeat along row.
Row 3, 5, 7: repeat row 1
Row 4, 6, 8: repeat row 2
Join the knitting, being careful not to twist it.
Row 9 and on: keep knitting in rounds


For both brims:
Knit main section
Keep knitting in the round until work reaches 12 - 15 cm. When it doubt, make it a bit longer as the brim can always be folded up if needed.

For both brims:
Begin decreasing
Decrease 9 stitches evenly across row. Continue to decrease in line each row until work can't get any smaller on the needles.

For both brims:
Finish crown
Cut yarn leaving a 50cm tail. Thread the yarn through the yarn needle. Slip each stitch off the needles on to the yarn needle. Pull tight to gather crown and tie off.

For ribbed brim
Finish brim
Use the yarn needle and the beginning tail to sew the short seam between the ribbing sides.

For ribbed brim
Finish brim
Secure beginning tail, trim, and roll up brim.

Ta da, all done!

This is the uncropped version of the above photo.
It was too cute not to post :)

These make a great inclusing in a baby gift pack, or you could give them to someone in need. If you want to make a larger beanie, try these instructions.

Wednesday, 18 April 2012

What's in a name bib: tutorial


I made a few bibs like this recently as gifts. They are super easy and super cute! I put the names onto bibs, but like the Heart Two Heart shirt you could put it on a shirt, a bag or anything else which would suit.

You will need:
- Something to place the name onto (a bib, a t shirt, a bag etc)
- knit fabric to cut up. An old t shirt is perfect, as long as the fabric isn't too thin or stretched. This is great for a t shirt which has a stain or a hole in one area only.
- thread in a coordinating or contrasting colour
- sewing machine or needle to hand sew
- scissors
- ruler (optional)

Firstly you need to cut out your letters. You could print off a template if you like; however I just free handed it, I cut a strip 7cm wide and then cut the small letters out of that (in this case, a, r and r). Out of a 10cm strip I cut out the large letters (H, y).

Arrange the letters on the bib until you're happy, then pin them. I recut a few letters to adjust the proportions until I was happy.


Stitch around the outside of each letter. I used a sewing machine, but you can hand stitch it if you like. My pi day shirt shows you what the hand stitching can look like. The knit fabric won't fray, which is why this works well.


Take out the pins, pull the threads through to the back and tie off.


Ta da! You're done.


Please let me know if you tried this tutorial, and if there's anything else you think I should add to it.
Linked
Related Posts Plugin for WordPress, Blogger...