It's raining here is Brisbane and much of Queensland. Ex tropical cyclone Oswald is certainly bringing some wild weather!
There is a lot of flooding north of us, and the peak of the flood in Brisbane is expected to hit tomorrow night, with a second peak the night after.
We are all right, especially compared to others. We've had a tree down on the footpath which thankfully missed the car. A lot of out gear which was is the car port due to the renovations is wet/ ruined but nothing that can't be replaced. The laundry has flooded yet again (which happens whenever we get heavy rain) but this time there were building supplies in there which are now very soggy.
There are many trees down and lots of road closures, and last estimate I heard there were thousands of home without power. There has been one confirmed death and a few people are still missing.
Today is a public holiday, which thankfully means that students are due to start school for the year tomorrow, not today as it would have otherwise been. A decision regarding school closures is due this afternoon apparently.
Please stay safe everyone.
Monday, 28 January 2013
Wednesday, 23 January 2013
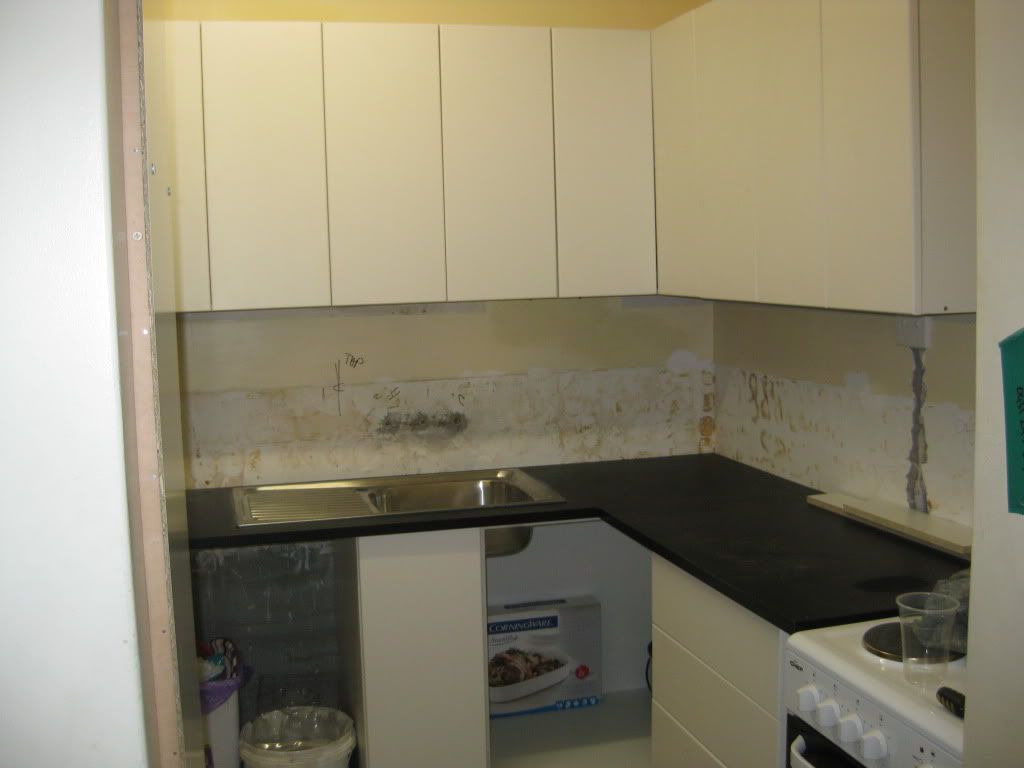
The kitchen is coming along
Slow progress today, but we're moving along.
On Monday it became apparent that the damage caused from when the slab was cut was more extensive than we first realised. All has been repaired now, but with much expense and stress sadly. It also delayed the work further. Sigh - a renovation with unexpected costs and delays - surely that's never happened before!?!?!
On Tuesday the plumber was able to return and finish the dishwasher installation, and it's pretty much been running non stop since then! As well as our regular dishes we have had to wash pretty much everything else before it is put away in the brand new clean cupboards. I put it on again just before Dear Husband and I went to bed last night and we couldn't hear it at all with the bedroom doors open. It's very quiet and we don't have to talk over it which is nice. I'm really, really appreciating having it and I promise to never take it for granted!

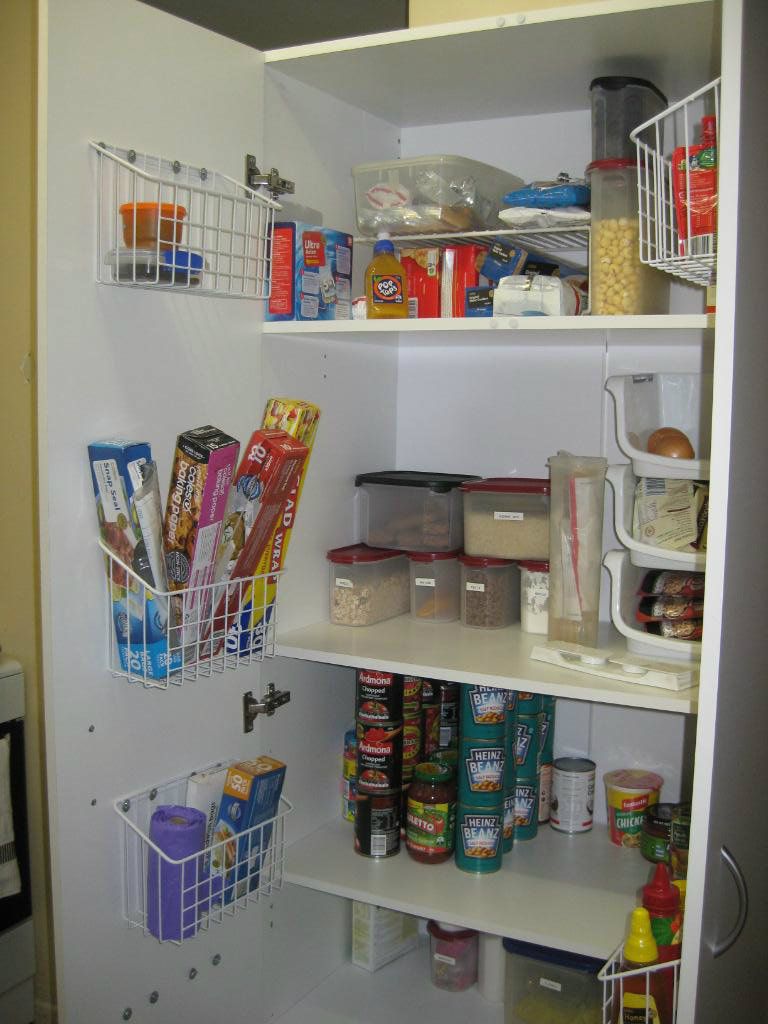
Slow progress today (Wednesday). We got the holes in the wall filled in, the handles on most of the doors and the baskets installed on the inside of the pantry. Hopefully we will get further tomorrow.
I bought a few shelves and add ons for inside the cupboards to make the space more useable. I also bought the photo boxes on the top of the overhead cupboards. I didn't want to waste the space up there, but I also didn't want it to look cluttered. I would have prefered all one colour but I cleared out their stock with the black and white! I'm loving the handles, I'm really glad that we picked those.

On Monday it became apparent that the damage caused from when the slab was cut was more extensive than we first realised. All has been repaired now, but with much expense and stress sadly. It also delayed the work further. Sigh - a renovation with unexpected costs and delays - surely that's never happened before!?!?!
On Tuesday the plumber was able to return and finish the dishwasher installation, and it's pretty much been running non stop since then! As well as our regular dishes we have had to wash pretty much everything else before it is put away in the brand new clean cupboards. I put it on again just before Dear Husband and I went to bed last night and we couldn't hear it at all with the bedroom doors open. It's very quiet and we don't have to talk over it which is nice. I'm really, really appreciating having it and I promise to never take it for granted!

Slow progress today (Wednesday). We got the holes in the wall filled in, the handles on most of the doors and the baskets installed on the inside of the pantry. Hopefully we will get further tomorrow.
I bought a few shelves and add ons for inside the cupboards to make the space more useable. I also bought the photo boxes on the top of the overhead cupboards. I didn't want to waste the space up there, but I also didn't want it to look cluttered. I would have prefered all one colour but I cleared out their stock with the black and white! I'm loving the handles, I'm really glad that we picked those.
Monday, 21 January 2013
Twenty thousand views
Sometime between Saturday night and Sunday night the blog ticked over to 20 000 page views. Thanks everyone!
Sunday, 20 January 2013
We're getting there!
Good news for today. Firstly I found my camera, and secondly we made some real progress today. Still lots of little things to do but we are closer to the finish than the beginning!
Here's the photos that I wanted to post yesterday of the cabinets screwed to the walls. We also got one of the bench tops on after I took this photo.

After a slow start today and many delays, we actually got somewhere this afternoon! All of the cabinets are in, the bench tops are on, the sink is in (but not connected) and most of the doors are on.
Still to do:
- The plumber is coming tomorrow to connect the dishwasher (woo hoo! DISHWASHER!), the taps and the waste pipe for the sink. All the hard stuff has been done (drilling into floors/ walls/ cupboards, copper and PVC pipes etc) so it should be fairly easy. We've had some problems with the water in the bathroom since the plumber was here on Saturday so we need him to check that too.
- The corner cupboard needs its shelf cut (since it has a pipe runing through it) and the under sink shelf needs cutting too.
- The corner cupboard needs the doors fitted
- All the doors need handles fitted
- The foam door stops and the screw caps need to be fitted
- The kiddy safety latches need to be fitted
- The holes in the wall need to be filled
- The tiles for the splashback need to be fitted
- The fridge and freezer need to be moved into place
- We aren't going to repaint the whole kitchen at this stage, but we need to do patch painting where required.
- The electricians damaged the bathroom wall when jackhammering the kitchen; this needs to be repaired.
Of course, all the kitchen things also need to be washed and replaced in the cupboards!
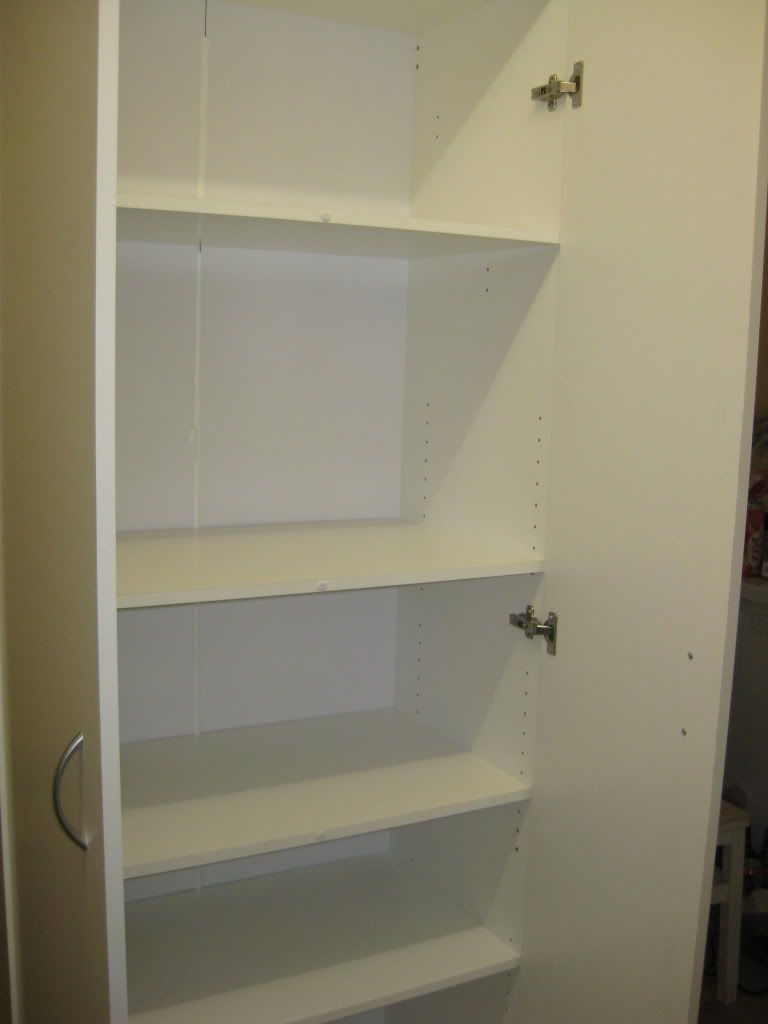
We are getting the floors replaced in the next few weeks. After that happens the pantry needs to be attached to the wall and the kickboards need to be installed.
It is really starting to look like a kitchen, rather than a building site!
Here's the photos that I wanted to post yesterday of the cabinets screwed to the walls. We also got one of the bench tops on after I took this photo.

After a slow start today and many delays, we actually got somewhere this afternoon! All of the cabinets are in, the bench tops are on, the sink is in (but not connected) and most of the doors are on.
Still to do:
- The plumber is coming tomorrow to connect the dishwasher (woo hoo! DISHWASHER!), the taps and the waste pipe for the sink. All the hard stuff has been done (drilling into floors/ walls/ cupboards, copper and PVC pipes etc) so it should be fairly easy. We've had some problems with the water in the bathroom since the plumber was here on Saturday so we need him to check that too.
- The corner cupboard needs its shelf cut (since it has a pipe runing through it) and the under sink shelf needs cutting too.
- The corner cupboard needs the doors fitted
- All the doors need handles fitted
- The foam door stops and the screw caps need to be fitted
- The kiddy safety latches need to be fitted
- The holes in the wall need to be filled
- The tiles for the splashback need to be fitted
- The fridge and freezer need to be moved into place
- We aren't going to repaint the whole kitchen at this stage, but we need to do patch painting where required.
- The electricians damaged the bathroom wall when jackhammering the kitchen; this needs to be repaired.
Of course, all the kitchen things also need to be washed and replaced in the cupboards!
We are getting the floors replaced in the next few weeks. After that happens the pantry needs to be attached to the wall and the kickboards need to be installed.
It is really starting to look like a kitchen, rather than a building site!
 |
| My pantry! It's not from the same company as the rest of the kitchen, but I think it's a pretty good match as long as you don't look too closely. |
 |
| Inside the pantry I can't wait to start stacking in here |
 |
| It's really looking like a kitchen now. That's the back of the pantry on the left. |
 |
| From the other angle, with doors open |
Slow progress...
There's no photos for today's post, since I can't seem to find the camera... :(
We made slow progress on Saturday. Thnkfully the plumber came out in the morning to finish the hot water which is good. All the base cupboards were attached to the wall, one benchtop was put on and the sink was put in to the bench. Hopefully today we can get all the cabinets and bench tops finished. After that the plumber needs to come in on Monday to connect the dishwasher, install the tap and install the waste pipe for the sink. Since the hot water was reconnected we have lost a lot of water pressure (hot and cold) in the bathroom so we also need him to check that.
We made slow progress on Saturday. Thnkfully the plumber came out in the morning to finish the hot water which is good. All the base cupboards were attached to the wall, one benchtop was put on and the sink was put in to the bench. Hopefully today we can get all the cabinets and bench tops finished. After that the plumber needs to come in on Monday to connect the dishwasher, install the tap and install the waste pipe for the sink. Since the hot water was reconnected we have lost a lot of water pressure (hot and cold) in the bathroom so we also need him to check that.
Friday, 18 January 2013
Kitchen work
Today was a bit of a stand still. We couldn't really do much more until the plumber and electrician did some more work. We think that all the electrics are finished after today, thankfully, although there are two more small plumbing jobs to be done. Once these are finished we are then back on 'our own time' and won't be reliant on anyone else which will mean we can get stuck in!
Consequently we didn't really get much done today. We decided last night that the microwave box was far too deep, so we took it off the wall, cut it down and then reinstalled it. We started to put the doors on the overhead cabinets. Since it's a kit kitchen it's all predrilled and marked which makes things much easier.
We did get some things done in the laundry while we were waiting for the tradies today. There isn'y much storage in there, or rather, there wasn't but there is now! These shelves used to be the cabinet over the old kitchen sink. They were still in good condition (despite being over 40 years old) so we kept them in the laundry. No more keeping the detergent on the floor!
I also got some hooks for the walls which we put up, and I'm wishing that I bought more of them! They were less than $2 each and can hold up to 30kg, so I'm going to go back and buy some more to put up. I got the laundry door open all the way for the first time in years today! Getting all the storage in the house soret out is a big job but I'm very much looking forward to when it's all finished.
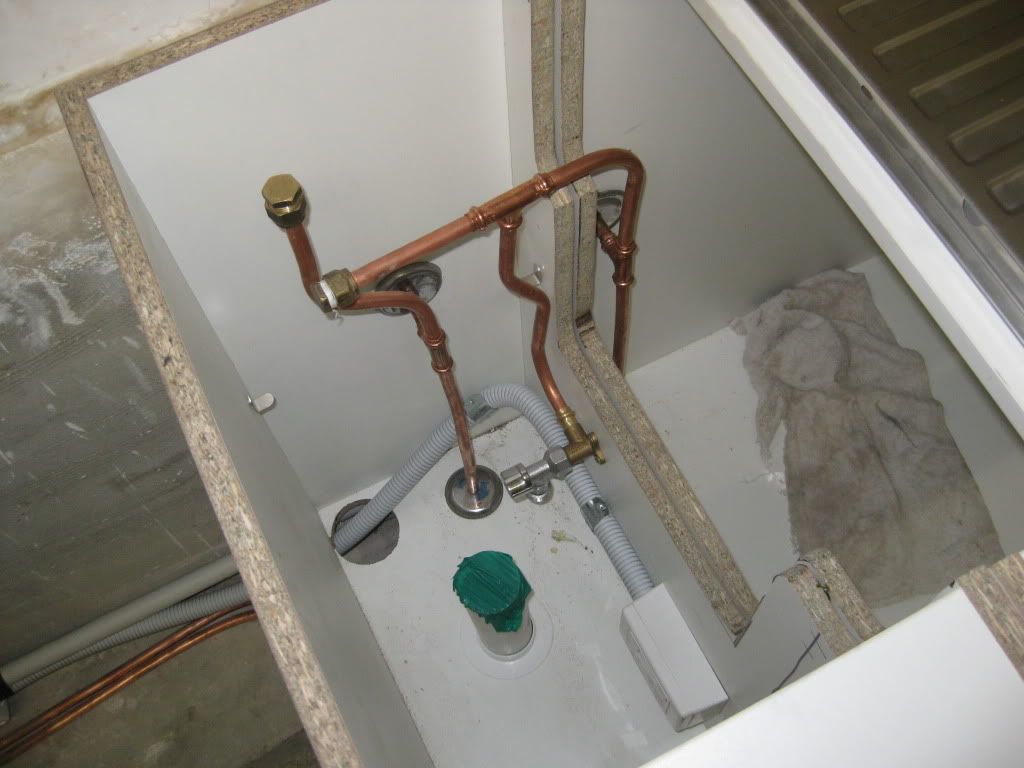 |
| Shiny shiny brand new plumbing Note the new power point for the DISHWASHER!! |
Consequently we didn't really get much done today. We decided last night that the microwave box was far too deep, so we took it off the wall, cut it down and then reinstalled it. We started to put the doors on the overhead cabinets. Since it's a kit kitchen it's all predrilled and marked which makes things much easier.
 |
| The cut down microwave box and the first doors on the overhead cabinets |
 |
| Repurposed shelving |
I also got some hooks for the walls which we put up, and I'm wishing that I bought more of them! They were less than $2 each and can hold up to 30kg, so I'm going to go back and buy some more to put up. I got the laundry door open all the way for the first time in years today! Getting all the storage in the house soret out is a big job but I'm very much looking forward to when it's all finished.
 |
| New hooks - more to come! |
Thursday, 17 January 2013
Kitchen work
The work continues steadily on the kitchen.
The electricians came today. It turns out that it was the stove cable that was cut (as we suspected) so thankfully it was easily. We also had the old stove disconnected and the new one put in. The existing power points needed replacing and moving, and we needed new power points as well. The new cables were put in for the hot water system. The electricians and the plumbers will all be back tomorrow, hopefully to finish all the specialist work off.
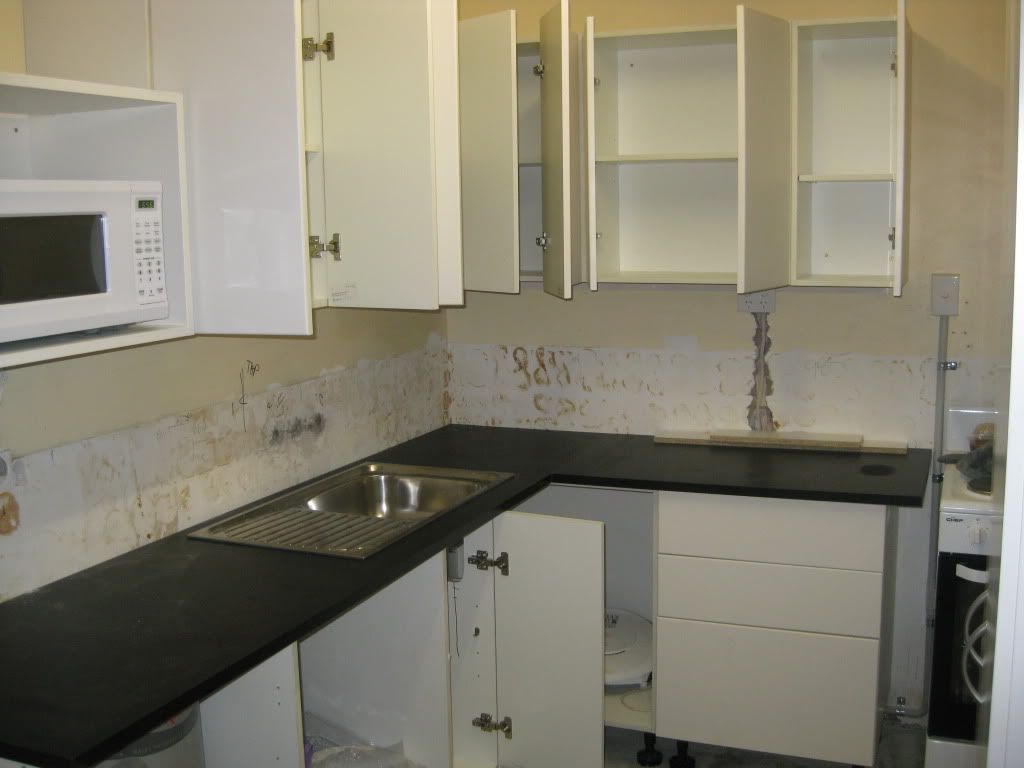
We started putting in the overhead cabinets today. The underbench cabinets were all put together yesterday (although I didn't put a photo up then.)
We had decided to change the pantry plan (again.) The one which is available with the kit we are using is as deep as the underbench cabinets - that is, 580mm deep. Now that we can actually see where everything will be, it confirms a thought that we had earlier - the pantry will simply stick out too far. It will take up too much floor space and will cut the large room off. We were really wanting a more open room but the pantry will prevent that. Since we can't get one to match the kit, we are hoping to find a narrower one which will match. Hopefully we can do so by just swapping some handles over. The pantry will be stand alone against it's own wall, so it doesn't need to click in with anything which opens up our options a bit.
 |
| Some of the overhead cabinets installed. |
The electricians came today. It turns out that it was the stove cable that was cut (as we suspected) so thankfully it was easily. We also had the old stove disconnected and the new one put in. The existing power points needed replacing and moving, and we needed new power points as well. The new cables were put in for the hot water system. The electricians and the plumbers will all be back tomorrow, hopefully to finish all the specialist work off.
We started putting in the overhead cabinets today. The underbench cabinets were all put together yesterday (although I didn't put a photo up then.)
 |
| The underbench cabinets and drawers assembled |
Wednesday, 16 January 2013
Kitchen yet again
Hopefully this is the 'bottom end' of pulling it all apart. Now the 'rebuilding phase' begins.
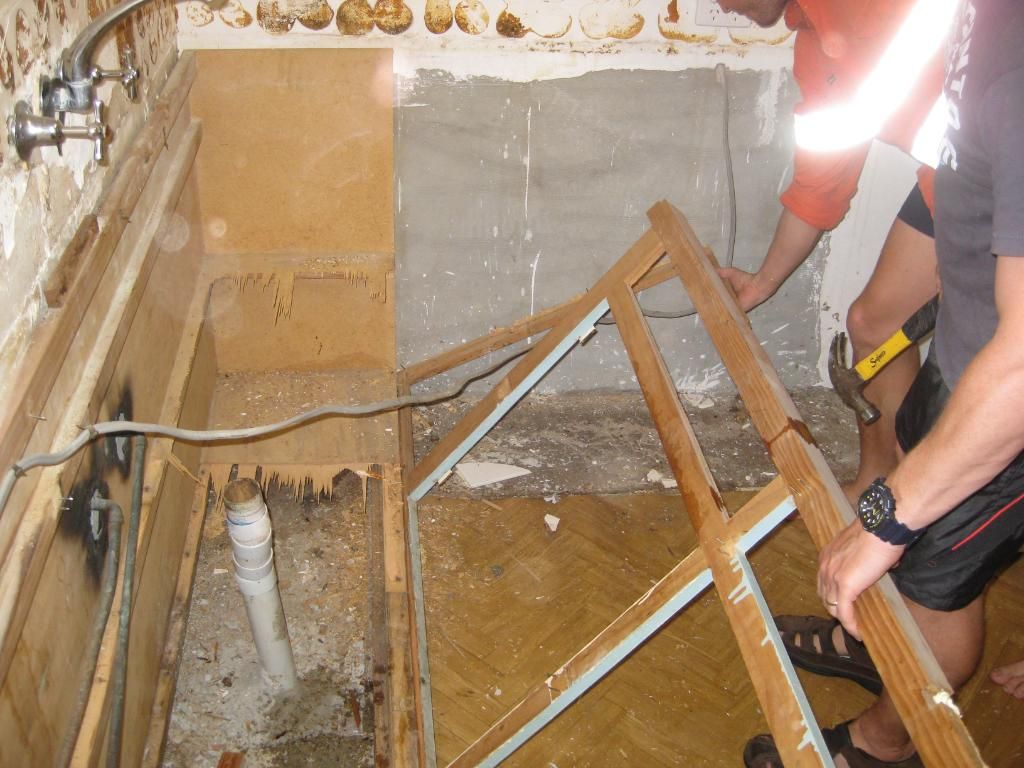
Today the pumbers took out the hot water system. The pipes were running through the middle of the cabinets which, whilst a bit of a pain, was still acceptable when the cabinets were used for storage. However, this wasn't doable for the dishwasher so we needed to set the pipes into the concrete floor (which is as much of a hassle as it sounds.) The jackhammer and the concrete saw went all morning.
The good news:
- The hot water system is in great condition and was removed and is ready to be reinstalled. The plumbers were able to contain the hot water system and associated pipes more compactly than we thought, so we can fit it into a 600mm cabinet. This leaves us with room for a 300mm cabinet (we were thinking that we could get a 150mm cabinet in at best) and will be perfect fit with the dishwasher.
- There were some issues with the safe tray on the hot water system which we didn't know about. It seems that it didn't drain anywhere (and therefore is totally useless). Now that we know about this, we can fix it.
- We were able to get all the under bench cabinets put together this afternoon (except for the doors) and the drawers (with covers).
- We worked out a good configuration for the overhead cabinets and purchased them today.
- We found some great, huge tiles for the splash back. They are very large (300 x 600) and super shiny white. We will add some coloured tiles to the top of the splashback to add some brightness.
The bad news:
- When the plumbers were cutting the concrete floor they cut through a cable that none of us knew was there - and we don't know what the cable is for. We need to wait for the electrician to investigate and fix it. This meant that we couldn't finish the hot water system reinstall, so we couldn't do the cabinet installation and so on. The electrician can't come until tomorrow afternoon and we can't do any more installation until he can fix this problem.
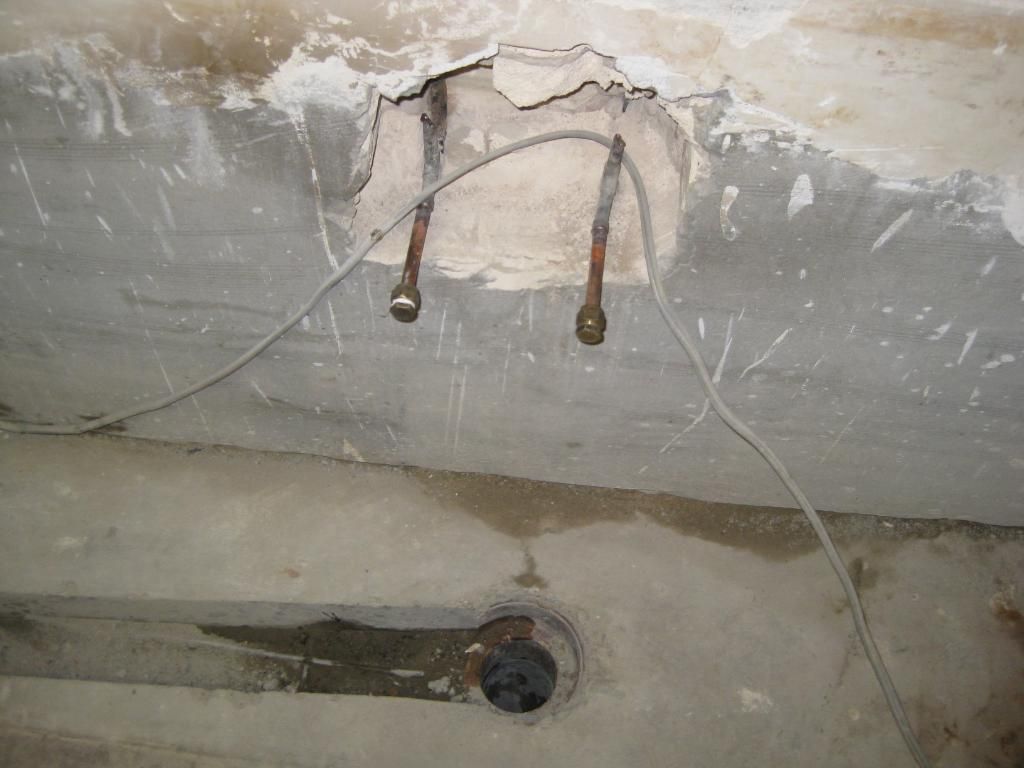 |
| Newly cut channel in the floor Newly jackhammered wall to give us access to the hot water pipes |
Today the pumbers took out the hot water system. The pipes were running through the middle of the cabinets which, whilst a bit of a pain, was still acceptable when the cabinets were used for storage. However, this wasn't doable for the dishwasher so we needed to set the pipes into the concrete floor (which is as much of a hassle as it sounds.) The jackhammer and the concrete saw went all morning.
The good news:
- The hot water system is in great condition and was removed and is ready to be reinstalled. The plumbers were able to contain the hot water system and associated pipes more compactly than we thought, so we can fit it into a 600mm cabinet. This leaves us with room for a 300mm cabinet (we were thinking that we could get a 150mm cabinet in at best) and will be perfect fit with the dishwasher.
- There were some issues with the safe tray on the hot water system which we didn't know about. It seems that it didn't drain anywhere (and therefore is totally useless). Now that we know about this, we can fix it.
- We were able to get all the under bench cabinets put together this afternoon (except for the doors) and the drawers (with covers).
- We worked out a good configuration for the overhead cabinets and purchased them today.
- We found some great, huge tiles for the splash back. They are very large (300 x 600) and super shiny white. We will add some coloured tiles to the top of the splashback to add some brightness.
The bad news:
- When the plumbers were cutting the concrete floor they cut through a cable that none of us knew was there - and we don't know what the cable is for. We need to wait for the electrician to investigate and fix it. This meant that we couldn't finish the hot water system reinstall, so we couldn't do the cabinet installation and so on. The electrician can't come until tomorrow afternoon and we can't do any more installation until he can fix this problem.
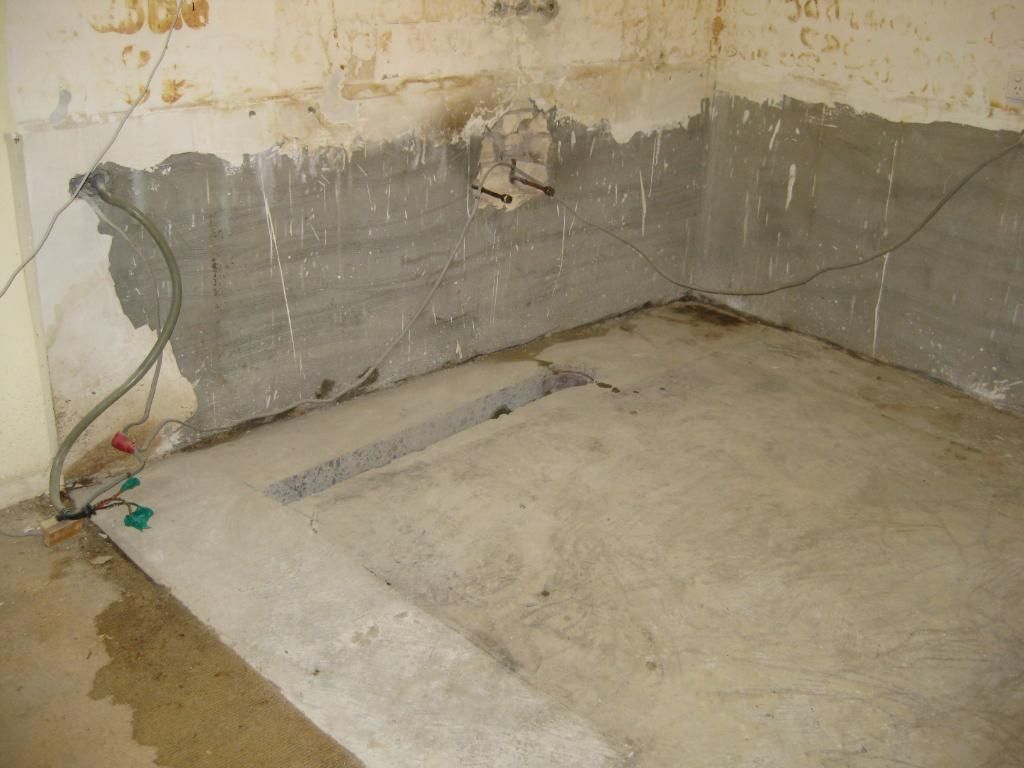 |
| Kitchen with everything removed The old taps (removed) are the three grey spots in the middle of the photo right at the top. The new tap will come out of the sink, not the wall. |
Tuesday, 15 January 2013
More kitchen renos
The kitchen is out! Everything in the kitchen has gone except the stove - the electrician will remove that later in the week.
Today we bought the some of cabinets and benchtops, screws, hinges, handles and other associated drill bits etc. We removed the sink, the rest of the cabinets and the splashback tiles. We took the floor coverings out (vinyl) which took a great deal of work to clean up (almost three hours). The stove and the dishwasher were delivered today, and I bought dishwasher tablets at the supermarket (which was incredibly exciting!)
We're on easy and disposable tonight since we have nothing but the microwave and a tap coming out of the wall. I'm so excited about it all going in!
 |
| Pulling the cabinets out |
Today we bought the some of cabinets and benchtops, screws, hinges, handles and other associated drill bits etc. We removed the sink, the rest of the cabinets and the splashback tiles. We took the floor coverings out (vinyl) which took a great deal of work to clean up (almost three hours). The stove and the dishwasher were delivered today, and I bought dishwasher tablets at the supermarket (which was incredibly exciting!)
 |
| Three cubic meters that used to be our kitchen |
We're on easy and disposable tonight since we have nothing but the microwave and a tap coming out of the wall. I'm so excited about it all going in!
New handbag :)
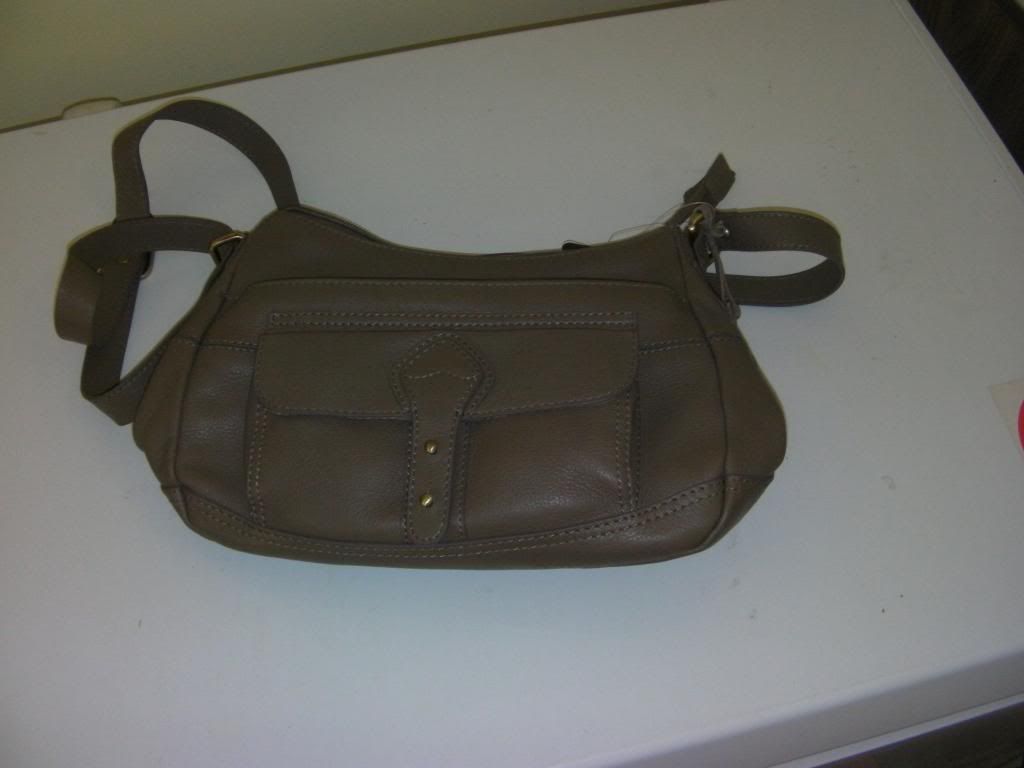
Sorry about the rubbish photo, but I wanted to share one of my Christmas presents from Dear Husband. I needed a new handbag since my old one was literally falling apart and had big chunks falling off the synthetic handle where I had been clipping it onto the stroller.
I wanted a smaller bag (!!!!) because I almost always have either the nappy bag or my work bag with me as well, so there's no need for another massive handbag. I hope I haven't gone too small though!
I was keen to find one with the shoulder strap; it leaves my hands free from chasing Chubs. It fits over the stroller (another key requirement) and I love it.
Yay for wonderful husbands <3 p="p">
Monday, 14 January 2013
Well behaved children
A well behaved child acts like a child. Sometimes this is sitting quietly and drawing. Sometimes this is running about giggling. Sometimes this is having a bit of a cry because you are tired and hungry.
Today I went out to lunch with some lovely girlfriends - two with teenagers and adult children and one childless. Chubs came too, and acted like a normal toddler.
My friends were very welcoming and supportive. They were happy to arrange the times around nap time (which actually backfired anyway, since toddlers can be a little unpredictable...) The friend who booked arranged a high chair and no one minded when I didn't finish a sentence.
The other diners were very understanding. Middle aged and elderly women gave me the "I've been there and I understand" look as I raced after Chubs as she made a dash for the carpark. A young couple who sat near us were encouraging of Chubs when she showed them her trucks and danced around while they were eating their meal. The young man gently grabbed Chubs when she made yet another run for the door when I couldn't get to her fast enough. It's very comforting to know that a random stranger cares for Chubs' safety.
I rang the cafe to thank them for not treating a child as an inconvience and I spoke with one of the owners. He hadn't been there when we were, and he said when he arrived he saw the sultanas on the floor and asked his wife if their almost two year old granddaughter had been in. He assured me that normal child like behaviour wasn't a bad thing at all and 'you can't just tell them to sit quietly'.
Both the owner and my friend commented that having Chubs/ children around made for a more enjoyable, fun and happy atmosphere. It's a real blessing to go somewhere were he vibrant and bubbly personality is valued and celebrated, rather than seen as something that I should apologise for.
Jamie Lynne posted a similar article, and it actually came across my newsfeed just after I got home from lunch which I thought was wonderful timing. Of course I'm not saying that children should be undisciplined, disrespectful, unattended or unaware of their surroundings. It was refreshing to go somewhere where children weren't just tolerated, but celebrated as a vibrant and beautiful part of the mosaic of life.
Linked
Sunday, 13 January 2013
What is said and what a mother hears
There are some things which as a mother I get a little, um, sensitive about. I don't know it it's hormonal, if it's some sort of rite of passage, or it's just me being a bit crazy, but sometimes what I hear isn't exactly what is said.
What Dear Husband says: "You know darling, Chubs's hair is getting a bit long, do you think we Should get it cut?"
What I hear: "How about we take Chubs out and get someone to slice her skin with a razor blade and then give her four tattoos."
What Dear Husband says: "You know darling, we could just buy Chubs a birthday cake"
What I hear: "You know darling, we could just buy Chubs a birthday cake, and then after the party we can let her play in a pile of used syringes and chew on some cigarette butts."
What Dear Husband says: "Hey darling, you think we should try some of these baby food pouches?"
What I hear: "If we buy Chubs these pouches then all the GoodMotherPoints you got from mashing up all that pumpkin into ice cube trays will null and void, actually all the GoodMotherPoints that you ever got from doing anything at all will be wiped if we even give her one spoon full of pre made baby food. Oh, and we should then let her chew on some lead paint."
It's crazy, it's irrational, and it's pretty bad. It's like I had a Caesaran and an ear implant at the same time, which translates perfectly reasonable suggestions into crazy-lady-extremo.
By the way, we are huge huge baby food pouch fans, probably too much so. "From six months" still counts at 19 months, right? Still no hair cut though, and it's one homemade bitrhday cake for one, so far. Phew.
Friday, 11 January 2013
Kitchen renos update
Well, one day in and the plan has already changed!
It turns out that we won't be able to fit in the corner pantry without huge effort and expense. To do so we will need to move plumbing through cavity brick walls which is a bit of a disaster. I will still have a big pantry but it will be a straight one (900mm).
The hot water system placement is giving us a bit of grief, but we're hoping that it can be contained without too much fuss. We will need to get a single sink rather than a double since we won't be able to fit the dishwasher in around the hot water system otherwise. I don't really mind - I've always had a single sink and I would prefer the extra cupboard and bench space with a single.
We pulled out about half of the kitchen today including the 'wall' of cabinets which closed it off from the rest of the living area. The room looks so much bigger already!
 |
| Cupboard doors and some shelves gone Overhead shelves gone |
It turns out that we won't be able to fit in the corner pantry without huge effort and expense. To do so we will need to move plumbing through cavity brick walls which is a bit of a disaster. I will still have a big pantry but it will be a straight one (900mm).
The hot water system placement is giving us a bit of grief, but we're hoping that it can be contained without too much fuss. We will need to get a single sink rather than a double since we won't be able to fit the dishwasher in around the hot water system otherwise. I don't really mind - I've always had a single sink and I would prefer the extra cupboard and bench space with a single.
We pulled out about half of the kitchen today including the 'wall' of cabinets which closed it off from the rest of the living area. The room looks so much bigger already!
 |
| I'm standing in the living room looking through what used to be a wall of cabinets and shelving. |
Kitchen renovations begin
Our kitchen renovations start today, I'm so excited!
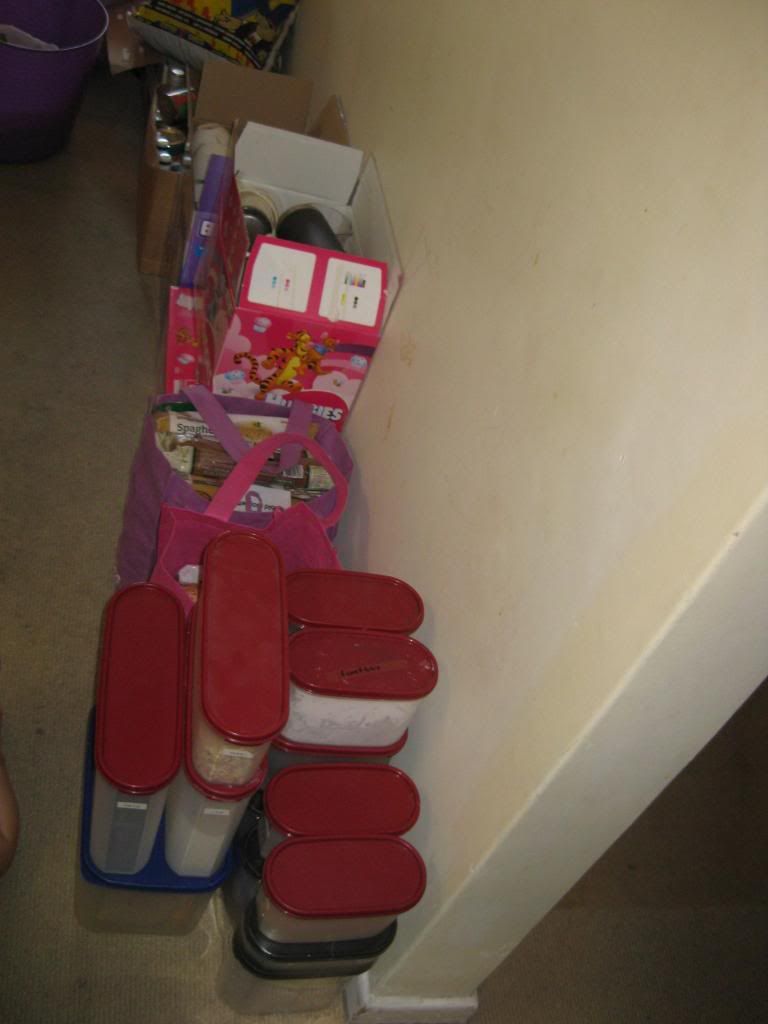 |
| Starting to move the food and gear out of the kitchen before pulling it out |
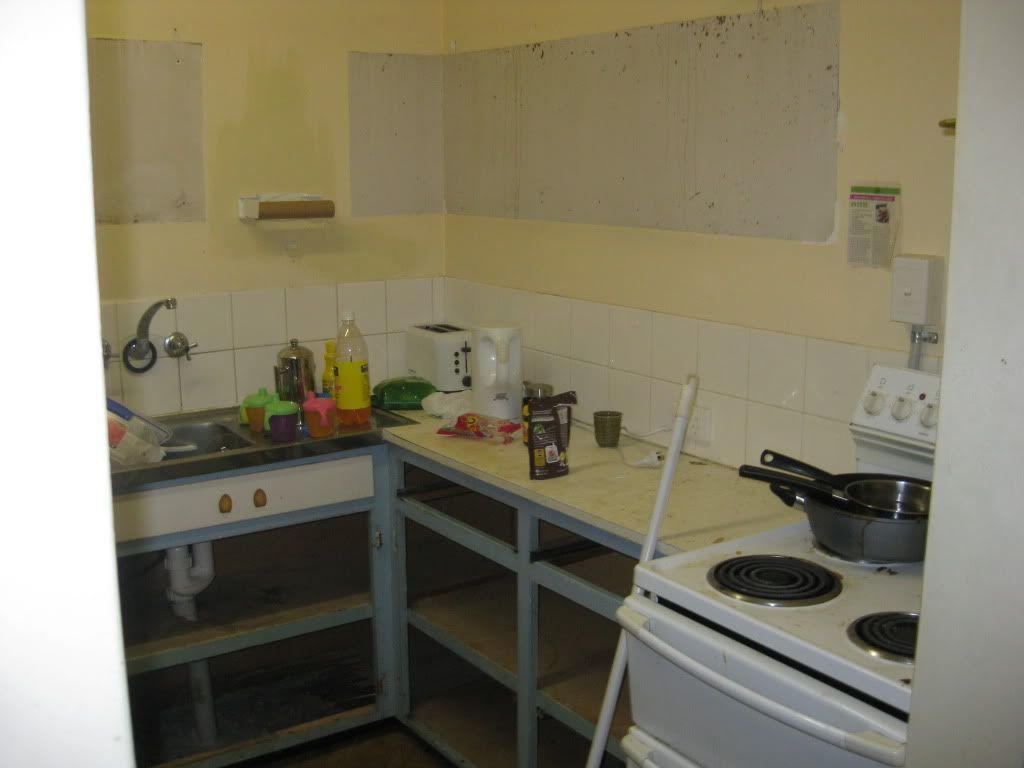
I have kitchen which is part of a home, it has
electricity and running water and food in it. This puts us in a better position
than many, many more people in the world and I try not to take it for granted.
I am, however, VERY excited about the renos! They are long overdue - we were going to do something about the kitchen when we moved in seven years ago. The changes about which I am most excited:
5. The newness of it all. I've never had a brand new kitchen and I'm really looking forward to being in a kitchen which I've planned for our needs, where all the cupboards close properly and which looks nice and shiny.
4. A working stove and oven. The oven broke years ago and we couldn't really replace it without doing the whole kitchen, and to be honest I was keen for an excuse not to bake! I am looking forward having everything back on track though.
3. New floors. Once the kitchen is in we are getting new floors in the kitchen, loving and dining area and hallway. The carpet is in dire need of replacing, and as much as I prefer carpet sanity dictated that hard floors are the way to go.
2. A big corner pantry. Out kitchen is probably too 'cosy' for a large pantry and I'm sure the design types would be quite horrified that I'm squeezing it in. I'm desperate for all the space and I can't wait until it's in.
1. A DISHWASHER. We're getting a dishwasher! I've never ever had a dishwasher, just a single sink for me and I'm so excited. I can't wait to see how much time it saves us
Wednesday, 9 January 2013
Happy one year blogiversary to me
It's been one year since I started my blog . It's been a lot of fun and I've really enjoyed it.
The most popular post by far has been the one about plain packaging for formula. Nine of my top ten search terms are for something to do with that article - 50s cigarette ads, pseudoscience ads, unethical ads etc.
Second and third most viewed are the simple slip over vest pattern, and the Knit a Square a Day launch. I can only hope that these page views translate into more knitted items to warm little children in need.
I've enjoyed having this blog to talk about things, to share ideas and thoughts. In the second half of the year I very much felt like I had 'brain fog' and couldn't connect my thoughts and ideas through a haze of exhaustion. Upon checking today, it seems that my blog post frequency reflects that. I don't apologise for this - when I started the blog it was supposed to be something that was fun and enjoyable, not a source of stress or something on the 'to do' list.
Kilo of Kindness is SLOWLY plugging away, although I do have more to write up.
Thanks for coming along for the ride everyone, and now onto the second year!
ETA 18 699 page views at the moment. I'm very please with that, thanks all!
Monday, 7 January 2013
How to use a snatch strap safely when 4WDing
A snatch strap is a critical piece of recovery gear, but it's also potentially dangerous. Many people have or know of horror stories of things going wrong with very dangerous consequences.
No recovery method is risk free. Indeed, 4WD itself (as with on road driving) is a long way from risk free. As with everything in life, what to do depends on the particulars of the situation and then minimising the risk as much as possible.
To safely snatch a vehicle from a bog:
1. Consider what other methods can be used to recover your vehicle. In sand especially, try the following options first.
Before you get bogged...
- Engage low range
- Approach the boggy or soft area with as much speed as is safe and in a low gear - usually 2L. Ensure that there is lots of revs, usually about 3500. Don't stop at all if you can help if. I know this sounds contradictory, but if you are slipping in the sand try to slow down while still keeping the revs up, but don't stop! Try to avoid changing gears.
- If you can get out, try again with more speed and more revs.
- If you do stop moving totally, then stop spinning your wheels if you don't get traction quickly, or you will get bogged more. It's a fine line between too much to dig you in, and too little to slow your momentum.
- A passenger or two (or three or more) pushing can get you through a small soft patch so that you might not get bogged. Adult passengers should be ready to jump out on soft sand and bypasses, as a quick shove might be enough to keep you moving through. Keep going til you are past the soft patch; don't stop for your passengers until you are on harder ground. It might seem mean, but it's better than having them push the car out again.
- If the wheels are dug in, then dig the sand out and try again.
- If you have traction mats, then now is the time to use them.
- Can you lower your tyre pressure any more? If you're not at 20psi or below, then you should have been before you got on the beach. Dropping down to 18psi is good for the beach, and you can cautiously go down to 15psi for a boggy patch, just make sure you reinflate once you're out.

2. If the above isn't enough to get you out, then you may need to snatch. Only attempt this if the recovering car is capable enough - this is where anyone with turbo diesel is your friend and unfortunately, a Suzuki isn't much help at all.
3. Attach the snatch strap to the bogged car. Sometimes it's easier to snatch backwards and try the boggy patch again, sometimes it's best to statch forward through the boggy patch and beyond.
Attach the snatch strap to both cars to rated recovery points with rated shackles, ensuring that there are no twists. Remember that tow points are not recovery points. If you don't know if you have rated points then check your vehicle manual; they may need to be installed as an aftermarket accessory. Ensure (before you leave) that your shackles will fit through your recovery points - the Kluger is notorious for having rated recovery points as standard, but they are too small to fit most shackles though! (Since the Kluger doesn't have low range either, there's a good chance that they will get bogged anyway...)
Using one snatch strap is generally preferable, however there may be occasions where two are needed to be joined to give the recovery car a better position. NEVER ever join two straps with a shackle - if something breaks this could be deadly. Instead, loop one inside the other to make a figure eight. If you ever want to get them apart again, then place a rolled up magazine, newspaper or similar in between before you use it.

4. Dig out any sand which has gotten caught around the wheels or low clearance of the car5. Use a towel, tarp, blanket, specialised recovery dampener or something to wrap around the middle of the snatch strap. If something fails and snaps, then the dampener will help to absorb some of the force so the strap doesn't fly and become a dangerous missle. This is a critical step which isoften overlooked. Skipping this step could result in a broken windscreen, a lost eye, a concussion or worse.
6. Get all passengers into a safe position. Depending on your surroundings, this may be out of the cars and further up the track. In other situations, it may be in the vehicles. The photo below was taken by the passenger in the bogged car. It was on a very busy bypass track with many, many cars going through at speed (see step one.) The track is very chaotic and busy, and steering is unreliable in sand. It was decided that the risk of a broken strap was less than the risk of being hit by car going past. Ensure that all shovels, eskys etc have been moved out if the way and that there is a clear path.
7. Agree on the plan. How far will the recovery car need to pull the bogged car? What is the stopping point? Is there a point where the recovery car can stop the tension on the strap, but still have both cars carefully moving to harder ground before removing the strap? What is the communication? Decide on hand signals, horn honking or using radios. This is a situation where it may be safer to have the passengers in the vehicle and communicating with each car, so that the drivers can use both hands for driving. Make sure any onlookers are out of the way and aware of what's happening.

8. Time to start snatching. The recovery vehicle (which should be in low range, lots of revs etc) should start to move to tighten the slack in the strap. Once it's tight, keep going until the bogged car is free. The driver in the bogged car should try to get revs up (without spinning wheels) and get as much traction as possible. At the same time, s/he needs to be cautious that s/he doesn't get a lot of traction quickly and shoot forward. Skill, good planning and good execution are all required. The driver of the recovery vehicle needs to be aware of it's limitations. If it loses traction, then stop immediately (using prearranged signals) before you get two bogged cars. Reassess the situation, and try something else if needed.
9. Once both vehicles are out, stop as soon as it is safe to. The driver of the bogged car needs to take extreme care not to drive over the strap while it's still connected. Disconnect the strap and the shackles, and make sure that all recovery gear (shovels, towels, shackles etc) go back into the car(s). Reinflate tyres back to 18psi if needed.
10. Continue on your merry way, enjoying your 4WDing adventure!
Sunday, 6 January 2013
Packing tip for baby
We cosleep a lot of the time, but have always taken the portacot away with us as well. We do this firstly because she spends the first part of the night in the cot, and secondly because it is good to have a safe contained space in case of a broken glass, a spill or a time out.
Whenever we have flown the portacot has been free luggage (along with the car seat and stroller and carry on nappy bag) which is good because a lap child does not have any luggage allowance of her own for clothes and other gear.
Solution: shove as many clothes as you can into the portacot. On our last trip away I was able to fit all of this into space in the portacot.

There is here:
- 7 cloth nappies
- 7 cloth nappy inserts
- 3 dresses
- set of portacot sheets
- 20 disposable nappies
- 2 maxi dresses of mine
As you can see, this is another bag (or overflowing beer carton box) of space which it would have taken up had it not been packed in the portacot.
Linked
Saturday, 5 January 2013
4WD Recovery Kit for Sand - list

I love love love four wheel driving. Unfortunately we haven't been as often as I would like. We used to be very regular visitors; going to Fraser Island once or twice a year, although our recent trip was the first time in three years. I wasn't confortable going while I was pregnant - I felt so awful, although even if I hadn't I wouldn't have gone due to the isolation. We didn't want to, or had the opportunity, to take a tiny baby. When the opportunity arose to take Chubs over we jumped at the chance. Unfortunately this will have been our last trip for the forseeable future.
A really, really good way to have an awful trip to Fraser Island or any other sand driving is to get bogged and to not be able to get yourselves out. Here's a list of things to have in your recovery kit.
Essential
1. A capable vehicle. You will never know your vehicle's limits until you try to go beyond them, but baby steps are a really good idea. Don't go to Fraser for your first trip - try Bribie Island first. Consider how much gear you have as well - don't overload the roof racks. Towing off road is a whole new ball park, so unless you car has the grunt to do it then don't even bother, or hire a tractor.
2. Knowledge and experience. Make sure you know where you are going and that you know how to use your recovery gear. You need to be able to engage 4WD on your vehicle and also all of whizz bang features. If you aren't an experienced 4WDer, then go away with someone who is who can help you. While helping other people get unstuck is part of the 4WD fun, it's poor form (and potentially dangerous) to rely on someone else outside your party. Read up on blogs, fora or magazines, or join a 4WD club if you need more help and confidence.
3. A shovel. Especially for sand driving, a shovel will be essential to getting you out of soft spots. Even if you can't get yourself out wth digging alone (which isn't uncommon), digging out is an important step before snatching or winching and makes both much more effective and safer.
4. A snatch strap. A snatch strap is a long strap which is elastic (about 10%). The elasticity helps to pull (or 'snatch') the second car out. Make sure that it is cared for well. Don't try to use a tow rope or anything else as a snatch strap as they could fail and don't have the elasticity. ALWAYS make sure you snatch safely using a dampener of some kind.
5. Shackles. These need to be rated, large enough for the mass of your vehicle but still small enough to fit through your recovery points (and the recovery points of your recovery vehicle).
6. Recovery points on your vehicle. These should be rated. Remember that tow points are not recovery points.
7. Towel, blanket, recovery dampener or similar. You need something with a little bit of weight which can be placed over the snatch strap to cushion the force if needed if something fails or snaps while snatching.
8. Regular travel gear. When 4WDing it's impossible to know how long a trip will take. What takes 90 minutes one time may quite easily take four hours another time. You need to allow time to get bogged, to turn around and go back, to wait for other traffic to pass on a one lane track or bypass, to get your car unbogged, to get someone else in your party or ahead of you in the track unbogged. All the normal things you would take for a long trip are essential - plenty of water, substantial snacks (eg muesli bars), sunscreen, insect repellent, first aid kit, wide brimmed hat and shoes. If you are digging someone out and pushing cars in the hot sun, these are all crucial.
Nice to have
9. Traction tracks. The best best best ones are the rigid plastic ones, but they have an associated price tag. These big orange pieces of plastic will make short work of any soft sand though, so for a frequent tripper they are worth the investment. I've never been keen on the folding ones - they are better than nothing but in my experience not by much.
10. Winch - electric or hand. By the time you're installing a winch bar, I'm guessing that you're getting your 4WD info from places other than this blog! An electric winch is the ultimate in self recovery (and in my experience not needed in frequently populated places such as Fraser Island) but by that stage you're talking about dual batteries and other complications, so these aren't for your first trip!
11. High lift jack. Again, you're getting into hard core gear here. Useful when needed, but that's not often if you're just sticking to Fraser.
12. Compressor. The excitement starts to build when you drop the pressure in your tyres, just before you hit the sand. It's a long way back to the servo to pump them up again when you're finished though. Driving on tyres at 18 or 20 psi on bitumen is going to wear them out pretty quickly. You may find yourself bogged and needing to drop your tyres to as low as 15 psi or perhaps lower. If you have a compressor then you can boost them up again before you get to the servo, reducing your chance of rolling off the rim. If you do purchase a compressor make sure it's a good one - cheap flimsy ones will take ages and won't stand the distance. In an emergency you can use a bike pump with the right attachment - it is hard, hard going but much cheaper than a decent compressor. You certainly wouldn't want to inflate from 18psi to 32 or 40psi, but it might get you from 16psi back up to 18 - if you're desperate.
13. Spare spare tyre. If you get a puncture or roll a tyre off the rim when the pressure is low, then that's a mighty big risk to be taking to return home with no working spare. If you have the space at all, then a second spare is a great investment, especially if you need to drop your pressures below 18psi.
Perhaps most importantly, make sure that your recovery gear is all easily accessed. A snatch strap is not very useful if it's under the seat, blocked by the esky, four bags and a pack of nappies. Shovels can be strapped to the outside of roof racks easily - don't put any recovery gear under a straped up tarp. When it's needed no one is going to feel like unpacking all of your roof racks to get to it, then securing it all before you're unbogged, and then putting it all back again. If it's not accessible, then you won't use it.
What's youre favourite 4WD adventure destination?
Friday, 4 January 2013
Operation Sleep Rule Change - abandoned
Operation Sleep Rule Change was about getting some more space in our bed in a gentle, respectful way. If you missed the first post, it's here. In summary, we were aiming to get Chubs to sleep in her cot until 3am, and then to come into out bed. Sometimes she does this on her own - the last few nights she's slept in her cot until 4:30am, but it's certainly not consistent.
It was working for a while, however things started to fall apart. Chubs was sick a lot, Dear Husband was away so I was flying solo and Chubs started waking more frequently and needing more settling. Over the Christmas break we had two trips away for over a week each which meant a break in routine.
Perhaps most importantly, the plan (that Dear Husband and I would get more sleep) wasn't working. In August I said: To be honest, Dear Husband and I aren't feeling as wonderfully well rested as I was hoping. As I supsected (but was dearly hoping I was wrong) I think at lot of our constant state of exhaustion is more to do with having a vibrant, beautiful, bouncy toddler than a cosleeping one. To resettle Chubs in the middle of the night when she is in our bed is much, much easier that getting up to feed/ cuddle/ rock her in the cot. I'm sure we all get much more sleep when she's in with us. Often Dear Husband and I don't know who brough her into bed with us or what time it was now that we aren't trying to change it.
The final straw for me was one night when she wouldn't settle in her cot. I felt so mean. I was trying to settle my young child in a cage in a room all on her own so that I could go into a separate room, and not only share that room with another loved one, but actually share a bed! Why should I, as a grown adult who knows all about object permanence and how to ask for help clearly, get to share a bed with someone I love and at the same time expect my baby to sleep on her own in a cot in a separate room? She clearly needs the comfort and closeness - this is normal toddler behaviour.
Yes, we still get a lot of diagonal starfishing and bed angels. There's nothing glamorous about waking up with one foot in your ear and the other in your back. The problems that caused us to seek Operations Sleep Rule Change still exist. However, it now seems that these things aren't going to be fixed by having me stand by Chubs' cot several times a night.
I don't regret bringing Chubs into bed with us when she was little and teaching her 'bad habits'. I don't regret feeding her to sleep, nor 'training' her to sleep through the night at weeks or months old. This is all normal behaviour. She's a happy, healthy, thriving little girl. She won't always be in bed with us, she won't always feed through the night, she won't always want cuddles during the night - well at least not from Mum and Dad anyway.
I've never heard anyone say "I wish that I had cuddled my child less when she was little". So, for the time being at least, we will continue to love, cuddle, feed, rock and sleep togetherin the big bed - just where everyone wants to be. Even if it is a bit crowded.
Thursday, 3 January 2013
Gingerbread house update
Well, in short - it worked! It's not often that I can say that about a baking endeavour. Yes, I know that I'm really stretching it to call this 'baking', but it's Christmas!
I didn't have too many dramas. It came as several pieces with a massive bag of fondant. It was more that enough, even after I made mistakes and slathered it on which was good. The leftovers may or may not have been eaten/ sucked from the bag later...

It was pretty easy to build, except for the 'hold in place for one minute until set' instruction. After an hour the roof was still sliding off and we discovered that this was made in Canada. I'm guessing that a Canadian Christmas and one in Queensland have a pretty huge difference in temperature! All was fixed with more fondant and a little rest in the fridge.

It was fun sticking it together. Because it was a kit I didn't do any planning, I just stuck on the lollies as I went. (Reckless, I know.) I'm looking forward to planning one in the future. Apparantly some people do themed ones each year, I'd love to do that after a couple of years. (By the way - this is definately an after bedtime or nap time project!)

Some last minute renovations to the chimney. This is the only house I've ever had with one.

The finished product! Unfortunately after the night in the fridge some of the lollies were 'crying' but otherwise I thought that it looked really good. The kit also came with a snowman, a gingerbread man and a Christmas tree which you can see in the 'front yard'.

This is the back of the house. Much less crying from the lollies here! The middle swirly mint is what the three on the front of the house are supposed to look like.
This was the first one I'd made and I enjoyed it. I'd love it to become a tradition in our family. It's not something that Dear Husband or I have ever done in our families before. It's very hard for us to get excited about Christmas, but it's something that we really want to make special for Chubs. I'd love to have her 'help' decorate as she gets older, and for gingerbread at breakfast to be a Christmas time treat. (Incidentally, she loved the icing but had a mixed appreciation of the gingerbread itself.) I thought that the kit biscuits tasted quite nice, although I may change my mind after I've made one from scratch!
So, all in all, a successful venture, which makes a nice change!
Wednesday, 2 January 2013
4WD cleaning up tip
It looks like we won't be going 4WDing for the forseeable future, unfortunately.

Whenever we return from a trip, I wash the snatch strap before putting it away. To do this easily and effectively I put it in the washing machine. I wash with a very small amount of detergent (less than a quarter) and with cold water and extra rinse. Line dry it very well before packing it away.
A snatch strap is a critical piece of recovery gear, especially in sand like on Fraser Island. They aren't cheap either, so make sure you look after it. Some snatch strap care tips:
- Wash and dry your strap completely when you return from a trip before packing it away
- Inspect it before and after every trip for signs of damage. Better to discard it and replace when you are at home than to have it snap when you are doing a recovery and leave you stranded or worse, injur someone.
- Keep it in a bag instead of rolling around in the car where sand and dirt can damage it. That's a good place to keep your gloves and shackles too, just make sure that you can get to it.
- Attaching the snatch strap to the car and leaving it there is really only necessary when doing a water crossing. If you get stuck while doing a water crossing, then it may be hard to reach your recovery point, and seconds count. By the time that you have found the recovery point, attached the snatch strap and run it to your recovering vehicle, then both the car and then engine may be flooded. However, in the case of sand or mud it will usually be easy enough to attach the snatch strap if and when needed, rather than leaving it attached and wrapped aroung the bull bar or roof racks. When exposed like this it experiences more wear and tear than necessary and may be more of a hassle. Sometimes it's easier to snatch a car backwards, so if you have attached to the front then moving it will be necessary anyway. So to preserve its life, only attach when and where needed.
- Ensure that shackles are cared for well. Only use rated shackles and don't drop them or bash them about. Again, it's preferable to replace a shackle at home than to have one break and become a missle when doing a recovery.
Have fun four wheel driving, and as always do it safely!
Linked
Subscribe to:
Posts (Atom)
